Pandemonium
Table of Contents [+]
Class: All Classes
Faction: All Factions
Level: 200-220
Item Links:
Quicklink (copy this):
Feedback: Feedback-Thread
Faction: All Factions
Level: 200-220
Item Links:
Quicklink (copy this):
Feedback: Feedback-Thread
Table of Contents
1. Introduction
2. Regular Mob & Their Loot
3. How To Enter the Instance
4. Left Side / West Side
5. Right Side / East Side
6. Middle Zodiacs
7. The Night Heart
8. The Beast
⇑
1. Introduction
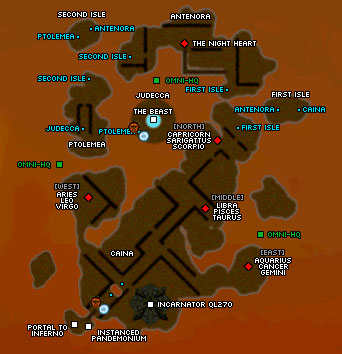
Map courtesy of Atlas of Shadowlands
Pandemonium is the endgame raid sector of the Shadowlands. It is populated with corrupted Redeemed, Unredeemed and Guardian faction mobs as well as 14 different bosses (4 Zodiac Spots each spawning one out of three possible bosses, The Night Heart and The Beast). With 18.1 Funcom added an instanced version of the raid so that, in a Raid Interface, you can go there with your friends and take it on at any time.
This guide will be split up into several parts, describing how to get to each of the Zodiacs, how to deal with The Night Heart and how to get to The Beast with loot tables listed along the way.
Note that this guide will be aimed at the instanced version, as this is one that most people will be be taking on. The main difference between the two "different" zones is that the uninstanced version will have more respawning mobs and thus will often require a bit more damage.
First of all, we have to cover the "Raid Locks" you are given inside Pandemonium. Pandemonium lock outs are split into two "sections". Each time you kill a Zodiac (Aries, The Night Heart, Portal Zodiacs, etc) you will be locked to that instance of Pandemonium for 4 hours. That means you will not be able to enter another raid instance of Pandemonium for that duration. In addition when you kill The Beast at the end you are locked into that instance of "The Beast Lair" for 9 hours.
⇑
2. Regular Mobs & Their Loot
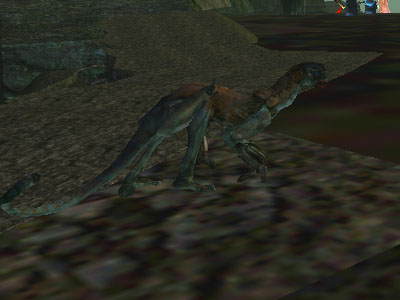
In pandemonium you will mainly be facing 5 types of mobs, each with different tricks and weaknesses.
| Corrupted Xan-Len Aka "Pink" | |
 | Calling Order # |
| #1 | |
| Notes | |
| Heals other mobs Can be calmed Note: In Instanced Pande they can have a ~5 min grace period in which they can not be attacked or calmed | |
| Corrupted Xan-Cur Aka "Blue" | |
 | Calling Order # |
| #2 | |
| Notes | |
| Can be charmed Can cast (i)CH blocking nano on tank | |
| Corrupted Hiisi Berserker Aka "Hiisi" | |
 | Calling Order # |
| #3 | |
| Notes | |
| Deals a lot of damage. | |
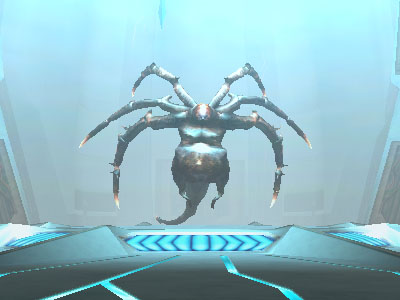
| Corrupted Xan-Kuir Aka "Spider" | |
 | Calling Order # |
| #4 | |
| Notes | |
| Rootable Casts AoE nukes Not aggressive, but social | |
| Pandemonium Geosurvey Dog Aka "Doggie" | |
 | Calling Order # |
| #5 | |
| Notes | |
| Not aggressive Drops Nano Crystal (Knowledge of The End) | |
Note that all of these mobs are UBTable.
With the exception of the Pandemonium Geosurvey Dog, they all have a chance to drop the following loot:
| Loot | ||
Control Unit Armor | Exterminator Unit Armor | |
Infantry Unit Armor | Artillery Unit Armor | Supply Unit Armor |
⇑
3. How To Enter the Instance
The entrance to the instanced version of Pandemonium is located just inside Pandemonium. After entering Pandemonium head right a few yards and you will be faced with the "altar" that will allow you to enter it (as long as you are in a raid interface).
I would suggest gathering the raid force here. Get your teams setup properly and get everyone buffed up. Next you will want to have at least one Doctor of sufficient level (though you can never have too many docs) an Enforcer to keep the mobs occupied and at least some sort of run speed buffing professions, a Fixer would be the best option but a shade and adventurer can help out as well, since the Enforcer will want to use the Shadowlands Essence that give a -2500 Run Speed penalty at the highest. In addition to these, an Engineer or a Soldier to give the Enforcer reflects is also very handy at some of the more critical areas of the zone. Having a calmer can also be extremely handy to keep the Pinks calmed, as well as the Portal Zodiacs which can hurt the tank quite a bit. As mentioned previously most of the mobs (including all the bosses, with the exception of The Beast) are UBTable, so having an Agent, if one is available, to dish out UBTs while the Doctor(s) focus on healing is usually a good tip. This is not to discourage Doctors from helping with UBTing if they have the time and the condition of the tank is not especially critical. If you lack an Agent to take on the task of primary UBTer but you have several Doctors at your disposal you might want to assign that task to one of them, preferably the one that is the lowest level if there is a difference in level.
You might also want to decide on one "Caller". This means that one person is in charge of selecting the target everyone will attack. This person should be aware of the "calling order" (covered earlier in the guide) as well as not have any issues with LDing, lag, etc. This is essential in the uninstanced version of Pandemonium as well as the Left and Right Zodiacs in the instanced version because of the quick respawn rates, thus you want to concentrate your firepower on one mob at a time.
Once you have your caller selected, make a macro for everyone to use such as:
| /macro Assist /assist <caller's name here> |
Make sure everyone is aware of this to make the raid a lot smoother and easier for all involved parties.
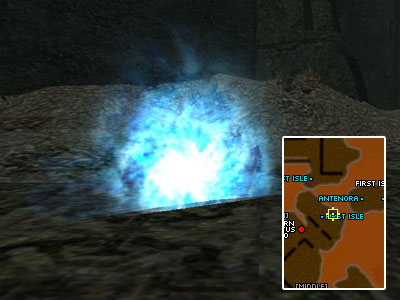
Once everyone is buffed up and ready to go, step onto the altar and you will be warped into the instance and find yourself at the start of the zone. For the uninstanced Pandemonium you have to kill the Zodiac standing at the start of the zone and then right click the portal that spawns once he goes down. Note that the portals that spawn in the uninstanced Pande disappear after a few minutes.
Inside there are two routes to take, one goes to the "Left Zodiac", also known as Left Side or West, and the other path takes you to the remaining Zodiacs, The Night Heart and The Beast him/her/itself.
⇑
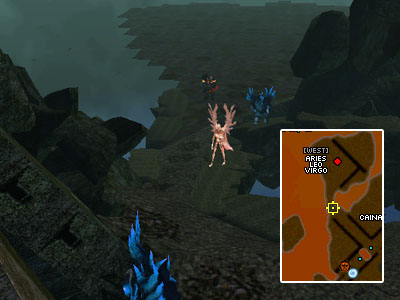
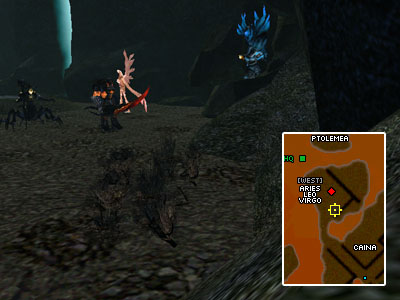
4. Left Side / West Side
As the name implies, the Zodiacs on the Left/West Side can be found at the end of the path going to the left from your start point inside Pandemonium. Keep in mind that in the instanced version (as well as the uninstanced version) of Pandemonium, the Left Side mobs will respawn, so you will want to keep your damage focused on one target at a time and perhaps move with the adds to avoid being stuck in wave after wave of respawns.
Beware that the Xan-Lens can be in "grace" right after entering the instance, and thus unattackable and uncalmable. Kill your way down the path ahead.

You might want to stop at the top of the path leading down to the island with the Zodiac and clear out any remaining mobs and then head down, gathering the mobs at the end of the narrow path.
It is usually a good idea to then move slightly north to the "Rocks".
Taking care not to get the attention of the Zodiac, clear out the remaining mobs that have attacked you. Make sure everyone is ready and then let the tank lead the way to the Zodiac straight North-West from the rocks. Be careful not to agg too many of the adds, unless you have a huge raid force with a lot of damage it is likely that you will have to keep fighting respawns as the Zodiac goes down. It is usually a good idea to make sure that the Pinks and Blues are down at the very least and then deal with the Zodiac and any pinks that respawn.
| Loot: | ||
| Aries | ||
Multi Melee | Multi Ranged | |
| Leo | ||
| Virgo | ||
After all is said and done, it is time to head back the way you came from. Alternatively if all you were doing was the Left Side you can jump into brink and be teleported to the last place you saved or to Omni-HQ if you are in uninstanced Pande.
⇑
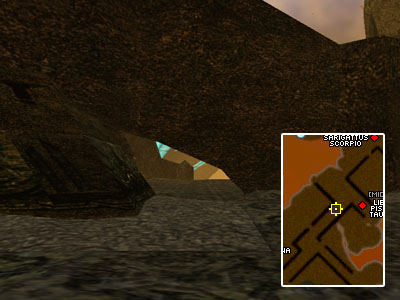
5. Right Side / East Side
The trip to the Right Zodiac spot is similar to the one taken to the Left Side in the sense that it also has respawning mobs in both versions of Pandemonium, so a raid that is low on damage will need to pull mobs along as well as keep their damage focused on one mob at a time.
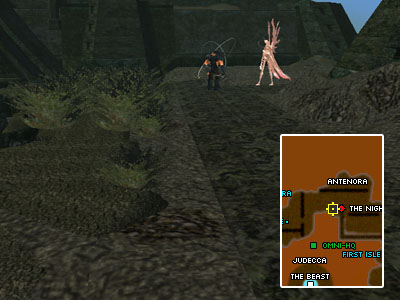
From the starting point of Pandemonium, you head north to the stairs and deal with the mobs around that area.
Keep in mind again that there might be pinks that are in grace in the area, so keep a watchful eye on them in case they decide to wake up at a very bad time.
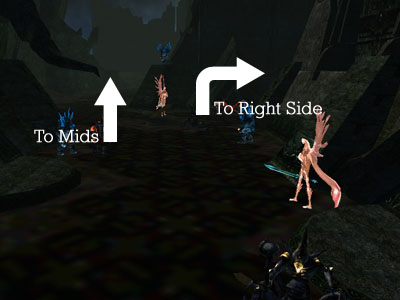
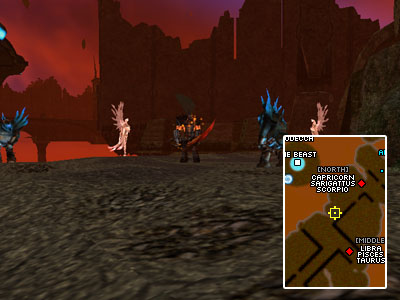
As you can see from the image, the road to the Right Side is, as the name implies, to the right. A good tactic is to clear out as many mobs as possible at the stairs before moving on to the corner before the path heading down towards the Zodiac. Be aware that there might be a pink or two lurking just around the corner, so be ready to calm or call them if they decide to drop by.
Once the coast is clear (or respawns are ruining your day) start moving down the path.
Gathering the mobs at the end of the path is usually a good idea to prevent respawns from bogging you down and then moving on to the small hill in front of the peninsula with the Right Zodiac, taking out the mobs located there.
There are usually three different tactics to use from this point on, as the region around the Zodiac has a lot of mobs.
The first one is having one person pull the mobs around the Zodiac, being careful not to agg the Zod, back to the hill. This however relies on having enough damage to avoid the mobs on the hill from respawning ontop of you.
The second is to move along the edge of the peninsula, killing the mobs as you go along and then rushing the Zodiac.
The last one is to simply rush the Zodiac from the hill, bringing along all the adds.
Whichever way you choose to approach the boss, the general lowdown on how to take the boss down is to get rid of the more annoying mobs, Pinks and Blues as well as Hiisis if the tank is taking a lot of damage from them, before focusing on the Zodiac until any mobs respawn.
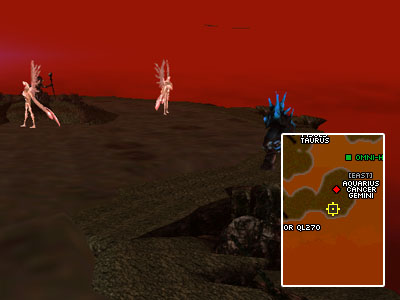
| Loot: | |
| Aquarius | |
| Cancer | |
| Gemini | |
Once the loot has been distributed and you are ready to move on, either head back the same way you came from or jump into the Brink and you will be teleported back to where you last saved or Omni-HQ if you are in the uninstanced version of Pandemonium.
⇑
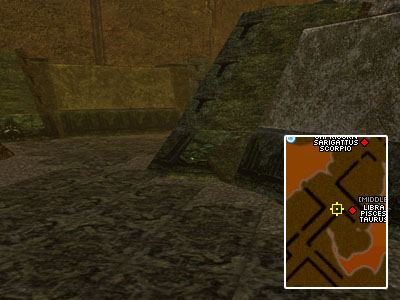
6. Middle Zodiacs
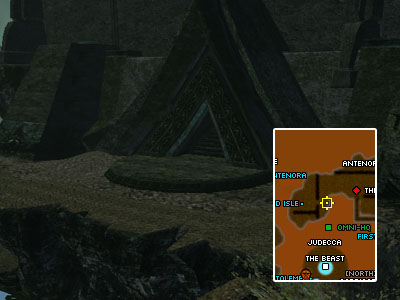
There are two Middle Zodiacs, referred to as either First Mid or Middle and Second Mid or North. In the instanced version of Pande most of the mobs from this point on do not respawn, so the damage required to move along is not particularly high. However in the uninstanced version the mobs respawn at a steady rate and you will want to drag mobs along at some parts to prevent yourself from getting stuck in all of the respawns. They are both along the same route, unlike Left and Right Side which are on separate routes.
To get to the Mids from the start you follow the first few steps as when you go to Right Side
But instead of heading to the right side, you follow the left path. Before moving from the first set of stairs you will want to clear out any mobs in the vicinity. Afterwards it is usually a good idea to gather the mobs in the first corner on the left hand side.
If you have just entered the instance, it is possible that the pink that frequents that spot is in grace and can not be attacked. So keep an eye out in case it suddenly wakes up and starts healing other mobs. You might also want to try and pull a few of the mobs ahead on the path leading north as well as get the pinks ahead calmed.
When you are satisfied that you have cleared out enough mobs, continue along the path north.
If you are not looking to kill one of the first mid Zodiacs, you can stop a bit short of the corner along the right side and head into the tunnel located on the left side of the path to avoid aggroing the First Mid.
However, if you are interested in taking out the first mid, your next destination is to gather the mobs at the corner just before the Zodiac while being careful not to get its attention.
With the mobs taken care of, and everyone ready, head around the corner and from then on the fight is pretty much identical to the Left and Right Zodiac.
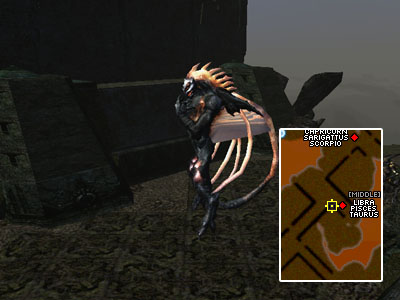
| Loot: | ||
| Libra | ||
x3 For Profession Star | ||
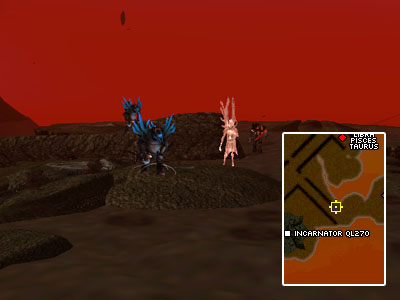
| Pisces | ||
| Taurus | ||
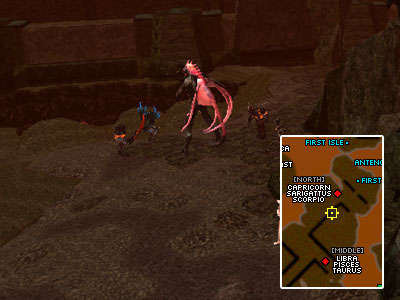
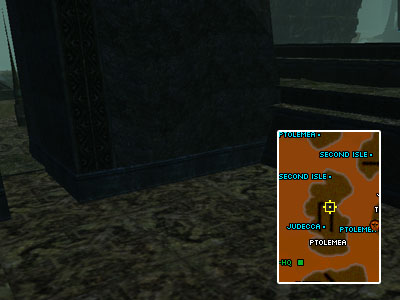
With the loot distributed amongst the raid, it is time to move along to the second Mid or North Zodiac. The first stop along the way, is usually at the corner just North-West from the First Mid spot.
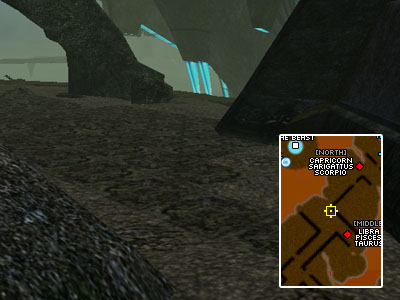
If you skipped the First Mid via the tunnel just south of the corner, you might attract the attention of a second pink in addition to the one standing just in front of the corner. Clear out the mobs before heading north.
It is usually a good idea to have a calmer calm the two pinks ahead and pull the visible mobs back south to avoid aggroing the Zodiac ahead. Once you have cleared out the mobs and everyone is ready, rush the Zodiac's spot.
The battle itself is fairly straight forward, clear out the adds and then focus your damage on the Zodiac itself.
| Loot: | |
| Capricorn | |
| Sagittarius | |
| Scorpio | |
⇑
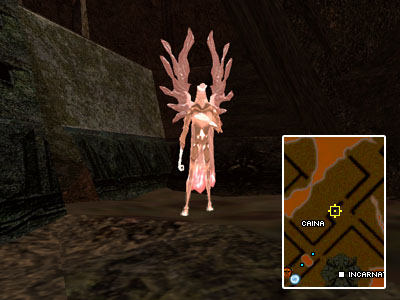
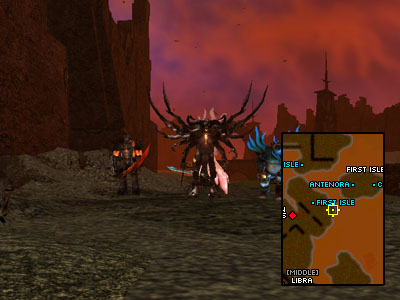
7. The Night Heart
Once the Zodiac at the northern spot has been dealt with and the loot has been distributed, you can now move on to The Night Heart. The first step along the way is to take out the first (or second, if you are doing the uninstanced version of Pande) portal Zodiac, the Timid Spectral Scourge. First head north west to the stairs.
Clear out any mobs in the vicinity by force or by calming and then head up the stairs. You might want to stay on the right side to avoid aggroing the portal Zodiac and his friends.
Usually it is a good idea to calm the Zodiac, thus aggroing the mobs surrounding it. This should make them move over to your position just at the top of the stairs, leaving more than enough room for the tank to mongo. Kill the adds before taking care of the Zodiac itself. However you decide to do it, once the Zodiac goes down a portal will spawn.
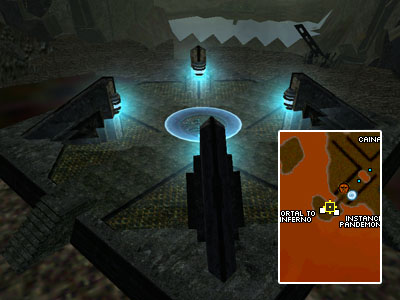
Make sure that no one has aggro from any mobs remaining, since you will be unable to use the portal if you are being attacked, and then right click it to head through. You will now find yourself on the first island and on the opposite side of where you are teleported there is an altar.
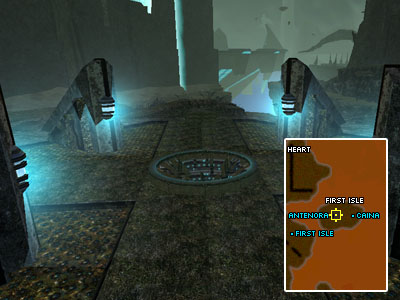
This is usually a good spot to rebuff and maybe take a quick break. Once the raid members are ready and freshly rebuffed, step onto the center of the altar to get warped to the next portion of Pandemonium.
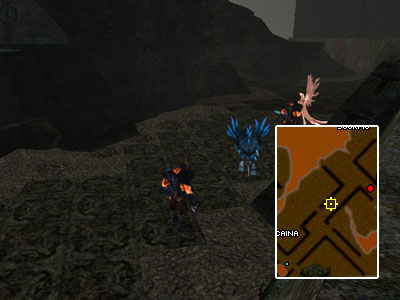
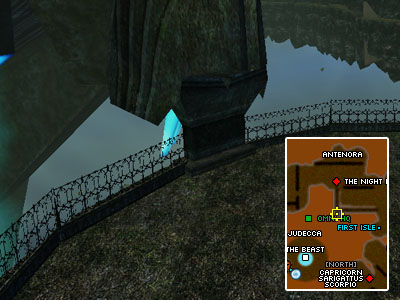
The first thing you want to do here is body pull a few mobs around the start of the bridge back towards the altar you entered this island, Antenora, from and deal with them there to avoid getting too many mobs. There are also some wandering pinks just north of the bridge that you might want to get calmed to avoid having to stick around too long.
When the mobs are gone head to the bridge.
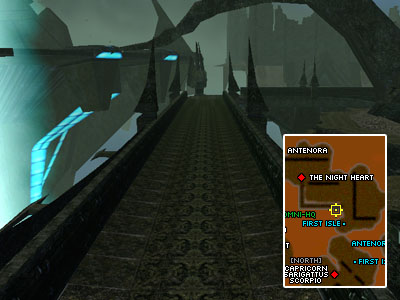
It might be a good idea to stop at the middle and take out the mobs there, though if you have enough damage and alert raiders in general you can probably rush straight to the western corner.
Whichever option you choose to go with, once all the mobs are dealt with and you are all ready, have the tank rush first straight north towards The Night Heart. In the uninstanced version of Pandemonium you will want to make sure everyone gets completely off the bridge to avoid the respawns on the bridge from noticing you. Be sure to not get behind TNH as that may alert the mobs directly north of it to your presence, likewise it is a good idea not to drift too far east or west towards the remaining mobs.
The fight itself pans out the same way as the regular Zodiacs, deal with the adds around The Night Heart before focusing all your damage on the boss itself.
| Loot: | |
Intelligence / Psychic | Stamina / Strength |
Agility / Sense | For Sword of Dawn |
For Sword of Dusk | Symbiants QL200+ including Intelligent (QL 300) that can be combined with Beta of appropriate Unit to turn into an Alpha |
| Note: TNH drops either one of the three belts or both Seeds. It also drops 10 symbs per kill | |
Once The Night Heart's loot has been distributed, it is time to move along to The Beast. Or alternatively if you are not interesting in bashing its head in you can just jump off the edge and find yourself at the last place you saved at, or in Omni HQ if you are raiding in the uninstanced version of Pande.
⇑
8. The Beast
From The Night Heart's spawn point you want to head westwards.
Be careful when moving so you avoid mobs from the north and east aggroing you. Pull the mobs ahead in a few batches, and move along to the staircase going up to the Senior Subjugator, the Portal Zodiac.
If you lack a calmer you might want to very, very carefully have one person, preferably someone quick and with no shields, pull mobs from around the top of the staircase down to the rest of the raid. Using this tactic, be careful not to attack the mobs before they have cleared the platform, otherwise you risk catching the attention of the Portal Zodiac which will then start warping whoever he is aggroing and can easily lead to a wipe if you are not prepared for it. Once you are satisfied that you can deal with the uncalmed Portal Zodiac as well as the remaining mobs, head upstairs and clear out the adds and then deal with the Zodiac.
The other alternative works best if you have a calmer. Rush up and into the South-East corner, calm the Senior Subjugator and deal with the adds. Be aware that the mobs might get stuck in the stairs and start hitting people at random, you might also attract the attention of the mobs on the other side of the southern wall. Once all the mobs are down, get to work on the Senior Subjugator who isn't all too mean on his own.
Whichever tactic you end up using, right click the portal that spawns when the Subjugator goes down. Beware that you can not use it while something is attacking you.
Once you go through the portal you will find yourself on the second island, which looks fairly identical to the first island. Head over to the West end and there will be an altar leading to the next area of Pandemonium.
As with the first island, this is usually a good place to stop to redo buffs and perhaps take a break before continuing on. Once everyone is ready, step onto the center of the altar and you will be warped to the area of Pandemonium called "Ptolemea."
Step off the altar and start to pull the mobs outside the doorway just south of you.

Once you have dealt with the mobs, head through the doorway and once again you will find yourself faced with two tactics depending on whether or not you have a calmer.
If you have one, head into one of the corners just inside the doorway.
Calm the Pandemonium Subjugator, the last Portal Zodiac, and gather all the mobs with more than enough space left for the tank to keep the attention of the mobs with mongo without waking up the Subjugator from the calm. When the mobs are down, start hitting on the Subjugator being careful not to end up aggroing the mobs a bit south of it.
If you don't have a calmer, then you will have to rush the Pandemonium Subjugator and deal with the adds before taking care of the Portal Zodiac.
Once the Subjugator is down a portal will spawn which works just like the other portals in Pandemonium, so be careful not to leave anyone behind because they got agged by a mob in the vicinity.
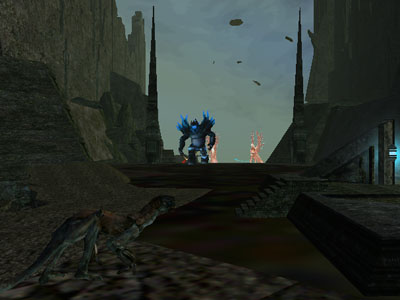
On the other side of the portal, you will find yourself in the area just before The Beast's Lair.
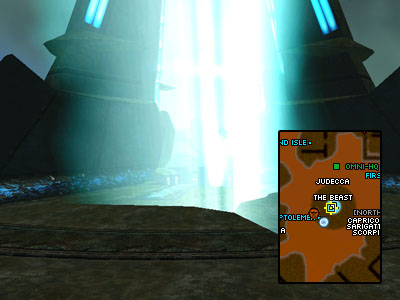
Unlike the recommendations of thousands of movies and television series.. Run towards the light and jump into the lair. Down below you will get a glimpse of... The Beast!
Don't worry though, you will find yourself well out of his aggro range, so take some time to rebuff and get everyone ready to fight The Beast. Once everyone is ready, have the tank run towards it and start attacking. When the tank feels he has built up sufficient aggro (for an enforcer this should usually be one or two Improved Mongos and/or Improved Elements of Malice) everyone should start attacking.
It is usually a good idea for doctors to stay back a bit to avoid being morphed into a spirit since this debuffs your nano init among other things.
The Beast has a few tricks up its sleeve in addition to being quite the proficient fighter. Every now and then he will put up a 1000 point reflect shield which can really hurt if you are right in the middle of a big perk chain, at this point everyone should stop attacking and wait for the shield to clear after a while.
It can also cast AoE nukes that can easily kill low leveled characters without any HP buffs running. At random he will also remove some of the programs running in your NCU, so keep an eye on your NCU window in case some of your essential buffs are cleared out.
In addition The Beast can also spawn waves of adds around him. Once this happens, your caller should start calling them to clear them out. However the Pinks can be spawned and be in grace, and thus unattackable, for a few minutes. Keep an attentive eye on them in this case and be sure to take them out ASAP if they awaken again so you avoid ending up with The Beast back at almost full HP. One trick to deal with this, which requires some coordination between your calmer and tank, is to have the calmer aggro the pinks and pull them away from the tank and then calm them well out of the way of the action.
Hopefully at the end you will find yourself looking at The Beast's remains!
| Loot: | |
| Armor | |
| Weapons All of these weapons can be upgraded | |
| Profession Stars All of these stars can be upgraded | |
Nano-Technician | Fixer |
Shade | Martial Artist |
Keeper | Soldier |
Enforcer | Adventurer |
Engineer | Trader |
Bureaucrat | Meta-Physicist |
Doctor | Agent |
| Hilts Used to make Sword of Dawn/Dusk | |
Clan | Omni |
| On each kill The Beast drops: 4 Parts of Armor Both Hilts 2-4 Weapons 1-2 Stars The weapons drop as either "Lord of X" (QL300) or "Lady of X" (QL299) Also it drops one random Shadowbreed | |
After The Beast dies a portal will spawn.
It functions like all the other portals in Pandemonium and by right clicking it you are transported back to Rubi-Ka. Specifically to the Pyramid inside the crater north of Home in Broken Shores. On the other side you can also find Number Nine, which is part of the quest for getting your Profession Star. At the other end of the area you find yourself in there is a doorway. However before entering it, click on the lever on the right hand side.
Last updated on 09.24.2021 by bitnykk
Written by Quilluck
Additional help, feedback and assistance provided by Ophiuchus, Solidstriker & the AOU Team.
Do you have questions about this article or found an error? 2 comment(s) - Click here to view them!
Written by Quilluck
Additional help, feedback and assistance provided by Ophiuchus, Solidstriker & the AOU Team.
Do you have questions about this article or found an error? 2 comment(s) - Click here to view them!
