Arid Rift
Table of Contents [+]
- Supplemental Mission #1 - Transmographic Dimension Shifter
- Unicorn Coordinator
- Inside Arid Rift
- Unicorn Commander Ryker
- Demolitionist Hock
- Mission :: Cocooned
- Mission :: Shiny Shards
- Mission : Evolution: Evolved Alien Entity
- Supplemental Mission #2 - Bounty: Specialists
- Mission : Dust Brigade Dusters
- Mission : The Xan
- Professor Morgan Parser
- Mission : The Ancient Trace
- Mission : Genomes and Evidence
- Professor Raji Masoud
- Mission : Archaeological Business
- Mission : Finders Keepers 1
- Mission : Finders Keepers 2
- Mission : Finders Keepers 3
- Professor Morgan Parser
- Mission : Deliverance
- Mission : A Way In
- Mission : Examine the Interior
- Ole Jacob
- Curator - Rimah'Uri
- Mission : Prove the Connection
- Mission : The Final Clue
- Lindsay Wriste
- Mission : The Aliens
- Mission : Missing Friend
- Mission : Insurance Policy
- Mission : Talk to Lindsay Wriste
- Mission : Find the Lost Friend
- Mission : Return the notebook
- Mission : Alien Technology
- Mission : Contact Dr. Hernandez
- Mission : Setting the trap
- Mission : The Abductee- Stockton Bass
- Mission : Provoke the Abduction
- Mission : Talk to Stockton Bass
- Mission : Diplomacy
- Mission : Return to Stockton
- Mission : Talk to Hernandez
- Misison : Talk to Sheri Tater
- Mission : In a Jam
- Mission : The Corruption
- Mission : Where to go from here
- Mission : Consultation
- Mission - From Within
- So, What is Left?
- Supplemental Mission #3 - Lindsay Wriste
- Supplemental Mission #4 - Sheri Tater
Class: All Classes
Faction: All Factions
Level: 201-220
Item Links:
Quicklink (copy this):
Feedback: Feedback-Thread
Faction: All Factions
Level: 201-220
Item Links:
Quicklink (copy this):
Feedback: Feedback-Thread
- Note: If you are doing this quest simply to get the ear(s) from here, and not to enjoy a true journey; one that may take 2-3 days, you should know that all of the Profession Ears from here in Arid Rift are also available in The Xan - 12Man encounter. Which often proves to be faster and easier!
Don't discount Arif Rift though! There is a lot to learn here, and it's well worth the time! Still want to give it a go? Great!
However, let's start with a side supplemental mission!
⇑
Supplemental Mission #1 - Transmographic Dimension Shifter- Transmographic Dimension Shifter - supplemental mission
A mission in Arid Rift from the Alien Agency Handler. If you haven't already taken your daily Alien Mission, this will prove to be very helpful to you once you begin the questline inside of Arid Rift!
To check this quest line out, click "Reveal" below.
[Reveal] Transmographic Dimension Shifter Walkthrough
- Note: You can also find this mission guide for easier use here: Transmographic Dimension Shifter
Pulling this Mission:
While this mission is done almost completely in the alien area, Arid Rift, it starts out with your friendly neighborhood Daily Mission Agency located in either Clan Old Athens, or Omni-Tek Rome Blue. Once there, seek out your Alien Agency Handler and open a chat with him.
Since this is a team mission, select: "I want to face the aliens with my friends".
Then tell the Alien Agency Handler that you would like to go to Arid Rift, and you will get a mission.
Unicorn Coordinator
Mission :: Making a Racket
It seems that one of the Agency's clients has requested help in building a custom made device used to lure aliens away from a certain area inside Arid Rift. He wants you to go find Dr. Torgrim Ness deep inside the instance for more details.
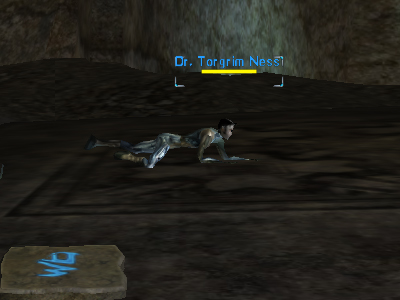
Dr. Torgrim Ness
Time to head to Arid rift!
If you don't know how to get there, check out Arid Rift-Unicorn Coordinator to learn about the area and how to get there!
Dr. Ness has a very nice tool for you. Though, he may make you work for it! It is definitely worth it though, and as you will find out very soon after you've started the Arid Rift quest that it might be very handy!
So how do you get this item? Well, first you have to find Dr. Ness inside Arid Rift. He's pretty deep inside Arid Rift, but getting there isn't always easy to figure out. It can be a bit tricky to find the Doc because of the way the map shows his location.
To help you find Ness, check out the image of the map below. You will need to go into Arid Rift through the Fence, and head West. Keep going toward the Collectors' area. Follow the arrows on our map, past the Collectors, and through the shard area. After the shards you will need to make a sharp RIGHT up a stone ramp, that is not visual on the map, (but we've marked it here).

Map to Ness
Click image to increase the size
Once you reach him, he will send you on a quest for some items that drop from Assembler mobs. You have to search for the following items:
The items can drop from any mob in Arid Rift but it is much better to follow Dr. Ness' advice and kill Assemblers.
You will find them near the Assembler Leader located here:
- 409x397
Or zoom in on your planet map and you can see the location on their.
After you've got all four parts, which are all NoDrop and Unique, you have to combine them:
|
You should now have Ness' Decoy Device in your inventory.
You will have to give Dr. Ness the Ness' Decoy Device in order to finish the mission. Continue to talk with him a little longer and he will tell you about this wonderful idea he has that should enhancement the device he just gave you. He will give you a Algorithm: Replotting Matrix.
Unfortunately, his idea entails you combining it with another Ness' Decoy Device.
That means you will have to go back to the Assemblers and aquire the above items again. Once you combine them, add the Algorithm: Replotting Matrix.
It will give you a:
Whenever you select yourself and then right-click the tool, you will get warped back to the entrance of Arid Rift.
- Note: It has a 7.5 - 10 minute lock out for Guardian of Shadow Faction, so when you use this that means it will also lock out the use of the ICC Peace Keeper Recall Beacon
It can be a very useful tool, but it only works inside Arid Rift, so use it wisely!
⇑
Unicorn Coordinator - 556.8x773.4
Now that you have the mission for the Transmographic Dimension Shifter from your Alien Agency Handler, you're ready to get started on the Arid Rift Questline. Don't forget to follow the instructions to get the Shifter while you are running around Arid Rift!
- Note: Don't worry if you already had an Alien Daily mission and got locked out because of the 18-hour timer. You can pull the mission for the Transmographic Dimension Shifter at any point, though, be aware that the Shifter will only be useful inside Arid Rift.
To start this questline you will first need to talk to the Unicorn Coordinator who stands just after you enter the Central Gateway entrance. He's standing near a table and in front of a tent.
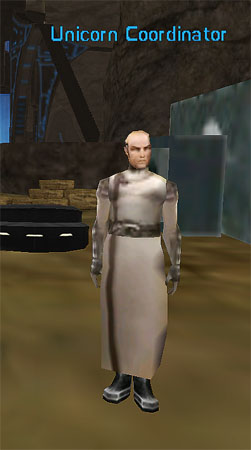
Unicorn Coordinator
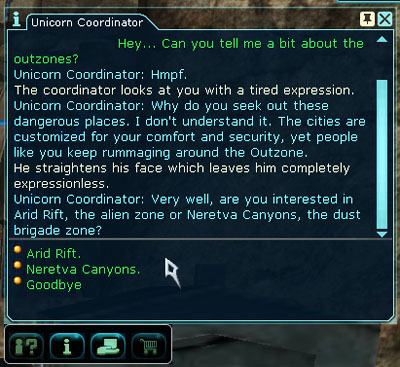
Open up a dialog with the Unicorn Coordinator and talk to him about the outzones. While he's not excited to discuss the areas with you, a bit of patience in letting him complain leads him to ask you which outzone you want to know about.
Unicorn Coordinator Dialog
After telling him Arid Rift is the outzone you're interested in, he will give you a brief history of the area and then send you off telling you that your contact should be Unicorn Commander Ryker.
To get to Arid Rift, turn right and head around the West side of the ravine, heading W/SW and keep going until you see the
Arid Rift Sign
. - 366x446

Unicorn Coordinator Dialog
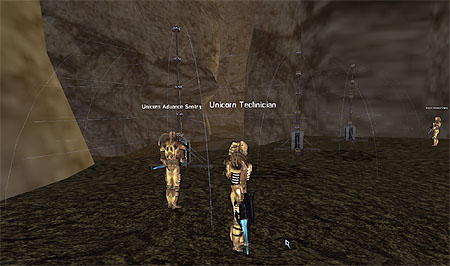
From there turn right, following the sign, and head up the ramp. Follow up the path, until you see Unicorn Advance Sentries killing level 210 Alien Larvae.
Unicorn Advance Sentries on the ramp up to Arid Rift
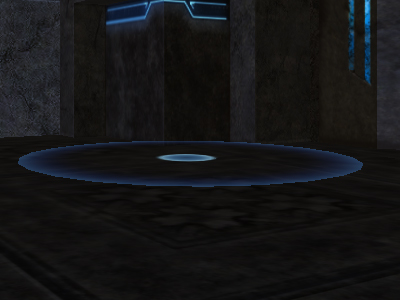
The Larvae spawn from the entrance of Arid Rift, but shouldn't attack you as the head down the path toward the Unicorn Advance Sentries. Keep heading the way they are coming from and you will reach the portal for Arid Rift.
Step on the Arid Rift Portal
- 264.9x632.9

Portal into Arid Rift
⇑
Inside Arid RiftAs you traverse your way though Arid Rift, you will want to keep a look-out for a few items that you will need for one of the last parts of this quest:
x3 | x1 | x1 | x1 |
These can drop from all the aliens in the zone, but seem to have a very nice drop rate from the Assemblers, deeper in Arid Rift, in particular.
⇑
Unicorn Commander Ryker - 251x876
After entering the area through the portal, the first person you will see is Unicorn Commander Ryker. Opening dialog with Ryker will complete your mission to find him, which was set by the Unicorn Coordinator on your way into the Central Gateway.
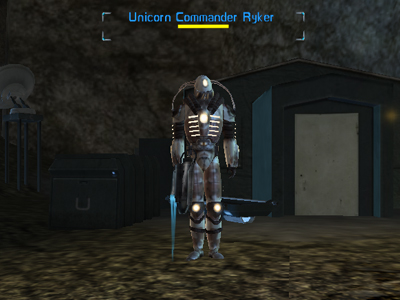
Unicorn Commander Ryker
Ryker will give you a mission to find a troop of Unicorns that are out in the field. Apparently, they haven't checked back to and he wants to know what's happened.
The contact you are to go and find is Demolitionist Hock.
Your mission should upload to your mini map, and you will see that the area you need to get to is through a large fence.
The Fence
- 314x895
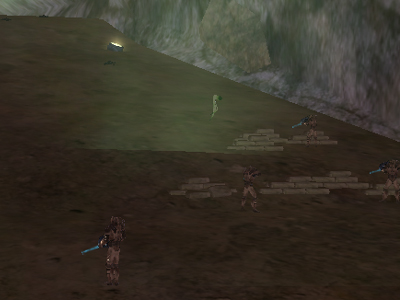
Unlike other "Darwin" fences within the Alien APF Outzones, this one is safe to go through, it's tuned to keep the aliens out of our safe area, as the Unicorn Advanced Sentry take them out.
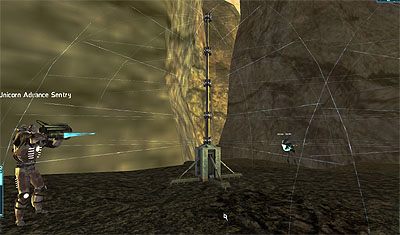
Sentry attacking Aliens
Note: Before you go through the fence, and to make it easier in the event you get eaten by the Aliens and end up in reclaim (die, it means die), located in this front area there is a save terminal.
- 283.7x900.5
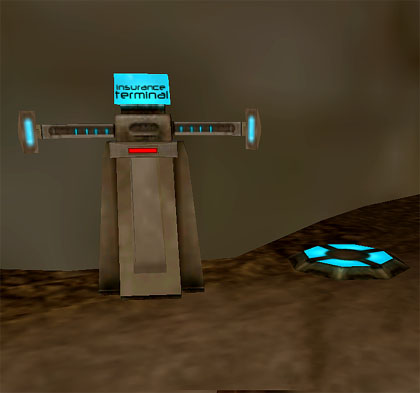
Insurance Terminal
Now that you've decided to save in Arid Rift (or not), you find heading through the fence will bring you almost immediately into contact with aliens. If it was as easy as just fighting your way through, things could get boring -- instead there are a couple of alien types you need to look out for because they do special things that could end up sending you to reclaim if you are caught unawares!
Firstly, Regeneration Conduits. These help the aliens heal, so when you see one of these, take it out before you attack the aliens around it. Also, Alien Scoutships -- when you attack this, aliens spawn out of it. It will also attack you.
⇑
Demolitionist Hock
- 710x952
When you speak with Hock, he will tell you that they are having trouble extracting information they need because their equipment is being jammed by alien cocoons.
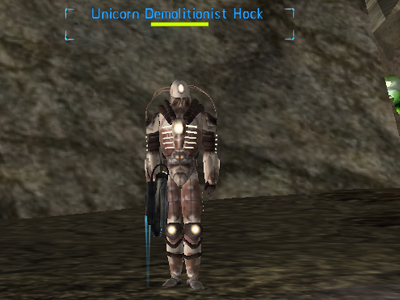
Demolitionist Hock
- The Unicorn Demolitionist told you that they are having trouble extracting the information they need because their equipment is being jammed by some
sort of alien cocoon further in the canyon.
If these were stopped, even for a short time, the Demolitionist might be able to get what he needs.
⇑
Mission :: CocoonedLocation:
- 766x960
You basically have 6 hours to kill 3 alien cocoons, which you will find just further north east of Hock. Alien Larvae will spawn from the cocoons, you can ignore them. Hocks men should help dispatch them if you are stood close enough for them to see them.
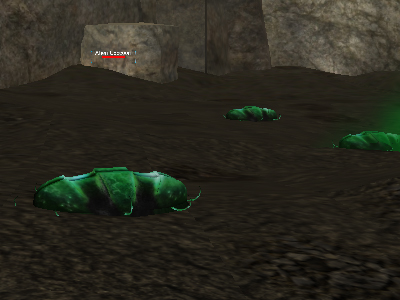
Alien Cocoons
When you have taken all 3 Cocoons out, return to Hock. Tell him of your accomplishment in kill three cocoons. He has already started the transmission to report it, but naturally, there are still problems.
The problem is they have discovered certain units with incredibly advanced technology, which the Company is interested in. Unfortunately the units are running some sort of self-destruct program preventing them from examining that equipment. To stop that, he will needs some crystal shards from deeper inside Arid Rift. Of course, you volunteer for that job, and Unicorn Demolitionist reluctantly gives it to you!
He gives you a: Crystal Cutter.
⇑
Mission :: Shiny Shards The location given via the upload to map waypoint for this mission is "approximate". However, if you look at our map for Arid Rift you should see the long pink line from the waypoint and along the ridge where you can find the crystals you need.
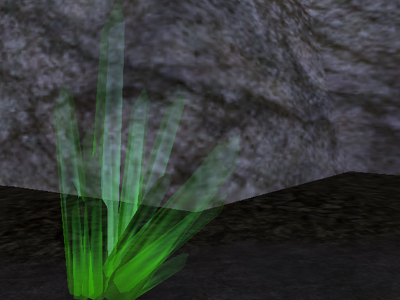
Crystals
As you can see in the image above. The "named" crystals seem to be a slightly greener version compared to the other non named ones.
If you would prefer to try the coordinates we found them at, then they are as follows:
Corrupted Crystal x1 Location: - 463x351 Nothing happens when you cut this one | Pulsating Corrupted Crystal x1 Location: - 344x357 When you cut this one, you get blinded There is a chance the 10 sec blind will time out, but the blind will not break. IF that happens, have each team member affected log out the slow way, and relog to fix it. | Oozing Corrupted Crystal x1 Location: - 553x348 - 410x357 When you cut this one you get rooted with Sticky feet | Polluting Corrupted Crystal x1 Location: - 502x341 - 446x358 When you cut this one you get Dotted with Radiation sickness |
To cut the shards, target the Crystal Shard you require, then pick up the Crystal Cutter that he gave you and R-Click it over the Crystal Shard.
- Note: When cutting and collecting each Corrupted Crystal Shard, the name listed on the shard on the ground in that area will say Corrupted, Pulsating Corrupted, Oozing Corrupted, and Polluting Corrupted Crystal. However, in your inventory, they will most likely be: Corrupted Crystal Shard. This was not always the outcome, and it used to show the correct named and icons for the cut crystals. What happened there, is hard to say. But do not worry. Do not delete and start the mission over. Demolitionist Hock will gladly accept all four Shards, even everyone of them says"Corrupted Crystal Shard"in your inventory. Just so long as you cut them from the correctly named Crystals in the canyon.
When you have gathered your 4 shards in the correct order, return them to Hock, as well as the cutter.
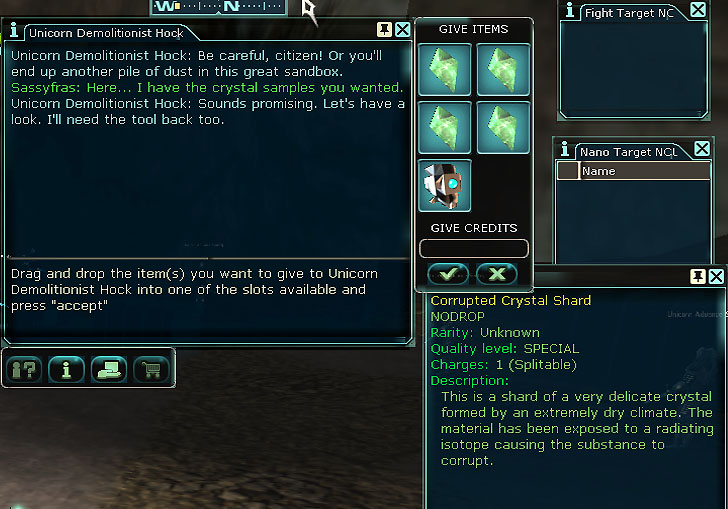
Turning in Corrupt Crystals Shards
He will send you back to Unicorn Commander Ryker in the staging area and give him a status report. When you have had a chat with him, he will give you your next mission.
⇑
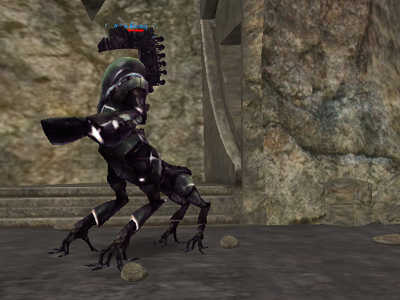
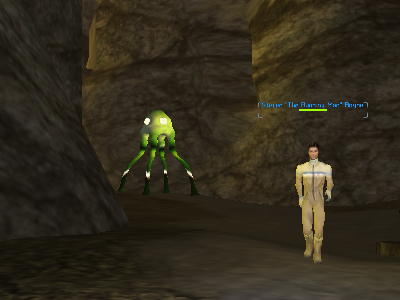
Mission : Evolution: Evolved Alien Entity - 722x593
Ryker wonders what happened to the unit of Omni-Tek AF soldiers sent out on a mission to kill a specific alien. Your next mission from him is to find the alien and get a status report. He wants it dead and buried!
When he gives you the mission, again the mission coordinates upload to your mini map.
The alien looks like a slightly smaller version of a city alien general, you basically just need to kill it.
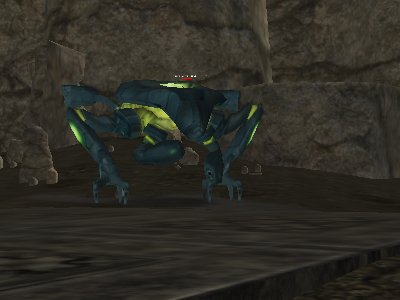
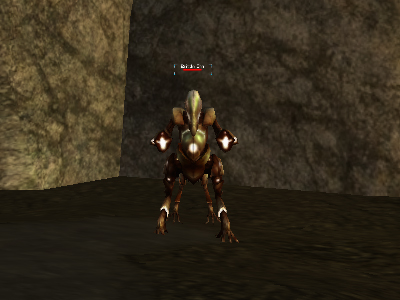
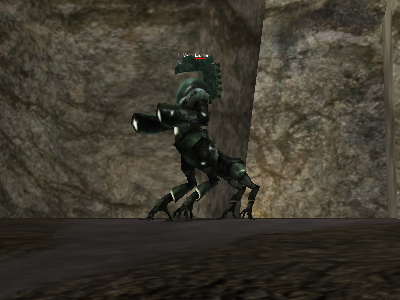
Evolved Alien Entity
We didnt notice any special attacks, it died quite quickly. When you have killed it, you have a choice to take on a supplemental mission! Let's take a look at that next.
⇑
Supplemental Mission #2 - Bounty: Specialists- Bounty: Specialists - supplemental mission
After finishing Evolved Alien Entity, you have a choice.
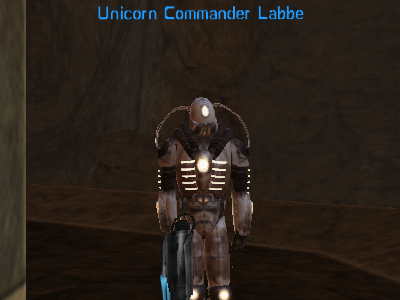
You can just go on with the original Arid Rift Questline, -OR- at this point you can pick up a supplimentary mission from Unicorn Commander Labbe in the Central Gateway
- 556x590
He has a job for you inside Arid Rift involving killing groups of aliens, and the best part is that it can be done while you continue to work your way through the Arid Rift questline.
Note: You need to be 210 to be able to get Labbe to give you this mission. However, this mission can be done at any point after Evolution, and can be pulled even if you go back and report to Commander Ryker after killing the Alien Entity, and get the Kamikaze Dusters mission from him.
It seems to be repeatable and can pulled during or after you finish Arid Rift, as often as you wish.
To check this quest line out, click "Reveal" below.
[Reveal] Bounty: Specialists Walkthrough
This is a quick and easy supplementary mission inside Arid Rift given by the Unicorn Commander Labbe in the Central Gateway
- 556x590
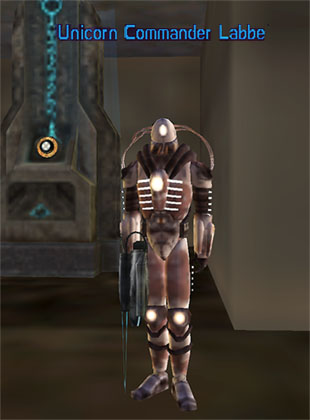
Unicorn Commander Labbe
You can obtain this supplemental mission as soon as you have completed the Mission: Evolution within the Arid Rift Questline as long as you are level 210.
Unicorn Commander Labbe offered you a bounty for terminating some of the green menace. They're a danger to the researchers.
You will find the aliens scattered all over the playfield which is why it is great to do it alongside the main Arid Rift Questline as you will no doubt be killing the aliens on your way through anyway!
Bounty: Specialists 1 / 5
Kill 5 Specialist - Rimah'Khaz.
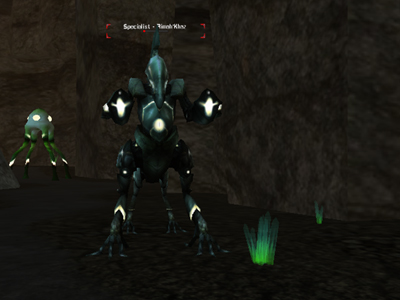
Specialist - Rimah'Khaz.
Bounty: Specialists 2 / 5
Kill 5 Combat Medic - Xoch'Uri.
Combat Medic - Xoch'Uri.
Bounty: Specialists 3 / 5
Kill 5 Technician Grade III - Ankari'Ra.
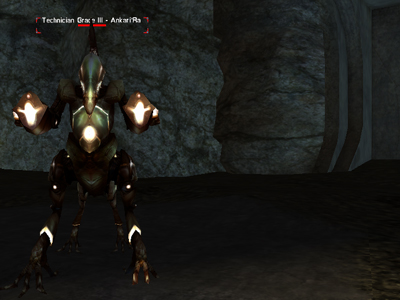
Technician Grade III - Ankari'Ra.
Bounty: Specialists 4 / 5
Kill 5 Alien Scoutships.
Alien Scoutships.
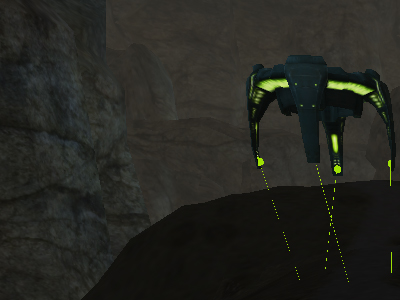
Bounty: Specialists 5 / 5
Kill 5 Vicars.
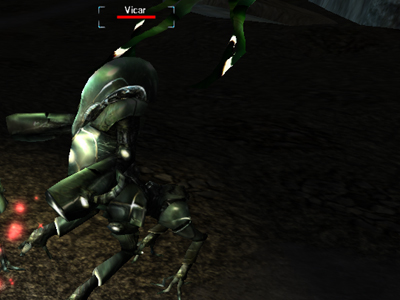
Vicars.
When you have killed your alien quota as given with the missions, return to Labbe to claim your bounty which in this case is SK and credits.
This mission appears to be repeatable by talking to Labbe again.
- Whether or not you decided to pick up the Supplemental mission, or just stuck with the original questline, it's time to revisit Commander Ryker, if you didn't already, to report back the outcome of the Evolution mission and get a reward from him as well as the next step in the Arid Rift questline.
⇑
Mission : Dust Brigade Dusters Location: approximate area:
- 501x908
Ryker has another task for you; apparently they have been working to find a way to salvage technology from kamikaze units. He wants you to take a special tool, head out to the canyons in search of kamikaze dusters and then to kill them.
You will get a Interrupter Tool
To work towards completing this mission, target the Kamikaze Dusters, then right-click the Interrupter tool in your inventory. Failing to hear the "pop" text in your vicinity text could mean that the Dusters will self-destruct and you will have to wait for another spawn.
Remember to use the interrupter tool on the Kamikaze Dusters before you attack them, or they will self-destruct before you can them!
Kamikaze Duster
When they die, loot the corpses to get your hands on
The items are not 100% drop rate, but sometimes corpses have multiple items on them.
When you have found all three, head back to Ryker and them to him trade, along with the tool.
⇑
Mission : The XanNext up, Commander Ryker suggests that the researchers stationed in the area might have use for you. Apparently they are here in Arid Rift to investigate the occurrence of Xan structures.
Let's go and have a chat with one of them.
⇑
Professor Morgan Parser - 265x934
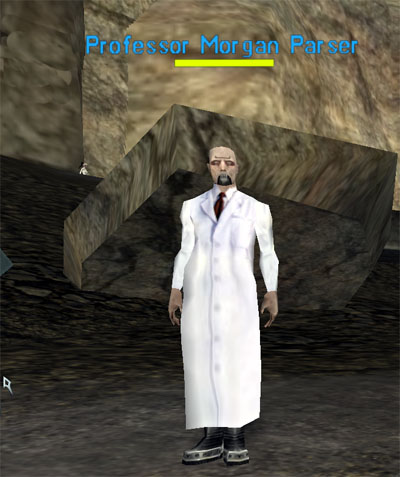
Professor Morgan Parser
Professor Parser, following being "impressed" by your persistance, decided that you could assist in the research. He wants you to find some things but to do so you will need a special tool. He will hand you a Magnifying Glass.
⇑
Mission : The Ancient Trace For this mission, you will need to visit 4 major ruins in order, and use the magnifying glass the professor gave you to examine the ground right in front of each of the ruins. To use the magnifying glass, simply stand close to the ruin entrance, and right click the magnifying glass in your inventory.
When it is successful, your mission will update. (If it's not updating move closer to the ruin's wall.)
1 / 4
- 530x957
2 / 4
- 775x771
You will need to jump up to this one
3 / 4
- 782x388
4 / 4
- 518x565
Now that you have found all four ruins and examined them, return back to Professor Morgan Parser. Tell him you have visited all the major ruins and describe them to him. Return your maginifying glass and feel free to ask him to brief you if you wish to continue missioning!
⇑
Mission : Genomes and EvidenceNow that Professor Morgan Parser has breifed you on what he needs next, you learn he wants you to go into the canyons and seek out 4 named aliens of specific types:
- Brittle Cha
Brittle Rimah
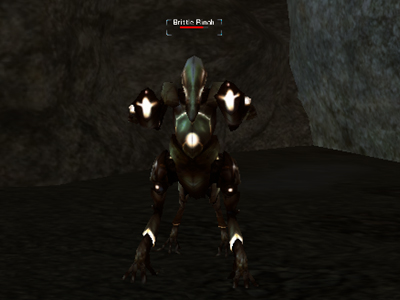
Brittle Xoch
Brittle Ilari
He then spawns a strange looking item called an Epithelium Biopsy Mixer in your inventory.
He wants you to use it to collect an Epithelium Tissue Sample from each of them.
- Note: Each time you attempt to collect a sample from these Named Aliens, two alien adds per each person/team member will spawn. So, if you are a team of 6, try not to all gather your sample at the same time, or be prepared to take on 12 alien adds!
Below is the order, images, and coordinates of the named aliens you need to seek out. First up is the Brittle Cha!
To acquire your sample, you need to target the named alien and right click the mixer. If successful, a sample will then spawn into your inventory.
Brittle Cha
- 510x841
Now that you have a Epithelium tissue sample, tradeskill it together with the Epithelium Biopsy Mixer from the Brittle Cha by picking up the sample and r-clicking it onto the mixer.
Now that you have combined them you should have a Epithelium Biopsy Mixer (1) in your inventory, you are good to move to the next Named Alien in the area.
Time to move to the next Named Alien: Brittle Rimah.
Find and target the Brittle Rimah with your Epithelium Biopsy Mixer. As with the last Named Alien, be prepared to fight and then just repeat the process to get your next sample.
Brittle Rimah
- 443x843
High resist on nanos and perks
- Note: If you forget to combine the Epithelium Biopsy Mixer with the Epithelium tissue sample any time you get a sample, you will be unable to obtain the next sample from the next Named Alien and you will receive this message:
"This is obviously doing nothing. Perhaps the skin of this life form is too thick to penetrate."
To fix this, be sure to combine the sample in your inventory with the mixer, and it should let you continue.
Combine the tissue sample again with the mixer, to gain your Epithelium Biopsy Mixer (2).
Move on and find, then target the Brittle Xoch with it.
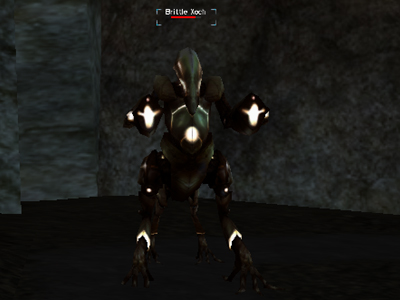
Brittle Xoch
- 562x823
Seems to have reasonable evades
Again, take the sample from the Xoch and combine with your mixer to get your Epithelium Biopsy Mixer (3).
Now you just need to find and target on the Brittle Ilari to get the last sample.
Brittle Ilari
- 593x729
When you gain your final sample, combine it to make yourself the Full Full Epithelium Biopsy Mixer.
It's now time to head back to Professor Parser with the samples.
Give him the samples and he will talk to you for a while. After telling you that you look cute, its time to go to talk to Professor Masoud to see if I could find out any more information about what I was just told.
⇑
Professor Raji MasoudLocation:
- 284x917

Professor Raji Masoud
Professor Masoud is waiting to here from a colleague of his who is apparently working out in the field. His name is Dr. Torgrim Ness. and he wants you to help I'm locate him. So, off we go to find him!
⇑
Mission : Archaeological BusinessLocation:
- 373x308
Yes, this is the same NPC from the start of this guide! It's time to find him again, and he is still just as tricky to find. In case you didn't do the mission from Dr. Ness at the start, we have added the thumbnail of the map here as well.
Again, to find Dr. Torgrim Ness, you will need to go back into Arid Rift through the Fence and head West. Keep going toward the Collectors' area. Follow the arrows past the Collectors, and through the shard area. After the shards you will need to make a sharp RIGHT up a stone ramp, that is not visual on the map, (but we've marked it here).
Map to Ness
Click image to increase the size
You will find Dr. Ness crawling on the ground, examining a ruin. He suggests you waiting 2 days for him to finish what he's doing, before he will be able to send you off with the required report. You can speed it up a little though by offering to do the ground work for him.
Dr. Torgrim Ness
He wants you to go and find 3 specific items, the details of which he will upload for you. When you find the items, simply double click on each one on the ground to pick it up, and it will spawn into your inventory.
- Note: These can be done in any order as long as you get all three for Dr. Ness.
⇑
Mission : Finders Keepers 1Location:
- 238x251
⇑
Mission : Finders Keepers 2Location:
- 573x231
⇑
Mission : Finders Keepers 3Location:
- 748x336
When you have gained all three items and they are in your inventory, return to Dr. Ness and trade them to him. He will then give you:
Head back to Professor Masoud and trade him the report. He is very excited at its contents and will give you a lot of information.
Your mission window should now update to "Talk to Professor Parser".
⇑
Professor Morgan Parser - 265x934
When you get back to Parser, he is surprised that Professor Raji Masoud actually spoke with you at length. Parser ironically doesn't have time to help you, but of course, he still wants your help. He has a couple of supplies for Dr. Ness.
Funnily enough, that food that was discussed earlier might just be what we are about to sign ourselves up for. Food Deliverer at your service!
⇑
Mission : DeliveranceLocation:
- 373x305
When you get back to Dr. Ness, tell him you brought supplies and trade them to him. Tell him that you need to get a sample of his work for Professor Parser. He will sit and eat while he tells you about his work.
When he has finished eating, he happily gives you a sealed sample.
Return back to Parser and tell him you delivered the supplies, he will tell you that Dr. Ness wants you to examine a well preserved Xan ruin.
⇑
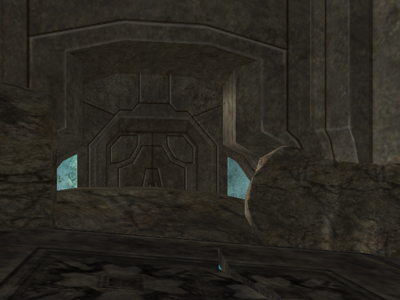
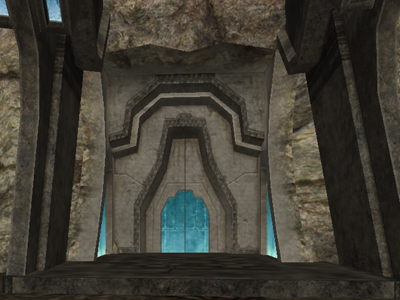
Mission : A Way InLocation:
- 647x530
Your next mission is to search the canyons of Arid Rift, (or follow your mission indicator on your map), for well preserved ruins that might conceal a hollow core. Walk toward the door until you zone into the old ruin.
Location:
- 768x525
While you do not need to team to enter, if you are in a team, your whole team will zone into the same instance as you. When you get inside, you should update almost immediately to: Examine the Interior.
⇑
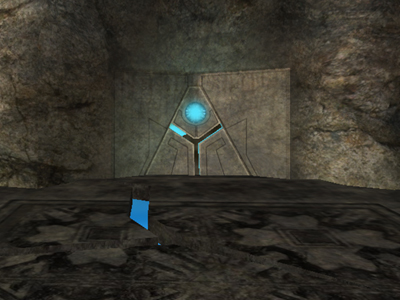
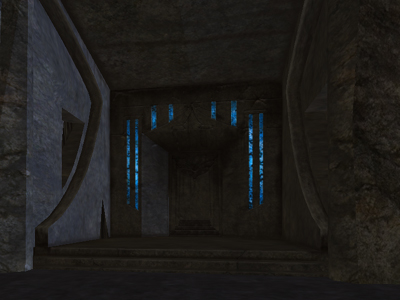
Mission : Examine the Interior Now that you and/or your team are all inside, you need to locate the three chests and activate them.
You will notice that there are three hallways off the main entrance. These hallways are guarded by an alien Protector Jaax'Sinuh which you will have to defeat. After you defeat the Protectors, and in order to reach each chest you will need to defeat three alien Collectors at the top of each set of steps leading to where the chests sit.
Each chest is located in a sunken room. From the stairway above each room, you can see the chest in the misty basement floor below. You can jump down, or take the stairs on either side of the room to reach it.
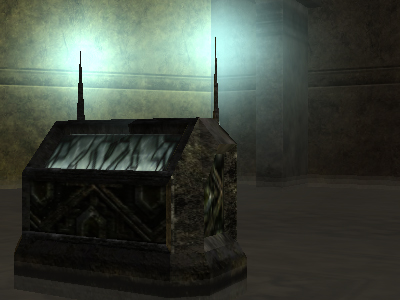
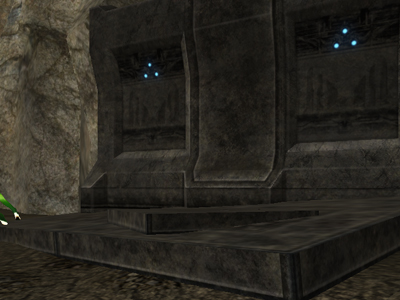
Mysterious Chest
Once at the chests, Right-click each chest to activate it. When you activate the chest it will trigger an alien spawn. The number of aliens that spawn is determined by the number of people in team, and the number of people who click the chest.
If it's just you soling in there, you will get one (though reports of getting six in a solo mission have been reported as well).
If you have a team, and each member of that team clicks the chest at roughly the same time, while you should get just 6 aliens, it has also been documented, and experienced to drop *36 aliens* on your head. Make sure if you are in a team, that one one persons clicks on the chests.
Defeat these aliens, and your mission should update each time. Take the steps back up to the main floor, head for the next hallway, and locate the other two chests in the other hallway basements. Rinse and repeat until all chests are activated and all aliens are killed.
- Note: AOU staff has personally experience the 36 alien drop when the chest was clicked by the entire team of 6. Needless to say, it was an insta-reclaim situation (death, It means dead. We died). This doesn't seem to have been reported in the past, so it may be a new glitch or "feature". It was very interesting to experience. With the entire team dying, we had to start the instance all over. To be safe, you my want to have just one person in the team click the chest and it will produce 6 alien mobs per chest.
⇑
Ole JacobWhile inside killing aliens, and activating chests, you may run into Ole Jacob in the ruin, where he will ask for help. He does not always appear, and you may actually go the entire instance without seeing Ole Jacob!
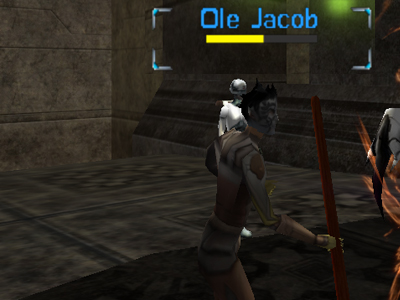
Ole Jacob.
In the past, he has been known to just attack you on sight! This was reported fixed and should not happen, as it is now supposed to be possible to speak with him, and learn more about his reason for being there. However, he still attacked an AOU team the was testing the Arid Rift instance in order to update this guide. So, maybe he's not as peaceful as hoped.
If he let's you chat, once your chat is done, he will see no reason to stay, and should leave. If he chooses violence instead, kill him and go on. Whether he shows his face, talks or attacks, this part of the quest should still updated fine for you.
⇑
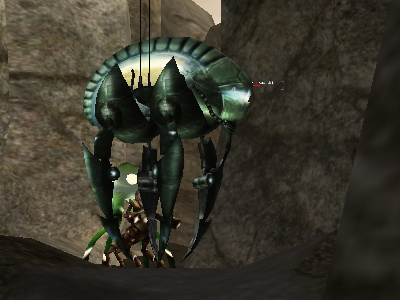
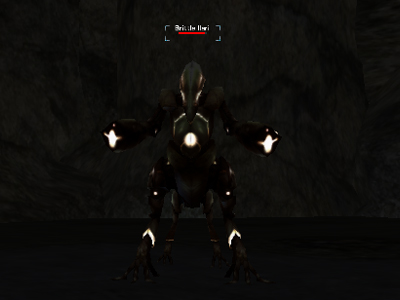
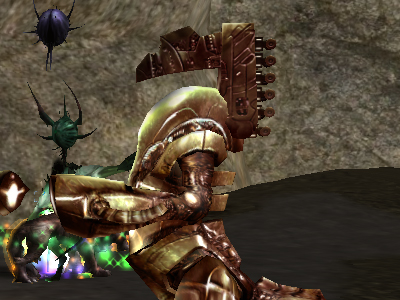
Curator - Rimah'UriOnce all the other aliens are dead, your end boss should spawn. The boss, Curator - Rimah'Uri is quite a big alien. He is UBT-able though, and perks and specials landed on him.
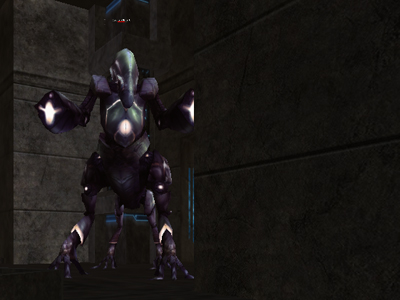
Curator - Rimah'Uri
Once he has been defeated, your mission should update and you can then leave the old ruins by Right-Clicking the portal on the floor where near you entered.
Portal
You will end up right outside the instance where you entered.
Return to Professor Parser. When you tell him you need to talk and to tell him about the ruin, he is irritated that you've bothered him. He thinks he needs to be telling you about something different... typical scientist!
⇑
Mission : Prove the ConnectionThe professor claims that alien collectors are transporting artifacts from the ancient ruins and wants you to investigate what kind of business they are running. Your next mission is to get your hands on three unique pieces of evidence from the alien collectors.
So, your next mission is to kill three Alien collectors to find three items. On each kill, a rune will appear in your inventory.
You should find a few Collectors at the location (listed under the image), ready and waiting for you!
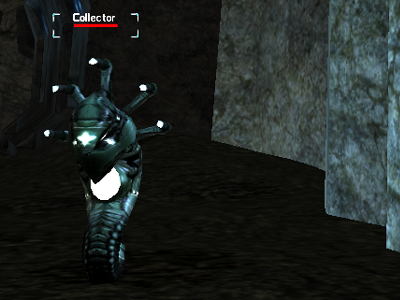
Collector
- 271x543
The items that should spawn in your inventory on each kill are:
Now you have the 3 items in your inventory, return to Professor Parser.
After telling him that killing them did the trick and trading them to him, Professor Parser claims that he could never have got so far without your help, and doesn't think twice about asking you for even more of your time! Once you agree he hands you a Kyr'Ozch Particle Scanner.
⇑
Mission : The Final ClueYour next mission is to scan four unique aliens in order to confirm his theory. No killing here! At least not at first!
You just need to use the Kyr'Ozch Particle Scanner on four different aliens in the zone. Again, target the alien and then right click the scanner in your inventory.
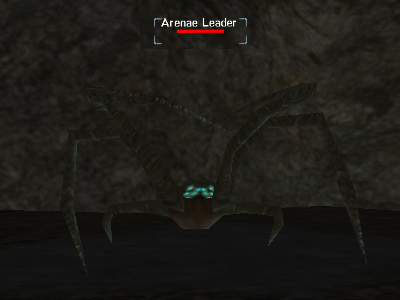
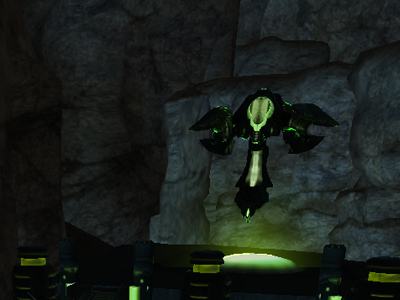
Arenae Leader :
- 353x734
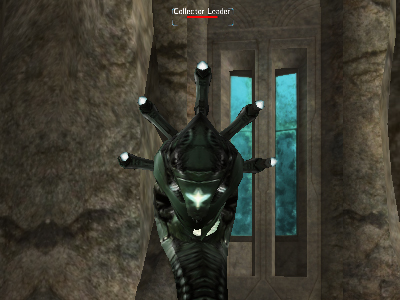
Collector Leader :
- 242x547
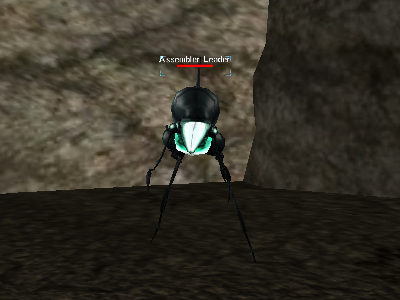
Assembler Leader :
- 409x397
Vicar Leader :
- 746x215
When you have tagged the Vicar, a larger mutated alien called Alien Supervisor will spawn. You need to kill it.
- Note: Our team had to wait for it to respawn as not everyone's tagging registered.
When he is dead, and everyone's mission updates, return to Professor Mogan Parser. Trade him back his scanner, tell him about the mutating Alien Supervisor.
He will take some time to talk about the ruin. The Professor will then, at last, give you some more information about The Xan.
When he comes to the end of his dialog, you can ask him if there is anything else to do here. He states that a woman has been driving him crazy and that if you can get her to sit still he would appreciate it.
⇑
Lindsay WristeYour first task is to find Lindsay. She wanders in the area near Professor Morgan Parser.
Arid Rift Start area
- 292x950

Lindsay Wriste
⇑
Mission : The AliensWhen you find her and speak with her, Lindsay will explain that her friend Charlie Moss has not been in contact. She is concerned about him and when you agree to help, she suggests you try to speak with Sheri Tater at the Canyon Camp.
⇑
Mission : Missing FriendLocation:
- 626x464
Following the waypoint on your map. You will know you have arrived at the right place when you see another guarded Security Fence up ahead. Like the fence at the start of Arid Rift, this is safe for you to enter and leave without risk of insta-death. Run toward and go through to he protect area housing our scientist's camp.
Security Gate.
Once you are safely in the camp, find Sheri Tater and open a chat. Tell her you are looking for Charlie.
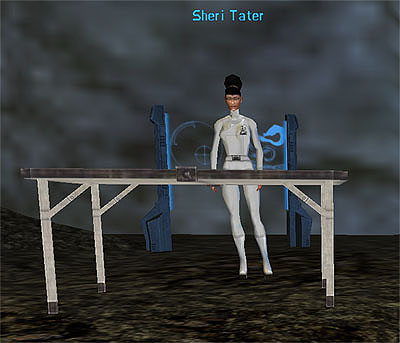
Sheri Tater.
Sheri remembers that Charlie is one of the volunteers that came here by shuttle from the Morning Star, however, she hasn't seen him. She suggests speaking with Dr. Hernandez
- 638x454
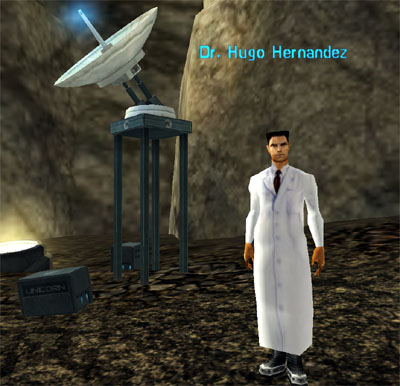
Dr. Hugo Hernandez
When you speak with Dr. Hernandez, you need to tell him you are looking for Charlie Moss. Unfortunately, he hasn't heard from him either. So, now we need to head back to Lindsay.
When you get back to Back to Lindsay, tell her that you talked to the researchers in the camp, but that they haven't seen any trace of Charlie.
Lindsay tells you that he had some issues when they were trying to buy their insurance. She still is very concerned. She suggests searching in the Central Gateway in order to find someone who could find out where he is.
⇑
Mission : Insurance PolicyLocation:
- 556.8x773.4
This has you headed back outside to the Unicorn Coordinator in the Central Gateway. Yes, the same Unicorn Coordinator you met and spoke with to start Arid Rift.
While he's no more happy to see you this time around, fortunately, he can be *cough* bribed with 500k to help with the information needed. If you don't want to bribe him with credits, you can also threaten him that the media will be told.
Unicorn Coordinator
When you have all the information the Coordinator can give you, your mission should update so you can return to Lindsay.
⇑
Mission : Talk to Lindsay WristeLindsay listen to what you've learned but is still worried about Charlie, so you now offer to go out into the field to look for him.
⇑
Mission : Find the Lost FriendLocation:
- 315x386
The waypoint LIndsay gives is an approximate area, the exact place you are headed is above. Once you get to this way point, you find Charlie has died. Target the body, and your mission will update. You should then have Charlies notebook in your inventory.
⇑
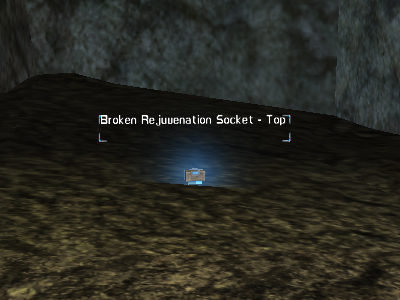
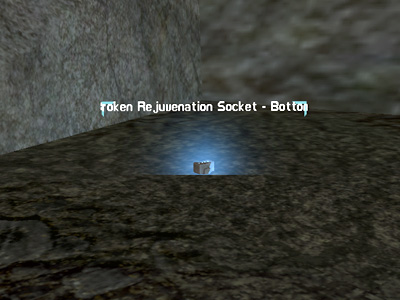
Mission : Return the notebookWhen you are back with Lindsay, open a chat and trade her the notebook.
She has a quick read, and notices Charlie has written something about a rejuvenation socket. Lindsay asks for you to check out the information Charlie has written about, and that if we find it, to go back and tell the researchers at the camp.
- 626x464
⇑
Mission : Alien TechnologyFor this mission, we actually have 2 missions in our window, both with uploadable waypoints. (R-click and select upload to map).
Location 1:
- 457x418
Location 2:
- 347x397
When you have found both, you should find the following items in your inventory:
Your mission should also update.
⇑
Mission : Contact Dr. HernandezTell Dr. Hernandez that you have some information that might interest him. Open the trade window and give him the Notebook and the Broken Rejuvenation Socket parts - Top and Bottom.
After a bit of chatting and reading Charlies Notebook, the Doctor asks for you to search the canyon for a specific alien. HE gibes you a stack of 10 Cage: Data Extractor. You should use the data extraction cage on ten Ensign-Iian to get sufficient data. If you have a team, each team member will need to cage their own ten Ensign - Iian aliens.
⇑
Mission : Setting the trapThe Ensign - Iian aliens are relatively easy to find, a few spawn right near the camp where the doctor is, but the majority of them can be found in the area of Alien Plants.
- 339x637
Once you find one, target and right click the Cage: Data Extractor in your inventory. This can only be performed once per alien. (You and your team mates can not cage the same alien). Caging the aliens will kill them after a few seconds.
- Note: It also works on other aliens other than Ensign - Iian. If you run out of cages, head back and talk to Dr. Hernandez. He will give you 10 more cages each time you ask him for more.
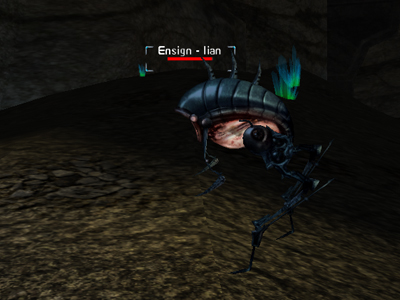
Ensign - Iian
When you have caged ten, andgained enough data, your mission will update. You then need to head back to the Doctor.
Tell him that you managed to gather data from all 10 and he will then suggest that you talk to his assistant, Stockton Bass for clarification on the situation he appears to be in.
⇑
Mission : The Abductee- Stockton Bass - 634x480
The Doctors assistant, Stockton Bass is located very near to the Doctor on a rock sitting down.
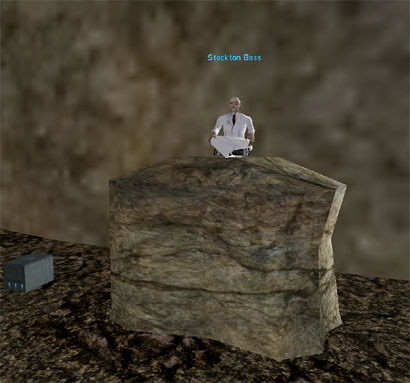
Stockton Bass.
After showing you believe in him, Stockton is quite happy for you to conduct some research of your own into his situation. He gives you his Biochemistry Sampling Tool and your mission tab should update.
⇑
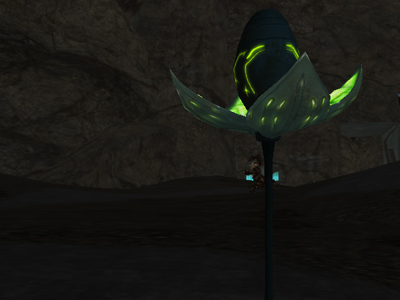
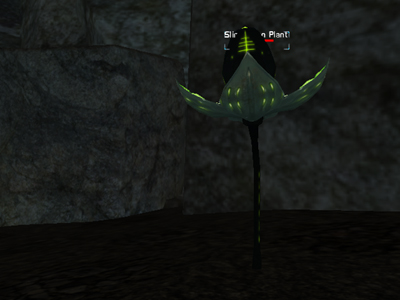
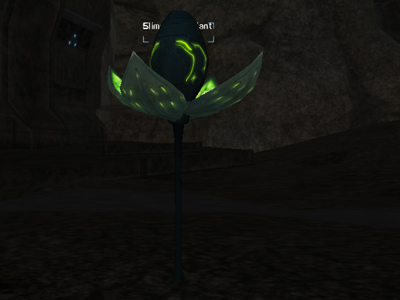
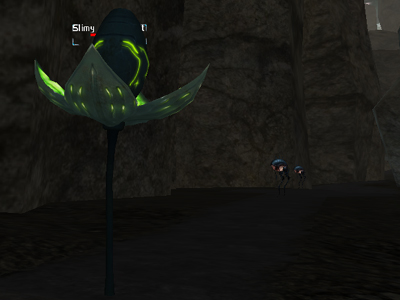
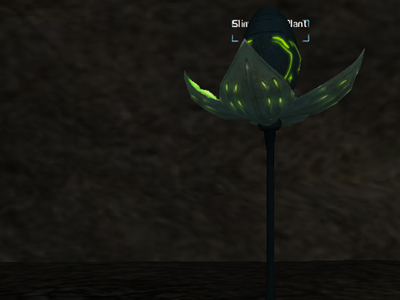
Mission : Provoke the AbductionYou need to look at a specimen of plant just north of the research camp. There are 5 plants to tag in this mission, so time for some running about.
When you find the plant, target and left click the Biochemistry Sampling Tool onto the plant.
The name of the five plants we are looking for is "Slimy Alien Plant."
Location 1:
- 339x637
Location 2:
- 502x540
Location 3:
- 429x653
Location 4:
- 511x723
Location 5:
- 567x646
It is now time to head back to Stockton Bass and tell him what we found out. Maybe he can shed more light on the situation for us.
⇑
Mission : Talk to Stockton BassOn returning to Stockton Bass, talk with him and return to him his Biochemistry Sampling Tool. After a little while of chatting, he sends you off to check out an Alien Envoy which is apparently located near to the plants we have just scanned.
⇑
Mission : DiplomacyLocation:
- 642x637
The Alien Envoy can be found where the mission marker shows on your map.
Alien Envoy.
You will notice that the Alien Envoy has a blue name, so he is an interactive NPC. Talk to it, or at least try to. It will start attacking you after a short while. So, hit it back.
When it is dead your mission will update.
⇑
Mission : Return to StocktonWhen you tell him that you had to kill the alien, he wont be best pleased. Infact, he wont really want to talk to you anymore.
Nevertheless this updates the mission.
⇑
Mission : Talk to HernandezRelay to Dr. Hernandez the discussion you had with Stockton. Also tell him about the tests you carried out. After a chat with the Doctor, he suggests you go to speak with Sheri Tater again.
⇑
Misison : Talk to Sheri TaterSheri talks with you about the tower structures that are keeping sheilds up and running. Specifically, regarding three methods that can be used to disable them.
- Spot jamming focuses on one single frequency, radiating intrusive signals to block the towers.
- Sweep jamming shifts the frequency repeatedly, allowing the jammer to block a wide range of frequencies in quick succession/session.
- Barrage jamming is similar to the previous kind, but with the ability to jam multiple frequencies at the same time instead of shifting things. This is apparently not as powerful.
Sheri expects you will be able to take care of assembling some components in order to make the above jamming devices she mentions to you.
⇑
Mission : In a JamFor this mission, Sheri has given you 3 Modular terminals. Also, hopefully while you were out and about killing aliens you might have managed to get your hands on the Kyr'Ozch Transceiver and Algorithm's we need to combine them with. If you didnt pick any up.. time to go hunting. The best drops for these items are on the "Assembler" aliens.
What you need:
3 x Modular Terminal (From Sheri)
3 x Kyr'Ozch Transceiver (Found on corpses in Arid Rift)
1 x Algorithm: Pseudo-Random Generator
1 x Algorithm: Intelligent Multi-Repeater
1 x Algorithm: Optimized Sensor
Step 1: Combine the Modular Terminals each with 1 Transceiver.
Repeat for all three.
Step 2: Combine each Basic Jammer with an Algorithm.
Now you have all 3 assembled, you need to speak again with Sheri.
Tell her you built all 3 jammers, she will talk to you and then ask that you help to interrupt the ship that is being tracked until the Unicorn forces arrive. She hands you a Unicorn Edition: Laser Tagging Device.
Time *gulp* not to die...hopefully.
- Note: Not everyone in team has to complete In a Jam section to get credit for killing the Drop Ship, and all THREE "Return to Tater" missions. However, on returning to Sheri, be sure you pay attention to how you answer her. If you choose the wrong answer, you will have to go through the mission In a Jam again, and then have to re-kill the Drop Shop.
⇑
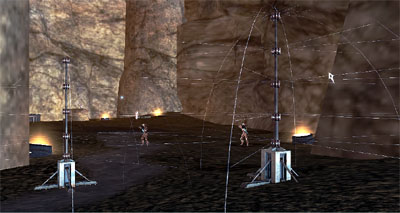
Mission : The CorruptionLocation:
- 341x247
Your mission is to damage the alien ship enough for the backup Unicorn forces to do their thing, stopping the aliens' plan from being executed.
To temporarily disable the towers from refreshing the ships defensive shield, use the three jamming devices. If you are teamed, only 1 person has to use the jammers on the towers, in addition only 1 person ought to use the Unicorn Edition: Laser Tagging Device that Sheri gave you.
The Alien Ship, landing pad and towers.
So, first things first. Decide who is going to be jamming and who will be activating the device.
Then, all of the team can go up to get the attention of the drop ship, apart from whoever is using the jamming devices. Once all the jamming devices have been used on the towers (by selecting the tower and r-clicking the appropriate jammer on it) the drop ship will take damage.
As soon as it is below 50%, one person can use their Unicorn Edition: Laser Tagging Device which will activate an Orbital strike on it.
When it goes down, you will receive an item : Strange Piece of Alien Technology. Time to return back to Sheri again.
⇑
Mission : Where to go from hereSheri could apparently see the orbital strike from where she was stood in the reseach camp! You need to tell her that you found a strange alien object and trade it with her.
Sheri finds a mechanism on the device.. and manages to release some viral-bots that stream straight into your NCU. She is immediately concerned and tells you to seek out Commander Labbe in the Central Gateway.
Interpretation Program is now running in your NCU.
⇑
Mission : ConsultationLocation: Central Gateway
- 556x590
Labbe is located at the top of the large structure in the centre of the large ravine within the Xan Hub.
Unicorn Commander Labbe
You need to tell him that Sheri told you to go and find him, although you arent likely to hear much of what he is saying... because suddenly you can feel the unmistakable sensation of Time and Space bending.
⇑
Mission - From WithinLocation: Xan Hub Tower Room 2 - Kyr'Ozch Envoy
You were suddenly warped mid conversation with Labbe. Within the room, you need to speak with the Kyr'Ozch Envoy.
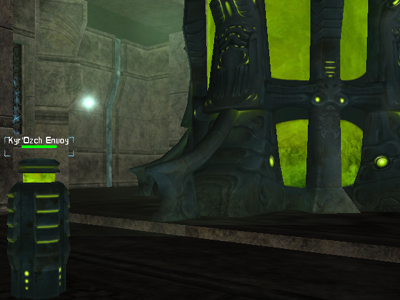
Kyr'Ozch Envoy
After speaking with the Kyr'Ozch Envoy, a few things will start to fit together. On asking the Kyr'Ozch Envoy how to get out of here, it will reward you for your help with an item:
This is also obtainable in The Xan - 12Man encounter.
(Right click until it changes to one suitable for your profession)
For shades he will reward you with:
This is also obtainable in The Xan - 12Man encounter.
And
This is also obtainable in The Xan - 12Man encounter.
The Kyr'Ozch Envoy will then tell that when you are ready we will let you out the same way you came.
He will then ask if you are ready to go? Once you answer yes, it will teleport you, and you find yourself back outside with Unicorn Commander Labbe.
You should also have a new mission in your tab : The Alien Threat - Mitaar Hero.
And this is the end of main Arid Rift questline! Congratulations!
⇑
So, What is Left?⇑
Supplemental Mission #3 - Lindsay WristeTalk to Unicorn Demolitionist Hock - supplemental mission
- Following completion of the main questline for Arid Rift, you can pick up a Supplemental Mission from Lindsay Wriste
Arid Rift Start Area
. - 292x950
She has a short and sweet job for you inside Arid Rift, Talk to Unicorn Demolitionist Hock involving something she saw and can't explain. Hock will send you for further exploring It does seem to be available after completing Arid Rift.
To check this quest line out, click "Reveal" below.
[Reveal] Talk to Unicorn Demolitionist Hock Walkthrough
This is a pretty short quest inside Arid Rift!
Lindsay Wriste Location:
Arid Rift Start Area
- 292x950
Lindsay Wriste.
When you speak with Lindsay, she explains that she saw something. That yesterday, the canyon south east of where she is usually wandering was emitting strange lights. You have the option to help her, which is something we always enjoy doing... do we not!
Lindsay suggests that you talk to Unicorn Demolitionist Hock.
Mission : Talk to Unicorn Demolitionist Hock
Location:
- 710x592
Speak to Hock and report to him about the pulsating lights emitting from the nearby canyon, and your suspicion about unknown alien technology.
Unicorn Demolitionist Hock.
Hock tells you to search for them where you saw the lights and to break apart their squadron by killing the leader.
Mission : Kill Cloaked Leader
Location:
- 768x526
When you get to the waypoint, you will need to "search" the area just south of it for the Cloaked Squadron Leader. It will not come out of concealment like the Cloaked Scouts do when you attack the other mobs in the area.
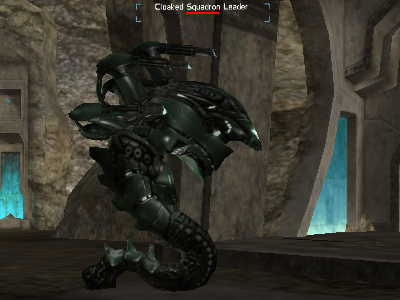
Cloaked Squadron Leader.
You do not appear to need much perception to be able to search for him. When he is out of concealment, he wanders around the area. When he is dead, your mission will update.
Mission : Return to Lindsay Wriste
Tell Lindsay that you managed to find the cloaked aliens and kill their leader. She was pleased to hear you completed your task.
Your reward for completing this mission is credits and SK.
⇑
Supplemental Mission #4 - Sheri TaterExtraction - supplemental mission
Following completion of the main questline for Arid Rift, you can pick up another Supplemental Mission from Sheri Tater Deep in Central Arid Rift
- 622x462
She has another short and sweet job for you inside Arid Rift, Extraction. After talking to her a bit, she will tell you about her team and one that she is worried about. This mission involves some more violence on your part!
To check this quest line out, click "Reveal" below.
[Reveal] Extraction Walkthrough
Following completion the main questline for Arid Rift, you can pick up an unconnected quest from Sheri Tater.
Sheri Tater
Location:
- 622x462
Sheri Tater.
You are able to ask Sheri some questions when you meet back up with her, she will tell you about who she is, her team... and the entomologist on their team, Aime Jet.
Apparently, Aime hasn't been seen since she and Sheri had an argument. Aime went out into the field on her own, and now Sheri is worried. This makes you concerned too (you are concerned aren't you?), so you can offer to go look for her.
Mission : Extraction
Location:
- 641x750
As Aime Jet hasn't been seen for some time our mission is to find her and escort her back. If multiple people in your team have this quest and speak with Aime, you will get multiples of 2 Protectors spawn for each person who speaks with her. This makes things a little challenging.
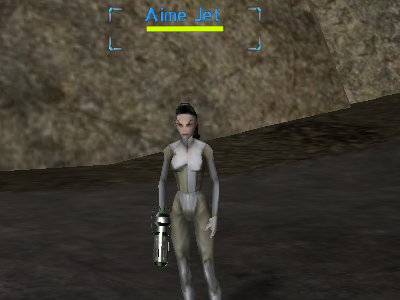
Aime Jet.
At the end of her dialog with you, Protector - Jaax'Sinuh will spawn as well as Aime herself attacking you. On killing Aime you will receive the Last Entry of Aime's Journal.
Protector - Jaax'Sinuh.
Mission : Return to Sheri with the Journal
On your return to Sheri, have a chat with her. Sheri will ask why Aime didn't return with you. Explain about the aliens, and then tell her you have the journal. Trade it with her and Sheri will ask if you had read the journal, if you did, you will understand why she wants you to now leave her be.
Reward : Credits and SK.
However... even though Sheri said she wants to be alone, you can pick up a mission from her to find Steven Rogne.
Mission : Locate The Running Man
Location: Area looping around from
- 420x700
Steven Rogne
You have to stop Steven from his running around to speak with him (Just open dialog with him to do this). Tell him that Sheri sent you to talk to him and to get a report. Steven will give you a dictation device which contains all his conclusions.
Item received : Dictation Device
Return to Sheri, speak with her and trade her the device.
Reward : Credits and SK.
Hopefully, you've enjoyed all the SK, Axp and exploring the new areas! We'll see you for the rest of LoX and all it has to offer.
Last updated on 06.06.2025 by Cariadast
Arid Rift revamped by Cariadast
Transmographic Dimension Shifter Ty to Aunce (RK19), Researched/updated/reformated by Cariadast, Last updated (2021) by Bitnykk and Researched and written by Afreng
Thank you to Acorn (RK19) for the run through helping test Arid Rift
Arid Rift originally Written by Ukblizzard
Information and research provided by the AOU team.
Special thanks to members of Omni-Pol RK1, who joined in the research -- especially Tarels, Scenegg, Tethien, Feyad and Thegenerator.
Thanks also to Ophiuchus, Bramage and Tinkerz for accompanying us on "The Corruption" mission.
Thank you to Deadlykis for coords for the Ostracon and additional information about Ol' Jacob
Labbe supplemental mission: Written by Ukblizzard and Uragon.
Labbe Supplemental Mission: corrections to when it can be pulled: Apero
Labbe Supplemental Mission: Level req: Saavick and Cariadast
Lindsay Wriste Supplemental Mission Written by Ukblizzard and Uragon.
Sheri Tater Supplemental Mission: Updated by Cariadast
Sheri Tater Supplemental Mission: Updated by Llie
Sheri Tater Supplemental Mission: Written by Ukblizzard
Sheri Tater Supplemental Mission: Researched by Ukblizzard, Uragon and SceneGG.
Do you have questions about this article or found an error? 6 comment(s) - Click here to view them!
