Dust Brigade / Peacekeeper Constad
Table of Contents [+]
- Peacekeeper Constad
- Priest Fontain
- Priest Atalas
- David Meyers and Jon Solare
- Relay Tower
- Peacekeeper Constad
- Since you will be reporting back to Peacekeeper Constad on a more regular basis from now on, you can repull quests with new timers from him. Always verify you have the next mission; sometimes you need to initiate chat with Constad again to get it.
- Checkpoints Relays
- Recon: Training Grounds
- Sean Powell
- Ground Chief Aune
- Dust Brigade Drone - Omega
- Deus Ex Machina
- Locating the Threat
- Peacekeeper Coursey
- Priest Fontain
- Peacekeeper Coursey
Class: All Classes
Faction: All Factions
Level: 205-220
Item Links:
Quicklink (copy this):
Feedback: Feedback-Thread
While some people might be able to solo a couple of the encounters, the various parts of this quest have short timers, so on the whole team damage is needed. Even so, a team could also find themselves running out of time if something goes wrong. Fortunately, in that case you can re-pull the quest.Faction: All Factions
Level: 205-220
Item Links:
Quicklink (copy this):
Feedback: Feedback-Thread
⇑
Peacekeeper ConstadLocation:
ICC HQ, Andromeda
Andromeda - 3260x920
You start the quest with Peacekeeper Constad. He is leading an investigation on new Dust Brigade activities. His first mission for you is to contact Priest Fontain in the City of Home, Broken Shores.
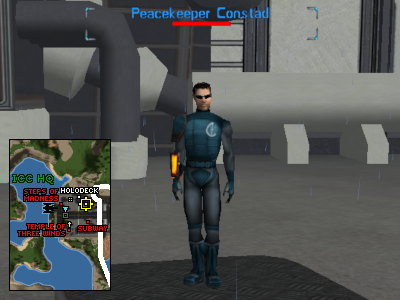
Peacekeeper Constad
⇑
Priest FontainLocation:
City of Home, Broken Shores
Broken Shores - 620x1500
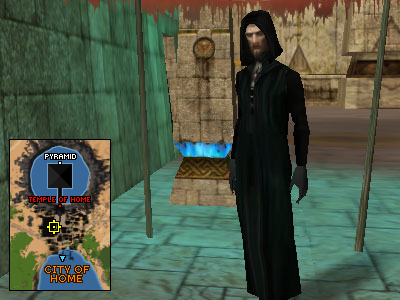
Priest Fontain
Priest Fontain will give you 1 hour to cure his colleague, Priest Atalas. This is the only part in the whole quest line where you don't get a mission marker on your map. Well, not so much cure as kill, since his friends are waiting at reclaim and will take things over from there. Atalas can't be pulled, warps players to his location and has a long aggro range. Gather and buff up at a safe distance from him.
⇑
Priest AtalasLocation:
The Dead Maze, Broken Shores
Broken Shores - 459x4055
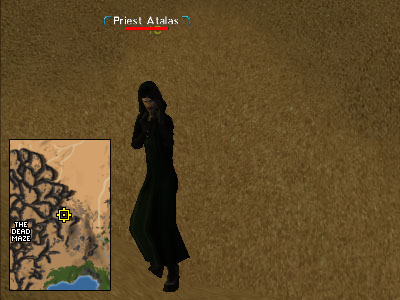
Priest Atalas
Once you kill Priest Atalas, return to Fontain. He will be ready to help you with further investigations into Dust Brigade activity. He only knows about two outside helpers and their locations. Your next task is to head to their locations and have a chat with them.
⇑
David Meyers and Jon SolareLocation:
The Sea of Home, Broken Shores
Broken Shores - 1193x730
The smaller guy, David Meyers, is a side-kick and he will just tell you to talk to Jon Solare.
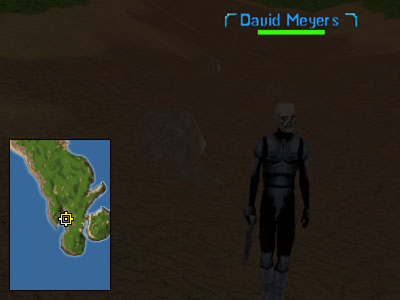
David Meyers
Jon is a bit tougher than David, so don't bother being nice. He only speaks two languages, money and violence.
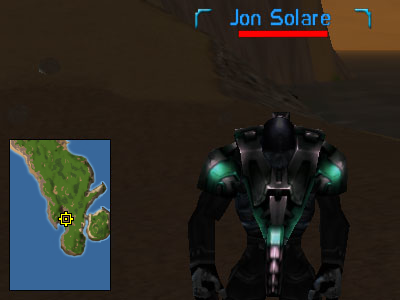
Jon Solare
Jon Solare will ask for 80 million credits, and while that amount might not be much for some players, he will get nervous about spilling out the secrets and will eventually attack you anyway. So, the better way is to simply insult him and attack him right away. At this point, it should be enough for just one team member to do the talking, but in case things go wrong, the whole team could start chatting with him.
With Jon Solare dead, Meyers is more willing to cooperate, so make sure you have a chat with him at this point, now. He'll give you coordinates to a Dust Brigade Tower which might hold more information (and a 30 minute timer).
⇑
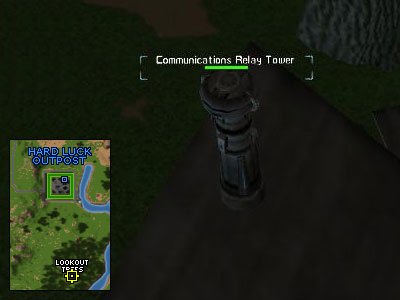
Relay TowerLocation:
Steep Shores, Broken Shores
Broken Shores - 709x476
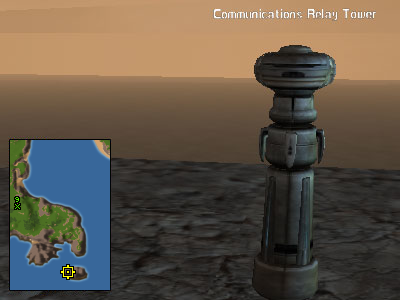
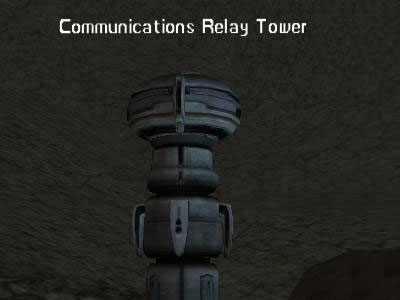
Communications Relay Tower
Once here each member of the team will need to talk to the Communication Relay Tower, so make sure all members of the team needing this mission are present. **Do not talk to the tower until everyone is at the correct site and prepared to do battle.** The Communication Relay Tower will not attack until you interact with it, so everyone is safe until someone does. But, be ready when you do!
The easiest way to extract the information you need from the mechanical contraption should be to open a chat with it and have it hand you what you need all friendly-like. After all, just using a soft touch and correct procedure, which includes providing it with the set of Security codes, should work and allow you to move on, right?
No, of course not.
Unfortunately, Meyers forgot to provide you with those security codes. So, the moment you open a chat and try to give the relay tower the code, it will engage in combat as soon as the first person enters the wrong codes. At this point, the only choice you have is to start whacking at it with anything and everything you can lay your hands on. You can technically still chat with the tower to update the mission, but it's a lot more painful.
**Be absolutely sure everyone in team with the mission speaks to the tower as quickly as possible. All must open a chat, and in the first option, pick a code. It's okay if it's wrong. The relay tower is going to attack you anyway. Not doing this can cause the mission to fail for one or all team members
The tower has two special modes to defend itself besides regular shooting of intruders. It spawns Dust Brigade Security Drone (if healers can keep the team alive, you can ignore it) and also uses AoE nukes (watch out for shouted vicinity countdown).
When you see the count down in vicinity, back up until you are out of range. Be careful not to fall off the sides of the hill and into the ocean. However, if there are pets in team, let them whack away at the relay tower. The Security Drones do NOT attack pets.
So, if you are a team full of pets, set them on the Relay Tower, back up to safety down the hill, east of the tower. If you only have a minimal amount of pets, attack with your weapon(s) but watch the timer in vicinity. When it starts to countdown, back up and let the pets keep pounding the tower, until the countdown is done!
- Note:
- If you have no pets and/or your team struggles to destroy this tower and finds that each attempt is leading to being sent to reclaim, it has been suggested that using a mech could be a viable, yet potentially slower option.
- A minimum of four players is recommended for this method to work.
- You can not speak to the tower if you are already in a Mech. If you need to speak to it for the quest, you will have to chat first, then mech up. Make sure a tank or other team member takes that agg while you mech!
- Be careful not to fall off the side of the island hill. The instant you hit the water in a Mech it will de-Mech you, and you will not be able to Mech up again while you or your team is in combat.
Once you have destroyed the tower, Encrypted Data Chips will spawn in your inventory and you're ready to return to Peacekeeper Constad.
- Note:
If you find yourself with 5, 8, ...orrrr say 24 Drones, attacking you, and you're taking heavy damage *cough* ...stop attacking, and make your way to the island north of the Relay Tower. Walk past the boats, toward the mobs there, slightly up the grassy hill, and you will lose their agg, (if you can Yalm up you've broken agg).
Return and stay out of their range. The drones will de-spawn within 15-20 minutes of each one's initial spawn. Once they start de-spawning, it goes quickly. You can reengage the Relay Tower without having to talk to it again, as soon as the last Drone is gone.
⇑
Peacekeeper ConstadOnce you return to Peacekeeper Constad he will reward you with a:

Professional Nanodeck
Your Nanodeck, will already be tuned to your profession. You'll need to have it equipped to use every nano reward from this questline.
Peacekeeper Constad has a new task for you. With increased Dust Brigade activity in Mort, he sends you there to patrol five Checkpoint hotspots.
Note:
⇑
Since you will be reporting back to Peacekeeper Constad on a more regular basis from now on, you can repull quests with new timers from him. Always verify you have the next mission; sometimes you need to initiate chat with Constad again to get it. ⇑
Checkpoints RelaysNow it's time to deal with the desert! All of the checkpoints are located in the desert sands of Mort! Take a bottle of water and stay hydrated! You'll need your energy for this!
Once you locate each Checkpoint Relay, open chat with it to update your progress (only one person can chat with the Relay at a time).
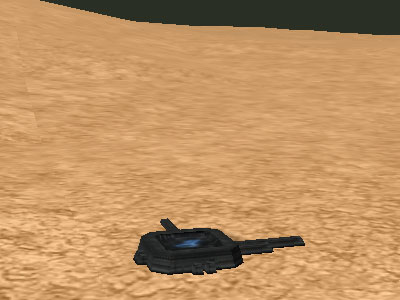
Checkpoint Relay
The second, fourth, and fifth checkpoints hold surprises. After the first team member opens a chat with a Relay, a Dust Brigade Flame Drone will spawn and start to attack. Be aware that these checkpoints will attack fast and hard once you open a chat. Have your team ready or you might find yourself in reclaim before you realize what is happening!
Note: It has been stated and experienced by players and staff that checkpoints 4 and 5 may also be a bit eviler than originally thought. They have been witnessed ignoring attempted taunts/mongo in favor of warping and rooting the person that opens the dialog. Also, it has been mentioned it seemingly resets aggro. Some box players have reported not having control when trying to defeat these particular checkpoints as well.
As these are all marked on your map, finding them should be easy. However, we have also included the waypoints if you are trying to help someone else to do their quest. They are also marked on Saavick's Map of Rubi-Ka.
- Checkpoint Relay OneMort - 1979x390
- Checkpoint Relay TwoMort - 2291x855
- Checkpoint Relay ThreeMort - 2206x1672
- Checkpoint Relay FourMort - 2263x2469
- Checkpoint Relay FiveMort - 2676x3104
Once killed, the entire team will get the update from each checkpoint as long as all are present in the zone when it's killed, so the rest of the team doesn't have to chat with every Checkpoint Relay.
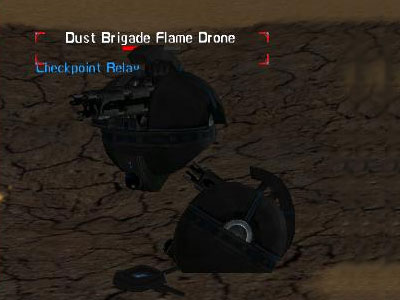
Dust Brigade Flame Drone
The last checkpoint location is defended a bit more heavily. First a powerful Dust Brigade Drone - Gamma will spawn and when you defeat it, you will get your first glance of what you're really up against. Ground Chief Aune will appear and issue you a warning in vicinity. Don't worry, he won't attack you... yet.
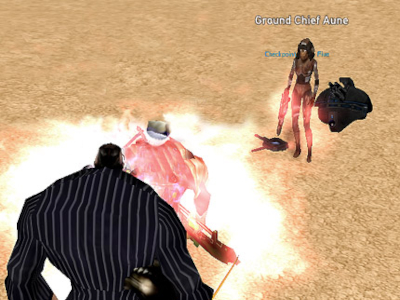
Checkpoint 5 Ground Chief Aune
With all these findings, you'd better report back to Constad.
While you can bet all your belongings that Constad will have another mission already lined up for you, he'll also present you with your first Nano Crystal reward:
| Profession | Reward |
| Adventurer | Nano Crystal (Improved Seed Life) |
| Agent | Nano Crystal (True Profession) |
| Bureaucrat | Nano Crystal (Motivational Speech: Improved Heroic Measures) |
| Doctor | Nano Crystal (Improved Team Health Plan) |
| Enforcer | Nano Crystal (Improved Essence of Behemoth) |
| Engineer | Nano Crystal (Empowered Pre-Nullity Cocoon) |
| Fixer | Nano Crystal (Luck's Improved Capricious Consequence) |
| Keeper | Nano Crystal (Improved Enervate Imprisonment) |
| Martial Artist | Nano Crystal (Anvil Fists) |
| Meta Physicist | Nano Crystal (Creation: Shield of Zset) |
| Nano Technician | Nano Crystal (Superior Fleeting Immunity) |
| Shade | Nano Crystal (Improved Puncture of the Tarasque) |
| Soldier | Nano Crystal (Improved Soldier Clip Junkie) |
| Trader | Nano Crystal (Divest Damage) |
⇑
Recon: Training GroundsYour next task will be in Eastern Fouls Plain's
Secluded Camp
. Eastern Fouls Plain - 1359x569
These next tasks are reconnaissance based, so you don't have to kill anything. All you have to do is target 3 different terminals (Data Encryption, Primary and Secondary Terminal).
 | 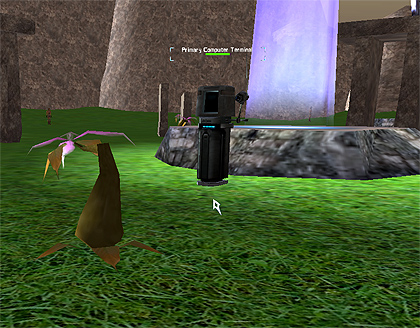 | 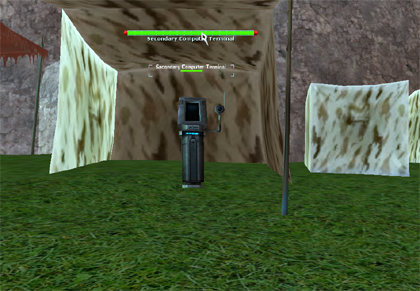 |
| Data Encryption Terminal | Primary Terminal | Secondary Terminal |
These are located inside a secluded camp guarded by Dust Brigade mobs. So, assuming you are NOT going to be training anyone inside the camp you can simply run in, tab like crazy, and manage to complete this mission.
Once you have managed to target them all, return to Constad.
On your return, Constad will give you a new mission.
This time he wants you to eliminate all 4 Drill Sergeants (Nortin, Weston, Estare, Sotoh) as well as hack into the Primary Computer terminal with a ICC-Modified Hacking Tool within the next 2 hours.
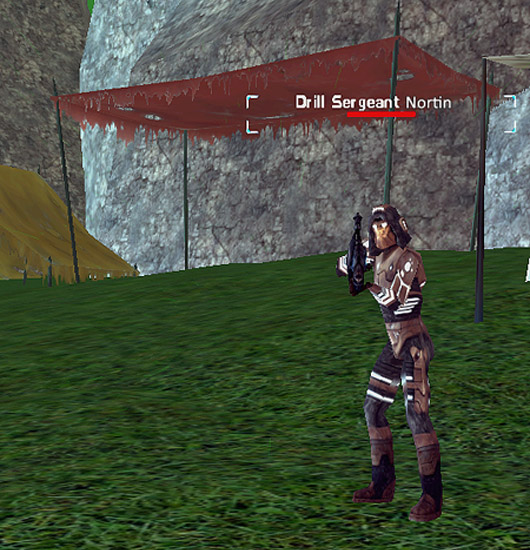 | 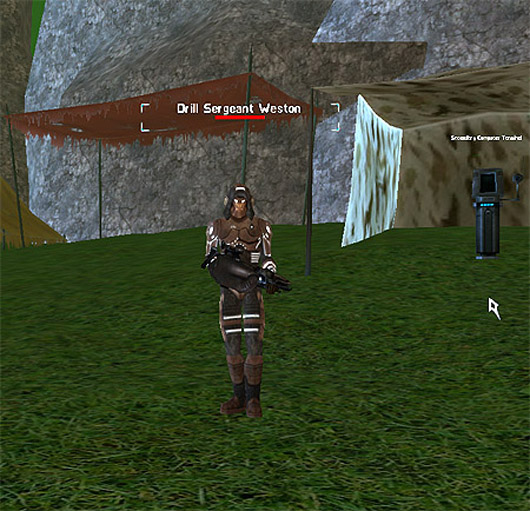 | 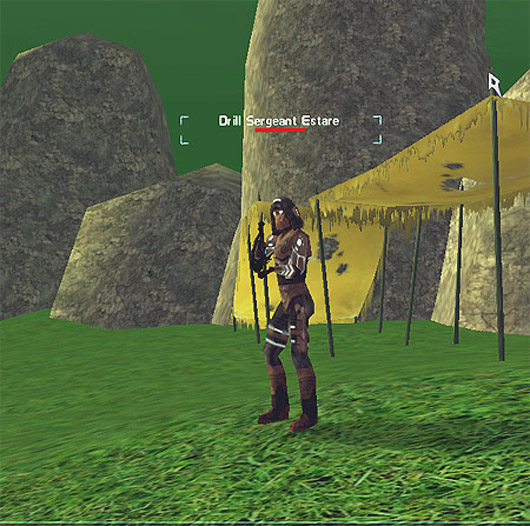 | 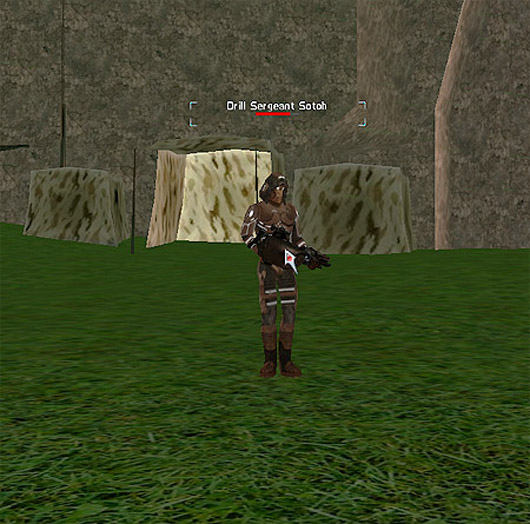 |
| Nortin | Weston | Estare | Sotoh |
The easiest way to deal with this task might seem to be to run clockwise along the inner walls of the camp and pull each Drill Sergeant separately. However, these are very social Dust Brigades and all of them will come running to defend each other! Either have a good calmer with you or just kill everything as you go!
Once they are all killed, you can safely go to the center, open the Primary Terminal's interface and trade the ICC-Modified Hacking Tool. At this point, the interface will start its countdown.
Fear not, instead of nuking you at the end of the countdown, you will receive Hacked Data Chips to bring back to Constad. He will have a new Nano Crystal ready for you:
| Profession | Reward |
| Adventurer | Nano Crystal (Poisonous bite) |
| Agent | Nano Crystal (Improved Dead Cold) |
| Bureaucrat | Nano Crystal (Pink Slip) |
| Doctor | Nano Crystal (Bone Eater) |
| Enforcer | Nano Crystal (Superior Fortify) |
| Engineer | Nano Crystal (Engineer Composite Specialist Tradeskills (8 hours)) |
| Fixer | Nano Crystal (Improved Frenzy of Shells) |
| Keeper | Nano Crystal (Adaptive Ambient Renewal) |
| Martial Artist | Nano Crystal (Supreme Kyudo) |
| Meta Physicist | Nano Crystal (Odin's Other Eye) |
| Nano Technician | Nano Crystal (Forget Me!) |
| Shade | Nano Crystal (Shadow in the Night) |
| Soldier | Nano Crystal (Total Combat Survival) |
| Trader | Nano Crystal (Trader Composite Specialist Tradeskills (8 hours)) |
Some parts of the next mission are in Perpetual Wastelands and Southern Fouls Hills. Saving in Inferno and jumping down to Rub-Ka will save some time on flying/running, unless you have either a fixer in your team or own a tower site in those zones.
You should now have a new mission. This one starts off easy as well. You need to find and hack a series of communication relay towers using an ICC Modified Hacking Tool. You'll have 45 minutes for each of them. They are located in Lush Fields, Perpetual Wastelands, Mort, Southern Foul Hills, and Milky Way. The last two locations are a bit tough.
In Southern Fouls Hills, the communication relay tower is located on top of a Tree House. Dust Brigade Snipers are waiting for you. With some luck, you can approach it flying in a vehicle, and not draw their attention.
Communications Relay Tower
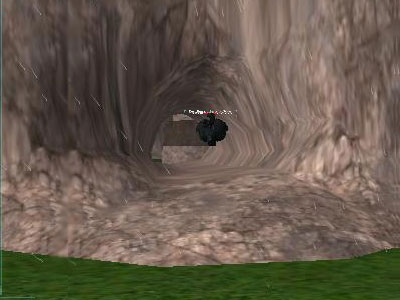
In Milky Way, the tower is located right at the end of a cave system.
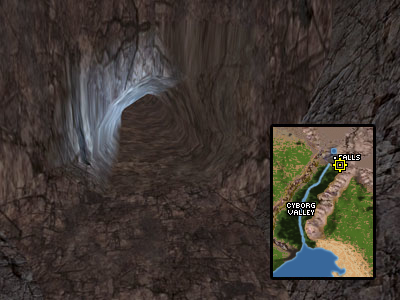
Entrance to the cave system
Deeper inside the caves, you'll encounter many Dust Brigade mobs looking for target practice. If you're already familiar with the area, you should have enough time to simply run to the tower, though unfortunately there's no way to check in advance if by doing this you won't train someone. Once you have hacked all 5 towers, return back to Peacekeeper Constad. He eagerly awaits your findings, and he will have a new reward for you:
| Profession | Reward |
| Adventurer | Nano Crystal (Improved Vengeance of Nature) |
| Agent | Nano Crystal (Ruse of Taren - Phase 4) |
| Bureaucrat | Nano Crystal (CEO Guardian) |
| Doctor | Nano Crystal (Superior Team Health Plan) |
| Enforcer | Nano Crystal (Mongo's Kraken) |
| Engineer | Nano Crystal (Improved Shield of the Obedient Servant) |
| Fixer | Nano Crystal (Superior Insurance Hack) |
| Keeper | Nano Crystal (Improved Guardian of Might) |
| Martial Artist | Nano Crystal (Unnoticed Strike) |
| Meta Physicist | Nano Crystal (Healthy Manifestation) |
| Nano Technician | Nano Crystal (Superior Nanobot Shelter) |
| Shade | Nano Crystal (Sneaking Health Drain) |
| Soldier | Nano Crystal (Improved Total Focus) |
| Trader | Nano Crystal (Improved Health Haggler) |
⇑
Sean PowellNow you're ready for your tough mission. You need to travel to Southern Fouls Hills
Secluded Base
and persuade Sean Powell, an ex Dusty, to return with you for ICC protection as well as for him to turn into a snitch. Since the Dust Brigade knows of his location and is already massing to kill him. (If required, remember you can always re-pull the mission if you fail). Southern Fouls Hills - 2597x2891
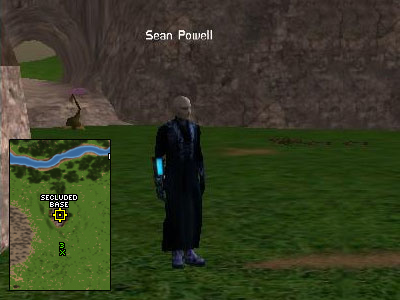
Sean Powell
Your objective is to keep Sean alive. With this being your main, and one of your last missions in this quest, you can be sure it's not going to be easy.
Sean is only able to talk to one person at a time. A mission holding member must chat with Sean, and the whole team should get ICC Identity Data Card as proof of your intention. *Don't worry if the whole team can't talk to him at this point. As long as one mission holder in your teams starts the chat, you'll get the completed mission at this point.
But also, when the first team member starts talking with him, Dust Brigade Security Drones will spawn at all entrances to prevent reinforcements or anyone's escape. Stay away from the entrances as they will attack you. Put pets on behind as they will try to attack the drones guarding the entrance/exits, and they will die. It doesn't hurt to have a spare pet in your inventory, if possible.
Dust Brigade Security Drone
Then, immediately after this, Dust Brigade Elite Commandos will start spawning in waves. After a couple of seconds, they'll start attacking. Some of them will be drawn to you and your team, but most of them will center in on Sean.
The easiest way to keep him alive during this part, where you're most likely to fail, and depending on the levels and number of people in the team needing the mission, is to have a decent Enfo and Doc. Or you can use 2 teams.
If you use two teams, one team which needs to be the kill team with those who have the mission, and a secondary team for supports is usually all you need. The second team needs to have a heavy-duty Enfo tank and a decent Doc. Some extra damage wouldn't hurt either, but you have to be sure to not out damage the kill team, or you'll have to do it all over again.
While the Enfo won't aggro Sean Powell, have the Enfo stand just far enough out of Sean Powell's range (which isn't but a few feet) and just keep mongoing each wave as the spawn. This way they don't even bother with Sean Powell. If needed and available, you can also calm incoming mobs but remember mongo will break the calms. So use this mostly if needed in an emergency or if for some reason you'd have no tank.
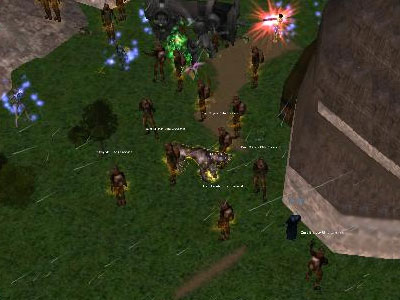
The Dust Brigade assault!
While you might seem overwhelmed at first, there's just a limited number of Dust Brigade Elite Commandos that spawn. There's even one special one among them that spawns Ground Chief Aune on his death.
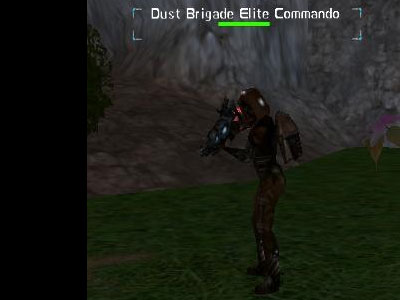
Dust Brigade Elite Commando
You can spot it by the fact it's the only one carrying a weapon. Try to kill the majority of the Commandos before taking this one out. You can either let the Enfo just tank it during the waves, or you can calm it outside Sean's aggro range and kill it last.
Note: If Sean Powell should die during this encounter, some have found deleting the current questline, "The Informant", usually allows you to speak to Peacekeeper Constad again and get another ICC Identity Data Card.
⇑
Ground Chief AuneOnce it's dead Ground Chief Aune will spawn a bit north of Sean. This means Sean will stop attacking (his heal regen will kick into overdrive) and as long as you have a decent tank and healer, you're over the worst part. Any remaining Dust Brigade Elite Commandos will still present some risk to Sean, but as long as an Enfo is casting Mongo, they will soon be forgetting Sean, and ready to be picked off by the support team. Ground Chief Aune has a lot of HP and can strike a blow. But with decent DD and a Doc is easily handled.
It's important to ensure the kill team with the mission does the most damage here, so the support team should back off the attack when Aune has 1/3 HP left.
Note: It has been reported and observed by AOU in some cases while trying to kill Aune that when she is at just 20% health remaining and starts talking that she puts up a 100% reflect. She does not despawn when she finishes talking and the only way to proceed with the questline is to break the reflect. In this post here, there is a suggestion to use Epsilon Purge. This does break the reflect when it lands. Another option is to use NT reflect piercing nukes (doubles/triples).
⇑
Dust Brigade Drone - OmegaOnce you kill her, a Dust Brigade Drone - Omega will spawn. This drone rivals Aune on the HP and damage level. It also has some tricks of its own, such as blinds. Don't panic. As long as you have a decent Tank you'll be alright. With some luck, and hard work you'll be able to take down this one as well.
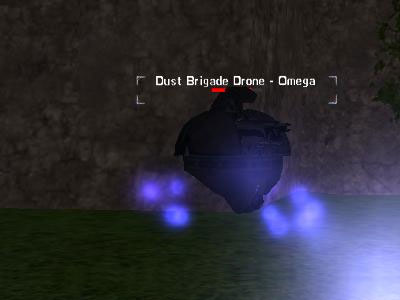
Dust Brigade Drone - Omega
It's important to ensure the kill team with the mission does the most damage here, so the support team should back off the attack when it has 1/3 HP left.
When the drone dies, all the remaining Elite Commands will also despawn, meaning you successfully kept Sean alive.
Now it's time to talk with Sean again.
Notes:
- If there's any other team present, they shouldn't talk to Sean until someone from your team has.
- If Sean doesn't want to talk to the original team, mech up, kill him, and wait for respawn.
- It has been noted by AOU that MP heal pets can heal Sean Powell
Sean only talks with one person at a time, but this time, but every team member should talk with him.[/b]
Nobody will be able to persuade him to return to Andromeda. However, he's ready to turn snitch, spilling out the info on Dust brigade activities to the best of his knowledge. Luck has it that he happens to have some Dust Brigade Security Codes. This is your fastest way to Inside the Machine, and the other Dust Brigade Instance entrances in Perpetual Wasteland, so keep it safe.
Since you have done your best in the given situation, you can only return to Constad with your last report. Even without Sean, he's thrilled about information you provide and in order to be prepared for the assault on the Dust Brigade encampment, when the ICC locates it, he rewards you with:
| Profession | Reward |
| Adventurer | Nano Crystal (Superior Seed Life) |
| Agent | Nano Crystal (Gnat's Wing) |
| Bureaucrat | Nano Crystal (Workplace Depression) |
| Doctor | Nano Crystal (Improved Complete Healing) |
| Enforcer | Nano Crystal (Mongo Demolish!) |
| Engineer | Nano Crystal (Improved Isochronal Sloughing Combat Field) |
| Fixer | Nano Crystal (Summon Shadowweb Spinner MK XI) |
| Keeper | Nano Crystal (Improved Vengeance of the Immaculate) |
| Martial Artist | Nano Crystal (Team Matrix of Ka) |
| Meta Physicist | Nano Crystal (Improved Instill With Malign Intent) |
| Nano Technician | Nano Crystal (Improved Dark Movement) |
| Shade | Nano Crystal (Improved Prowler) |
| Soldier | Nano Crystal (Augmented Mirror Shield MK V) |
| Trader | Nano Crystal (Improved Quantum Uncertainty) |
With all the information you have gathered, Constad has found another use for you. Try talking to him about the new machine that Aune and the rest of the Dust Brigade have constructed.
⇑
Deus Ex MachinaAfter Constad rewards you, you should continue speaking to him and he will ask you to completed the challenge of Deus Ex Machina before you can move on to the very last part of this quest.
You may skip this part if you wish, but there is a final mission in this questline which you will not be able to do if you choose to skip it.
Please see the remaining portion of the quest rewards below Locating the Threat and decide if the reward is worth continuing. If it is, please visit Deus Ex Machina to learn more about the DB2 instance and how to complete it.
⇑
Locating the ThreatNote: You must have completed the Dust Brigade Quest as well as the Deus Ex Machina quest before you can start this quest.
This is the final mission of the Dust Brigade Quest and it is short and easy.

Peacekeeper Constad
While it starts with you talking to Peacekeeper Constad, you'll find he is none too pleased and is busy with all the information you provided him with from before. So he will pawn you off and send you to a coworker of his, Peacekeeper Heather Coursey. She's a new arrival on Rubi-Ka and is currently checking out the sights in Newland.
⇑
Peacekeeper CourseyLocation:
Newland City
Newland City - 477x282
First off, you should identify yourself and provide Peacekeeper Coursey with information stored on the ICC Secure Datacard, provided to you by Constad.
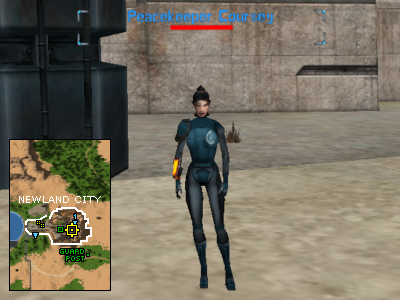
Peacekeeper Coursey
After speaking with her, you will need to head back to Peacekeeper Constad to update him on the hostile situation. He'll have some new information on Dust Brigade activity for you. As his attention is now occupied by Peacekeeper Coursey, you will be sent to meet an old contact in Broken Shores, Priest Fontain.
⇑
Priest FontainLocation:
City of Home, Broken Shores
Broken Shores - 620x1500
Priest Fontain will provide you with his view on the current situation.

Priest Fontain
NOTE: He will also hint that you might help a local Warden with some escaped Prisoners. As well as the standard Prisoner quest, you can now also pick up a quest linked with the Warden, the Prisoners, and Priest Fontain; Soulbound Questline. **this is a side quest and is not needed to move on in the Coursey quest.
That's a mission you can do later if you want. For now though, you should return to Peacekeeeper Constad, who will send you to Peacekeeper Coursey again. By now you should know better than to trust his word that she'll treat you like a human being.
⇑
Peacekeeper CourseyLocation:
Newland City
Newland City - 477x282
Coursey has a Zero-Point Transmission Relay Scoop and needs you to go and tag the Communications Relay Towers from the previous quest.
Communications Relay Tower
So your task is the same as before. It seems once wasn't enough for these Peacekeepers! You'll have 45 minutes for each of the Relay Towers. These are located in Lush Fields, Perpetual Wastelands, Mort, Southern Foul Hills, and Milky Way. The last two locations are a bit tougher.
Travel to the towers, open conversation with them, drop the Zero-Point Transmission Relay Scoop into the trade window that opens, make sure your mission has updated, and then go to the next location.
The locations are:
- Lush Fields: 445 x 3506Lush Fields - 445x3506
- Perpetual Wastelands: 2323 x 3422Perpetual Wastelands - 2323x3422
- Mort: 3630 x 3620Mort - 3630x3620
- Southern Fouls Hills: 1630 x 1660Southern Fouls Hills - 1630x1660
- Milky Way: 4310 x 2080Milky Way - 4310x2080
All the Communications Relay Towers are also marked on Saavick's Map of Rubi-Ka.
Once you have completed the tagging, return to Coursey. She will have bad news for you. The origin of the communications has been located deep within the Outzones. As a newcomer, this is out of her hands, so she sends you to Constad with an ICC Secure Datacard. He'll provide you with even more information and plans on how to deal with this problem.
You should now return to Coursey, who will give you your reward:
| Profession | Reward |
| Adventurer | Nano Crystal (Form of Cerberus) |
| Agent | Nano Crystal (Assassin's Aimed Shot) |
| Bureaucrat | Nano Crystal (The Choir Fantastic) |
| Doctor | Nano Crystal (Team Improved Life Channeler) |
| Enforcer | Nano Crystal (Improved Element of Malice) |
| Engineer | Nano Crystal (Formula 22) |
| Fixer | Nano Crystal (Firewalled Sync Compressor) |
| Keeper | Nano Crystal (Watch Ward) |
| Martial Artist | Touch of Sai Fung |
| Meta Physicist | Aggressive Staff of Julian Redfire |
| Nano Technician | Nano Crystal (Izgimmer's Wealth) |
| Shade | Wistful Brain Spirit of Computer Skill |
| Soldier | Nano Crystal (Art of War) |
| Trader | Nano Crystal (Divest Skills (Nanite Improved)) and Nano Crystal (Plunder Skills (Nanite Improved)) |
Last updated on 05.11.2025 by lopnk
Information originally provided by Renfred.
Additional information by Trgeorge.
Formatting and corrections by Ukblizzard.
Updated by Saavick
Info on MP heal pet provided by Saavick
Info and guide for Dust Brigade/Locating the Threat provided by Saavick
Do you have questions about this article or found an error? 18 comment(s) - Click here to view them!
