The Collector
Table of Contents [+]
- Introduction
- 1. Collected Essence
- 2. Sister Botanicus
- 3. Immortal Guardians
- 4. The Secretary
- 5. The Collector
- Loot
- Where The Collect gets his loot, and how he stores it:
- What The Collector is known to drop!
- On the Corpse:
- Bronze:
- Silver:
- Gold:
- Manex Adventuring Protection System
- Getting out of the instance.
Class: All Classes
Faction: All Factions
Level: 200-220
Item Links:
Quicklink (copy this):
Feedback: Feedback-Thread
Faction: All Factions
Level: 200-220
Item Links:
Quicklink (copy this):
Feedback: Feedback-Thread
⇑
Introduction The Collector is the endgame single-team instance in Caina, (the first sector of Pandemonium). It has been designed to be one of the hardest challenges for a high-level team ever released in Anarchy Online.
The portal entrance to The Collector instance is near the instanced Pandemonium portal, as shown in the image below. Obviously, this means you already need to have access to Pandemonium to enter The Collector.
Entrance to The Collector
Once your team is buffed up and ready to go, step onto the right altar, and you will be warped into the instance and find yourself at the start of the playfield.
NOTE: This instance does not have a lockout and you can repeat it as many times as you'd want.
Inside you will be find five main different types of mobs that you will encounter, (2 bosses, 3 mobs, 1 NPC then final boss) : Collected Essence, Sister Botanicus, Immortal Guardians, The Secretary and finally The Collector. Keep in mind that most of these will have adds, and you will more than likely also have to deal with them.
NOTE: If you happen to die or go link dead while inside, you can re-enter the playfield as long as you want. However, if you all die, (inside the Collector's room, for example), then you will have to redo the entire instance! So, making sure you are saved in Pandemonium garden before starting is a safe choice.
⇑
1. Collected Essence Collected Essence is a large level 300 spirit that resembles a Redeemed mob.

Collected Essence
Collected Essence is surrounded by many smaller spirits (Essence Fragments). These Essence Fragments give him a huge amount of AAD and make him almost unkillable (or very, very slowly to kill).
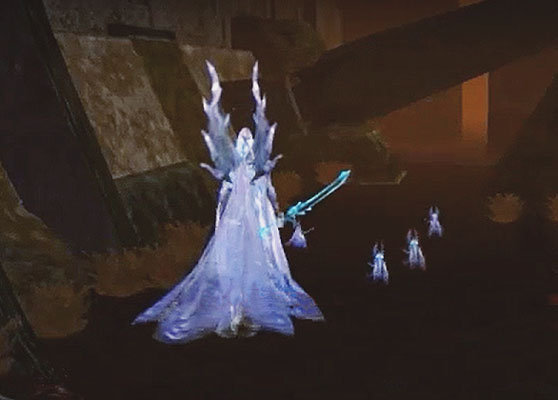
Collected Essence and Essence Fragments
However, there is a fix for that. Killing an Essence Fragment will cause the Collected Essence to shrink in size for Approx 25-30 seconds, opening it up to being killed faster, at which point everybody in the team should start attacking Collected Essence.
Once Collected Essence returns to normal size, change the target back to one of the Essence Fragment and kill another until Collected Essence shrinks in size again. Repeat this process until the boss dies.
When the Collected Essence is dead, you can start moving North to the next encounter. On the way, you will find several more Essence Fragments. These do attack on sight.
Essence Fragments.
It is up to you to kill them and/or mezz them (normal calms will not work on these. A crat's Last Minute Negotiation is ideal if you have a crat). It is easy to outrun them as well, however, you run the risk of them following.
⇑
2. Sister BotanicusSister Botanicus has a couple of tricks during the fight, such as spawning Orchid Plants, which you have to kill really quickly to prevent them from healing her.
Sister Botanicus among her Orchid Plants.
Once an Orchid Plant is dead, it will spawn Orchid Abyss Sprouts, which acts in the same way as an alien cocoon, on player(s) does, which lasts 10 seconds. In that short period, players are stunned and unable to attack or heal.
Other players in the team can break these cocoons and "free" the player trapped inside by attacking the sprout. It always helps to first concentrate on freeing your healer and tank instead of leaving them cocooned for the whole 10 seconds.
Orchid Abyss Sprout.
These Orchid Abyss Sprouts will not do damage on players, but keep in mind that Sister Botanicus occasionally casts area nukes. Thus, why it is important to "free" your healer from them quickly.
Keep an eye on Orchid Plants and kill them as quickly as possible (pets are very handy here), while doing damage on Sister Botanicus in the meantime.
Once Sister Botanicus is dead, Immortal Guardians will spawn to the East.
⇑
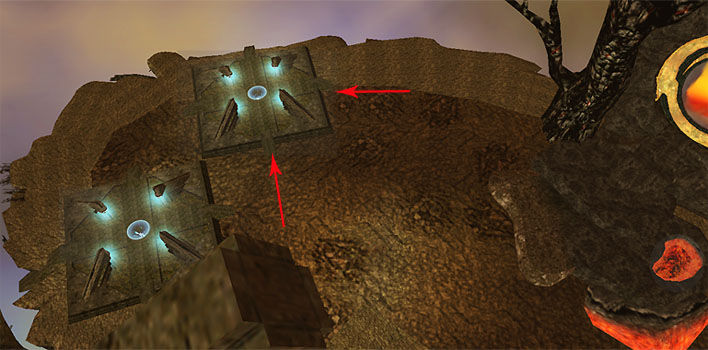
3. Immortal GuardiansYou are not supposed to kill these Guardians.

Immortal Guardian
They are meant to kick you over the walls. You read that correctly! Your goal here is to get three different Immortal Guardians to kick you over the three high walls they each stand near, one wall at a time.
At the foot of each wall, you will find an Immortal Guardian. He is usually accompanied by Essence Fragments.
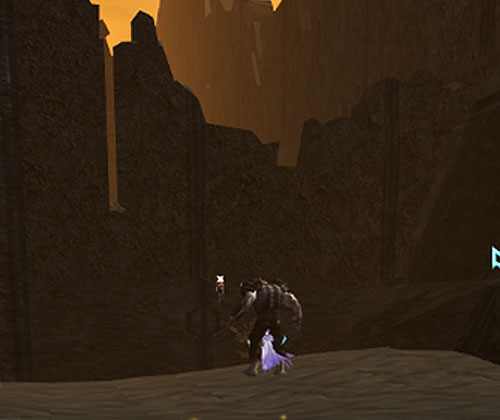
Immortal Guarding near wall
The best way to do this is to let one player at a time get aggro'd by the Guardian, and pull him back away from the wall. Let him chase you around as you make your way back toward the wall until you are about 16 feet (5 meters) away from the wall before engaging him. The point is to get the Guardian facing the wall, and give him enough room to kick you over it.
Aggro Guardian
On top of each wall, you might notice an "opening". It being the lowest part makes it the easiest area to go through. As the guardian tries to hit you, he will also soon proc & kick you over. Aim for that point!
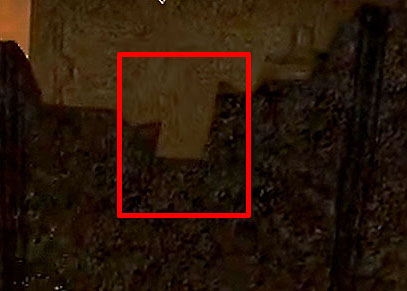
Opening in High Wall
Don't worry : the guardian doesn't hit hard and this is the funniest moment of the instance ;)
Take your turns one by one, rinse and repeat for the next 2 walls. It is up to you and your team to decide who will go first and who will go last. Remember there may be adds you will have to kill or calm as you wait for everyone.
- Note: Those with high evades have a harder time getting him to kick. Those with very low evades will get hit more. Be careful in how and when you plan who take the Guardian on!
When everyone is over the three walls, meet with your team at The Secretary.
⇑
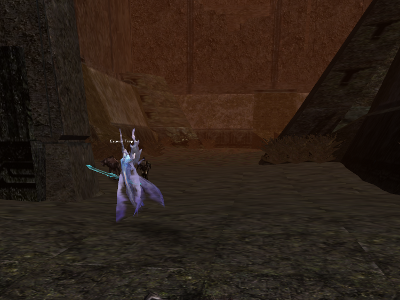
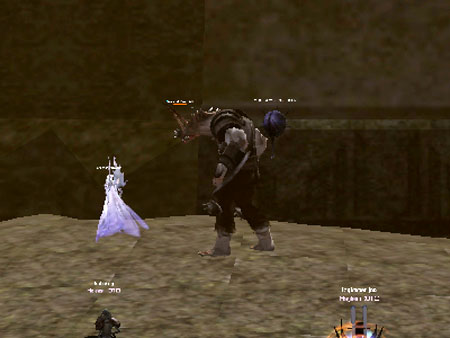
4. The SecretaryThe Secretary is a NPC who you have to talk to in order to be warped into The Collector room. At this point it is not important who talks to her first.

The Secretary.
As soon this NPC being spoken to, players will receive temporary perk action "Dimension Shift" which activates a knock-back attack, to be found in your attacks tab (CTRL+2).
⇑
5. The CollectorBefore starting the boss, only one or two person(s) should be given role to use the perk inside the Collector room. It is very important to decide exactly who will be in charge of this "kicker" duty. If you happen to have an engineer, trader or nano technician in your team, remind these professions are ideal to knock-back.
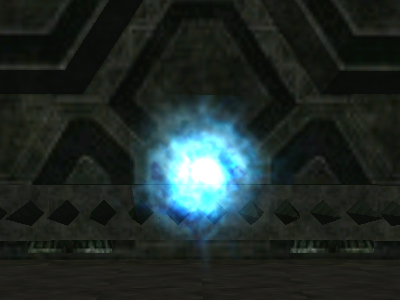
When entering the Collector's room, nothing happens until the Collector is attacked. Take a look around, you will see two towers: one with a red fire and one with blue fire.
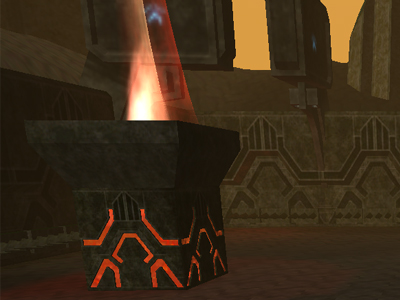
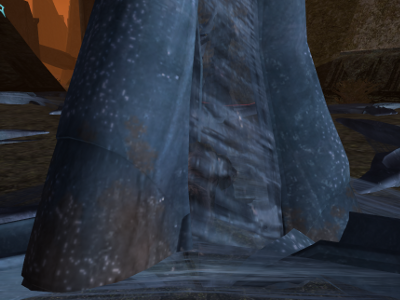
Tower with Red Fire
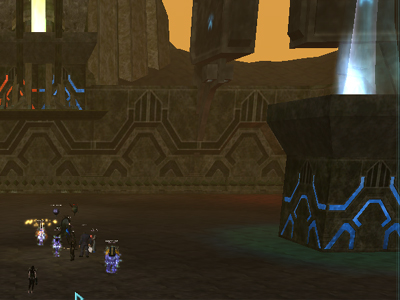
Tower with Blue Fire
You should also see the Collector and his huge HP bar watching you from up on his ledge ...
The Collector.
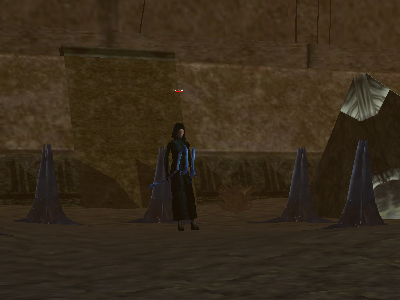
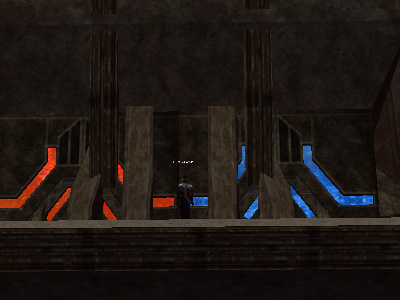
In the center of room (wich is a wrong place to be as healer and/or low HP), the Collector will spawn several waves of Fire/red (healers) and Frost/blue (kickers) shades, and that is the point when your own kicker(s) has/have to get on with this job. Kick blue (Frost) shades into the red tower, and oppositely red (Fire) shades to the blue tower. After two waves with red & blue shades only, get prepared for the next waves with green (Plague) & black (Death) shades in addition.
Unless you've good pulling skills (e.g. : Agg. Enhancer) to pick only red/blue out of the pack, these other types of shades can be mezzed at first, wich will prevent your healer from getting massive aggro. You then can keep green & black shades remezzed frequently, or you can prefer killing them, or let them alone and pull wisely, it is up to you. If you opt for mezz, just avoid any area tool/nano that might demezz them all together ...
The coloured Shades between the altars.
The Collector himself will knock you back (tank especially) every few seconds as long as a blue shade is alive, so make sure you stay in vicinity of your healer, and try to keep your distance off the deadly walls : these have spikes and if you get bounced into these, you will receive massive damage and probably die. It is also possible for some shades to perform a random knock-back on you. And remind boss will be healed as long as a red shade is alive.
Hint : [i]a proven method is to root/snare the boss (e.g. : Crat's Shackle of Obedience nano, Trader's Legshot perk, Engi's Pet Snare Aura nano, etc) and optionnally let your tank use Lost Eden "Charge!" nano to land at same coordinates than boss and consequently avoid being knocked all around in spikes. This will stabilize the situation in a corner for a good period allowing all team to avoid center & deal damage more easily !
⇑
LootOnce The Collector is dead, you will find 6 bronze boxes and some random loot in the corpse. Depending on how lucky you are, the bronze chest you get may contain some good items, or even a silver or gold chest.
You can expect to receive all sorts of items including some that do not appear in any other in-game loot drop tables anymore, or some belonging to level locked dungeons you might not be able to visit yourself, anymore.
⇑
Where The Collect gets his loot, and how he stores it:Corpse loots = low/medium encounters: Rubi-Ka dungeons or unique bosses + ShadowLands catacombs.
Bronze chest = high encounters: Rubi-Ka dungeons or unique bosses + various ShadowLands items.
Silver chest = rare encounters: Rubi-Ka stuff, ShadowLands items, Dust Brigade, Alien stuff.
Golden chest = super rare/expensive encounters: Rubi-ka, Alien sector (S42 ACDC included).
⇑
What The Collector is known to drop!Note: The following are verified items that have dropped from The Collector. It doesn't mean they will always drop, or that there are not additional items not listed here that drop.
⇑
On the Corpse:Ape Fist of Khalum
Assault-class Tank Armor
Aura Magnifier
Black Molybdenum-Matrix of Xan
Blood Bat
Breastplate of Spiritual Rites
Burst of Speed Stim
Charred Abaddon Chassis
Cold Stone
Customized IMI Desert Reet 1000
Energized Carbonan Oven Mittens
Exarch Robe
Experimental Cyborg Token Board
Exterminator Ocular Enhancement
Fist of the Dominator
Fleshchopper
Fork of Ghasap
Frost-bound Reaper
Helmet of Spiritual Rites
Holy Book of the Immortal
Jobe Explorer Personal Pistol
Left Sleeves of the Pest
Manex Social Armour
Mantis Scissors
Neleb's Nano-circuit Robe
Neleb's Notum Battlerod
Original Search Glasses
Patch of Pest
Petticoat of Pest
Punishment Rod
Queen Blade
Reflex Pistol
Right Sleeves of the Pest
Small Gold Ingot
Small Platinum Ingot
Small Silver Ingot
Spirit Focus
Stereotypical Dragon Tooth Poker
Teachings of the Immortal One
The Edge of the Tarasque
Toothpicker
Tree of Enlightenment
Vagabond Cloak
Watchful Spirit Phulakterion
Yalmaha - 29500 - The Poniard
Yalmaha - 29610 - Daylight
Yalmaha - 29610 - Dusk
Yalmaha - 29610 - Sunrise
Yalmaha - 29610 - Sunset
⇑
Bronze:Ambidextrous Plasteel Gloves
Awakened Soul Crystal
Beeping Backpack
Deformed Mantidae Abdomen
Deformed Mantidae Antennae
Deformed Mantidae Coxa
Deformed Mantidae Eye
Deformed Mantidae Femur
Deformed Mantidae Head
Deformed Mantidae Mandibles
Deformed Mantidae Prothorax
Deformed Mantidae Tarsus
Deformed Mantidae Tibia
Deformed Mantidae Wing
Diamond-Matrix Mesh
Electrophoridae Gloves
Enhanced Queen Blade
Fancy Stethoscopic Glasses
Fly Catcher's Specs
Frozen Tear of Uklesh
Gift of the Old Gargantula
Glimmering Magnetic Ring
Hacked Medi-Blade
Heavily Padded Overcoat
Hellspinner Shock Cannon
Journeyman Durable Boost
Kevlar Armbands
Low Recoil Diamondine Kick Pistol
Manex Social Armour (Backpiece Only)
Mantis Egg
Modified A-4000 NCU-sheet
Modified A-4000 Sensory Panel
Morphing Memory
Nelly Johnsons Little Black Dress
Notum Focus
Notum Saturated Metaplast Shell
Patch of Hard Novictum Spangled Hide
Patch of Soft Novictum Spangled Hide
Poetic Pants
Poetic Sleeves
Purifying Rod
Quick-Draw Holster of Aries
Ring of Memory Loss
Ring of the Nucleus Basalis
Rod of Dismissal
Signet Ring of the Green Knight
Silver Chest of the Collector
Silver ingot
Small Patch of Hard Novictum Spangled Hide
Small Patch of Soft Novictum Spangled Hide
Smart Hood of the Wanderer
Smelly Butcher Gloves
Spirit Bauble of Artillery Expertise
Spirit Bauble of Control Expertise
Spirit Bauble of Extermination Expertise
Spirit Bauble of Infantry Expertise
Spirit Bauble of Support Expertise
Stinging Snake Tattoo
Sturdy Detention Boots
Supporting Carbonan Holster
Titan Viper Tattoo
⇑
Silver:Advanced Scent Sensor
Anything
Arithmetic Lead Viralbots
Blackshirt of Zuwadza
Burden of Competence
Chunk of Living Dragon Flesh
Cloak of the Wandering Knight
Copy of Excalibur
De'Valos Lava Protection Ring
De'Valos Radiation Protection Ring
Enduring Lead Viralbots
Enhanced Dustbrigade Chemist Gloves
Enhanced Dustbrigade Flexible Boots
Enhanced Dustbrigade Notum Gloves
Enhanced Dustbrigade Sleeves
Enhanced Dustbrigade Spirit-tech Chestpiece
Enhanced Safeguarded NCU Memory Unit
Exact Copy of Excalibur
Eye of the Evening Star
Fly Catcher's Specs
Frederickson Micro-kinetic Sleeves
Frederickson's Kinetic Sleeves
Gaily Painted Hood
Gall Stone
Globe of Clarity
Globe of Sufferance
Gold ingot
Golden Chest of the Collector
Heart of Tarasque
Iridium ingot
Lava capsule
Lump of Living Dragon Marrow
Master Combat Program
Master Melee Program
Master Nano Technology Program
Modified Aggression Enhancer
Modified Ancient Combat Bracer
Modified Ancient Combat Bracer
Modified Ancient Combat Bracer
Nanobot Infusion Device
Observant Lead Viralbots
Omni-Tek Gunship
Osmium ingot
Patch of Living Dragon Skin
Perfected Infused Dust Brigade Bracer
Piece of Living Dragon Wing
Platinum ingot
Poetic Stretch-band
Protected Safeguarded NCU Memory Unit
Shades of Lucubration
Shard of Living Dragon Skull
Silken Legchopper Gloves
Silver ingot
Sinew of Tarasque
Small Titan Message Container
Spiritual Lead Viralbots
Strong Lead Viralbots
Supple Lead Viralbots
The Expensive Kevlar Vest of Professor Jones
The Third Eye of Daria
Viral Targeting Subunit
*Modified Ancient Combat Bracer has three versions
⇑
Gold:Alien Combat Directive Controller
Alien Matrix Alpha Box
Alien Matrix Beta Box
Alien Probe
Arithmetic lead viralbots
Extreme Low Light Targeting Scope
Observant Lead Viralbots
Omni-Tek Gunship
Robust Backpack
Strong Lead Viralbots
Supple Lead Viralbots
Weapon Upgrade
⇑
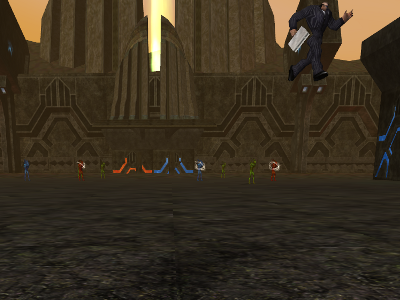
Manex Adventuring Protection SystemThe Collector also drops its own social clothing range called "Manex Adventuring Protection System." Be sure to check both the body, and the chests!
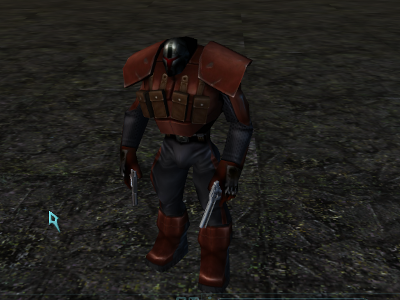
Manex Adventuring Protection System modelled by Memotech.
⇑
Getting out of the instance.When you have finished looting, look for this portal.
Use the portal to exit the instance.
Hopefully, you've gotten some good loot from The Collector, and lightened up his greedy pockets a bit! If not, or you didn't get what you were hoping for, remember there is NO LOCK-OUT on this instance, so jump right back in and grab some treasure!
Last updated on 05.20.2025 by Cariadast
Research: Cariadast
Loot list from Archived AO Forums: Infinite0, live team experience/research, Valheru Ascendants
Research : Muckota & Shamen
Screenshots : Muckota, Memotech, Ukblizzard, Cariadast
Edits : Ukblizzard & Bitnykk
bronze= #BC863C silver #C0C0C0
Do you have questions about this article or found an error? 4 comment(s) - Click here to view them!
