Dust Brigade - The Facility (DB3)
Class: All Classes
Faction: All Factions
Level: 210-220
Item Links:
Quicklink (copy this):
Feedback: Feedback-Thread
Faction: All Factions
Level: 210-220
Item Links:
Quicklink (copy this):
Feedback: Feedback-Thread
⇑
IntroductionAt the time this guide is being written, The Facility (AKA DB3) is quite possibly the most difficult instance in the game, and for very good reason. It was made in response to veteran players complaining that the rest of the game held no challenge or was easily exploited. Funcom certainly didn’t let down with the release of The Facility, as after the initial release the pioneering teams took approximately 5 hours to figure it out, but were only able to pass the second floor using an exploit. This was fixed and the instance became nearly unable to do by most for a very long time, making the price of loot spike to over 400-700m per piece. Now, however, there is a guide!
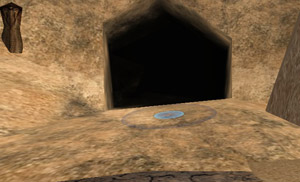
Entrance
Layout
The instance is divided into six floors, the first, third and fifth being very similar, but dropping no loot. The second, fourth and sixth floors, however, are where the money is, but also the challenge of the instance. Going into this instance you must expect a few wipes if more than one or two of your team is not experienced, and even then most experienced teams do not make it to the top floor, or even past the second floor, without a death or two. That said, here is what I would consider the optimum team layout:
- Doctor (Improved Complete Healing helps greatly)
- Soldier (As a tank)
- Bureaucrat (most or all red tapes/malaise/AoE root/Shackles of Obedience required)
- Shade (may need to tank)
- Fixer (with top snares)
- Misc/damage (preferably melee or pet class or a backup doctor/backup tank)
- An enforcer tank works, but there are some nasty surprises for melee classes. A melee profession is 100% required for the final floor, and pets just don’t cut it, for reasons that will be explained.
Keep in mind, players cannot change floors while the team is in combat, so if a player dies there is no getting back until victory is achieved or defeat is suffered.
⇑
Floor 1The first boss (UBTable) is a simple add-spawning boss, that spawns four types of adds:
- Technicians (nukers)
- Superior Commandos (healers)
- Operators (low HP high damage)
- Engineers (debuffers)
Engineers and Operators are calmable, so despite engineers being debuffers you will want to save them for last. The spawns are related to the boss’ HP, so when adds spawn the team needs to immediately stop all damage on the boss or else you risk a double-spawn, which can be lethal If more than 2 technicians are spawned (or more than one if your healer isn’t on top of things). Using an assist macro is highly recommended, if not required to kill mobs in the optimum order, that order being: Superior Commando, Technician, Operator, Engineer. If you do not have a bureaucrat, I advise you move engineers to the front of that list, but if you do not have a bureaucrat you don’t stand much of a chance anyways on later floors. Don’t worry about doing damage to the boss, just keep killing adds until the boss eventually dies. If you wipe, the instance will probably be safe and adds won’t spawn again until you get his health back down to where it was.
You will repeat this on floors 3 and 5 but remember that there are pre-spawned adds before each boss, so zone up as a team.
⇑
Floor 2
2nd floor map
Now the fun begins. This floor is laced with instant-death traps, a fast-hitting, high-damage boss and loads of environmental hazards. The layout of the room (see above) is a 3x3 grid with the boss in the middle tile. In the corners are four shapes, each giving whoever clicks on them a positive buff.
| Cylinder +500 initiatives | 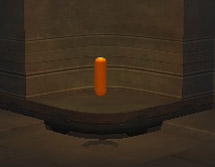 |
| Square +250 damage | 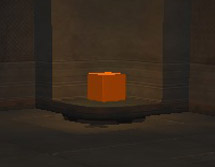 |
| Torus +15% critical hit rate | 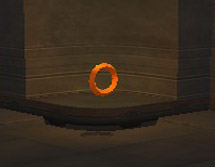 |
| Triangle +15% Nano damage and healing efficiency | 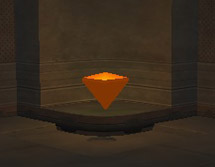 |
These are awesome buffs and it’s to your benefit to keep them running for more reasons than their effects help you deal damage. Keeping a buff running is required throughout the fight. Not having a buff in your NCU possibly means receiving an extremely high damage over time program that will eat at you until you die.
Furthermore, the boss will occasionally yell out phrases like “Torus of Aim, Give me your precision!” when he does this, the shape named is “Cursed” and if you have that buff running it will turn hostile if you do not get rid of it fast enough, turning it’s bonuses negative and giving you a damage over time that you cannot get rid of before the timer runs out.
Keeping an uncursed buff running isn’t as easy as it sounds, since the main cause of death on this floor is the environmental hazard: pillars of fire. In straight lines passing through the boss’ square, fires will start throughout the fight in no particular order. Looking at the grid, they always stretch from one end of the room to the other, always passing through the boss’ square. Typically 1-2 rows will be lit up, leaving only 1/3 of the squares habitable most of the time. This can get in the way if he curses an object’s buff that you have running but you become trapped between two fields of fire. While small they will do around 2000 damage each time you hit one (and hitting more than one can be extremely damaging), but you can jump over them. The big fires, which cannot be jumped over, will instantly kill you. This chain of fires will be continuing throughout the fight with no end, so attention to this is crucial.
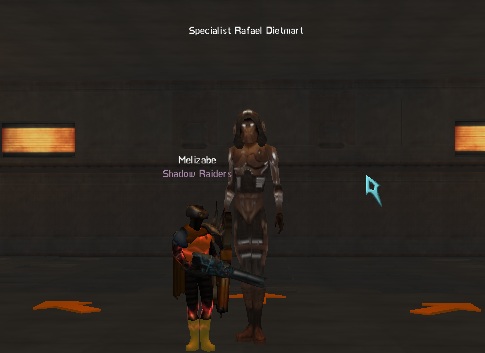
Dietmart
Now how about the boss himself, Specialist Rafael Dietmart? Throughout the fight he will be shouting one of five phrases, four regarding the shapes but also “Cowards! You are next!”. When he shouts this, melee professions need to get away from him VERY quickly, as he is about to do a short-ranged 9000+ damage AoE nuke. Furthermore, when he possesses an object, he receives a buff similar to what it gives to the players, but there isn’t much that can be done about this. The boss’ damage itself is roughly 3000-5000 per hit, and he hits considerably quickly, but he is UBTable even though his nano resist is quite high.
As for where the boss stands, it is unpredictable whether standing near him will kill you, melee professions are advised to stand within one of the outer squares and hit him at a distance, as this will protect you from the fires constantly going through the center as well as give you less distance to run from his AoE.
That sums up floor 2, and should you be able to succeed then the worst of this instance is behind you. Floor 4 has it’s challenges but nothing of the same caliber as floor 2. Floor 3 is the same as floor 1, and at this point would be considered a break, so enjoy it while it lasts.
⇑
Floor 4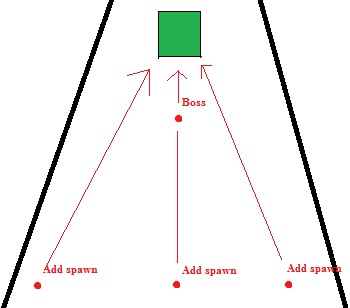
4th floor map
After floor 2 the rest of the instance might seem easy. Heck, after the entire instance the rest of the game will probably seem easy. That said, however, floor 4 still has quite some nasty tricks up it’s sleeves, meaning – you guessed it – more instant deathtraps.
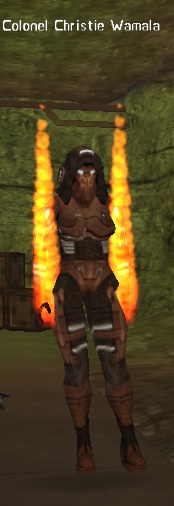
Wamala
The Boss, Colonel Christie Wamala, spawns in the center of the room near a pile of crates. On the opposite side of the room is a wall where adds spawn. Starting with the boss herself, she doesn’t hit too hard, less and more slowly than the floor 2 boss. Tanking her is easy; making her move where you want to is not. Throughout the fight she will yell out one of four phrases triggering firstly adds to spawn, secondly an AoE fear effect and two other effects that could be lethal: a Nanobot Virus and she sets someone up the bomb, giving them no chance to survive unless they make their time.
The Nanobot Virus instantly kills anyone who does not right-click the pile of boxes at the narrow end of the room. If you make it inside of the box beforehand, you can cancel it as soon as she casts the virus (large green ring effect), or just wait for the timer.
The Bomb effect turns one player into a time bomb, giving them a bomb icon in their NCU window. The player with the bomb will detonate, damaging the team for an amount of damage scaling by how many people they were near – if the entire team gets hit, it can do around 90% of each player’s health. But if the bomb player runs from the team they will take little to no damage, so watching your NCU constantly is essential.
The Boxes become a bit of a thorn in the Colonel’s side, however, and throughout the fight she will spawn 3 adds on the opposite side of the room. If any of these enemies (Hand of the Colonel), or the colonel herself, reach the boxes they will be destroyed and the team will wipe on the next Virus attack. The adds, however, can be rooted and snared (but not calmed). It is recommended that the bureaucrat or fixer cast an AoE root/snare on the middle enemy before the team kills them from right to left. The boss, however, will cast a nano on the adds one at a time that removes all roots and snares from them and at the same giving them 3 seconds of immunity. Rooters must watch their target NCU windows to make sure this nano isn’t running or the add will make it much further before a root can be landed.
Expect a wipe or two if too much of your team is inexperienced, and get ready for one more repetition of floor 1 on floor 5.
⇑
Floor 6If you’ve made it this far and have the team composition recommended, then congratulations on your victory. Floor 6 is not much more than a straight damage race. The boss, Technological Officer Darwelsi, runs around the room rigging the facility to self-destruct. To stall you while he does this, he spawns a very powerful Slayerdroid that does a high-damage AoE with a short range, spams heals on Darwelsi and deals some nasty damage normally. This is why a melee profession is required, since the droids healing nano will absolutely destroy your chances of victory – unless you can interrupt it. A melee profession must be on the droid constantly to interrupt the healing nano, while the rest of the team focuses their damage on the boss. Snares and Roots work on him, but he will cast a remover nano and give himself immunity. It is still worth spamming roots and snares on him as this can buy you valuable seconds.
Darwelsi
Upon killing Darwelsi you will be rewarded with the Dust Brigade Bracer - First Edition, as well as one or two other items from him. The Slayerdroid, once in a while, will also drop a random item.
⇑
LootLoot drops on floors 2, 4 and 6 only. Floors 2 and 4 will drop 1-2 items, usually a Dust Brigade Module or an Infuser for the bracer that drops on floor 6. Floor 6 has a higher drop rate on the Helmet, a 100% drop rate on the Bracer, and will also drop a ql300 health and nano stim or health and nano recharger, each requiring roughly 2200 treatment/first aid.
Full Listing of Loot:
Congratulations on completing DB3, The Facility ...
⇑
Upgrade... but beware that once you looted the upper Bracer (First Edition) you may want to improve it twice with the following special infuser :
Therefore you may end up owning, in order this
or even better, the further and final
Last updated on 03.12.2023 by bitnykk
Written by Firebat, with additional information from Byste.
Do you have questions about this article or found an error? 4 comment(s) - Click here to view them!
Written by Firebat, with additional information from Byste.
Do you have questions about this article or found an error? 4 comment(s) - Click here to view them!
