Condemned Subway (raid)
Table of Contents [+]
Class: All Classes
Faction: All Factions
Level: 201-220
Item Links:
Quicklink (copy this):
Feedback: Feedback-Thread
Faction: All Factions
Level: 201-220
Item Links:
Quicklink (copy this):
Feedback: Feedback-Thread
⇑
IntroductionThe existence of a subway system on a technologically advanced planet as Rubi-Ka may at first be surprising. It is said to have been a pet project of a former Omni-Tek CEO, which was eventually abandoned due to rising costs and the creation of the Whompah network. The tunnels that had already been dug were closed off to the public and over time became home to various mutants, robots, addicts and vagabonds. Some of these tunnels were later reopened again for engineering works, and then left open after that project too was abandoned. Most people will know the subway as a challenging dungeon for players up to level 25, but surviving the most dangerous tunnels requires a group of highly experienced people.
To enter this new dungeon, you have to be level 201+ and teamed in a raid of up to 6 people. The entrance is the same as for the original
subway
in ICC HQ.Andromeda - 3305x838
Once you kill Eliminator Shiro, you receive a 5 hour raid lock. This lock is updated to 5 hours again for every boss you kill.
⇑
Layout and MapThis high level subway raid instance is in many ways similar to the original Condemned Subway for lower levels. The main difference is that the various sections are not directly connected through tunnels, but by portals. These portals spawn after you kill a boss and can only be used if noone in the team is fighting. Be careful when starting a fight if the team hasn't entirely gone through yet. There are no respawns, making entering late easy. Eliminator Shiro spawns two portals, giving you a choice which way to go.
⇑
Bosses and LootEvery boss has its own unique special abilities and loot, but each has a chance to drop the following shared loot:
In contrast to the original Subway, only the bosses drop loot. Filth Fleas, Stim Fiends, Uncontrollable Angers, Lost Thoughts and all other mobs don't leave a lootable body when killed.
⇑
Eliminator ShiroSpecials
- He may drain tank's nanopoints.
- Smoke Bomb. He vanishes and you stop attacking him.
- Spawns Hacked Mechdog adds. They will usually not climb the structure he stands on, making that a good place to fight him.
- Knockback. If you fight Shiro on top of the structure he stands on, this will kick you into a group of Mechdogs. Standing with your back agains the wall will prevent you from getting kicked off.
- Rotating immunity to certain damage types. Items or nanos that change your damage type, such as a Poison Injector Bracelet help against this. You can also switch to a different weapon.
Loot

Eliminator Shiro
⇑
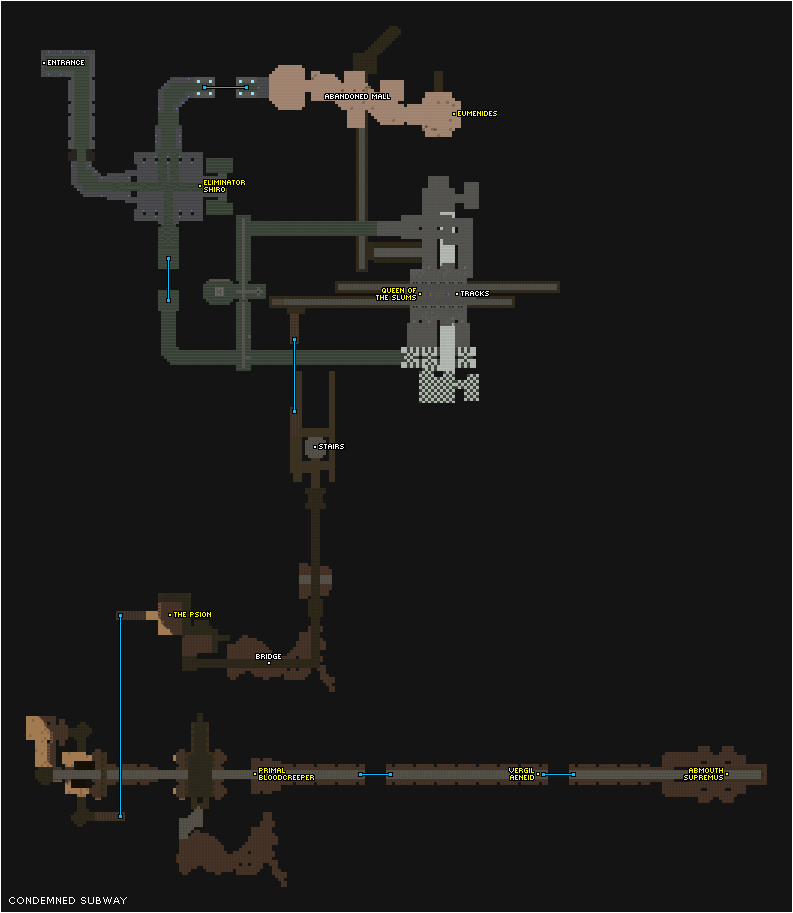
EumenidesDespite being relatively early in the dungeon, this may actually be the hardest boss to kill. Fortunately, killing Eumenides is not required to get to the rest of the subway. If you find your team cannot beat him, it is possible to head towards the Queen of the Slums instead and still reach all the other bosses.
Specials
- Calia's Corruption. One of the following:
- Parrot morph. This is a -1000 damage debuff and a 99% chance proc to heal the fighting target for 18826-35950. Stop attacking while this is affecting you.
Polymorph/Unremovable Snare: Can be removed with A Return to Form.
- Pit Lizard morph. This is a -3000 debuff to initiatives and runspeed.
Polymorph/Initiative Debuffs: Can be removed with e.g. A Return to Form, Hale and Hearty and Wake Up Call.
- Tree morph. This is a nano point drain and a root.
Polymorph/DOT Strain C: Can be removed with e.g. A Return to Form, Cure 1, Epsilon Purge and Hale and Hearty.
- Wolf morph. This is a DoT and mind control. If you are a healer with Complete Healing, make sure to have this nano line on cooldown to prevent healing Eumenides.
Polymorph/DOT - Line A: Can be removed with e.g. A Return to Form, Cure 1, Epsilon Purge, Hale and Hearty and Wake Up Call.
If you pay attention to Eumenides, you can actually see him cast a nano right before morphing. This gives you an early warning to be prepared for it.
- Parrot morph. This is a -1000 damage debuff and a 99% chance proc to heal the fighting target for 18826-35950. Stop attacking while this is affecting you.
- Spawns Curse Rot.
This is a green fog around you. Avoid standing in it as it will do damage, but also try to remain spread out. Standing closely together will cause a lot of fog in a small area, doing a lot of damage.
- Three waves of mobs.
When Eumenides reaches 75%, 50% and 25% health, he spawns a number of mobs.
- Curse-Rotted Grove Sage. At 75% there will be one, at 50% two and at 25% three. These trees give Eumenides a 1000 reflect shield.
- Director - Public Relations. These well-dressed humanoids use Nano Shutdown; kill them first.
- Curse-Rotted Grove Sage. At 75% there will be one, at 50% two and at 25% three. These trees give Eumenides a 1000 reflect shield.
Loot
Eumenides
⇑
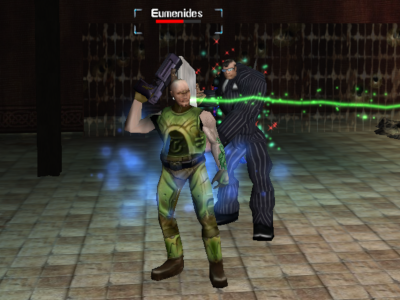
Queen of the SlumsThe Queen of the Slums is positioned on one end of the tracks, with three doors leading up to the platforms from either side. If you take the nearest door you are likely to get attacked immediately and may have to fight some Slum Runners at the same time. If you take the furthest door, you can enter safely, allowing you to clear the platforms and tunnels before engaging the boss.
Specials
- Arachnophobia (fear). Having a keeper with Courage Of The Just helps here.
- Spawns Slum Spawn adds.
Loot
Queen of the Slums
⇑
The PsionSpecials
- Desolation of Will. Debuffs damage, initiatives and heal efficiency.
- Nanobot Domination. Nano Shutdown.
- Spawns Searing Flames on the location of the tank. Standing in these flames will cause a lot of damage; avoid them.
Loot
The Psion
⇑
Primal BloodcreeperSpecials
- AOE stuns in a small area. Melee characters can stand out of range of the stuns while still being close enough to hit him.
Loot

Primal Bloodcreeper
⇑
Vergil AeneidSpecials
Vergil Aeneid has various specials which are indicated by him spawning a coloured beam of light before using them.
- Blue. Spawns a blue nano cloud in a straight line through the room. It can be in either a North-South or an East-West direction. Avoid standing in it as it will do a lot of damage.
- Red. Spawns Vergil Doppelgangers. These adds hit hard but despawn after a short time again. Sources familiar with the matter have informed me their name is Melvin.
- Yellow. An AOE nuke in a small radius around Vergil.
Loot
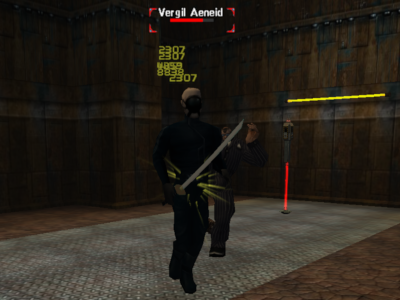
Vergil Aeneid
⇑
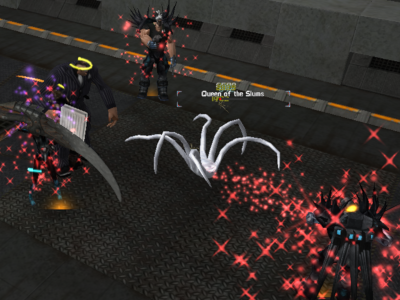
Abmouth SupremusSpecials
- Devours the tank. This warps the tank away into a separate room (his stomach). As with a real stomach, there is one exit; find it and right click on it. Someone else will have to take over while the tank gets back to the fight. Built up aggro is reset after the tank is warped, and it may take some time to build it up again.
- Spawns flames around him; avoid standing in them.
- Knockback. Try to position yourself with your back against a wall, to prevent being kicked into flames.
- Spawns two Harbingers of Pestilence close to Abmouth. They respawn when killed, so it would be a good idea to snare these somewhere out of the way, as they hit hard, cast AOE nukes and spawn Curse Rot.
- Curse Rot: this is a green fog around you. Avoid standing in it as it will do damage, but also try to remain spread out. Standing closely together will cause a lot of fog in a small area, doing a lot of damage. Keep line of sight in mind; it is quite easy to lose line of sight with healers if you move out of the center.
Loot
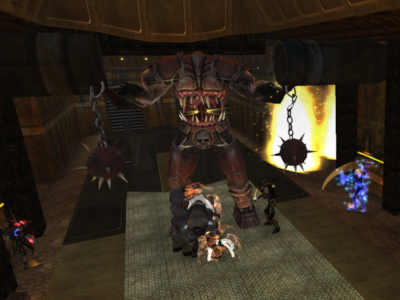
Abmouth Supremus
⇑
Hologram of Adeline GuerraA Freelancers Inc. Hologram of Adeline Guerra stands just
outside
the subway. If you have a raid lock for the Condemned Subway raid and you have a Freelancers Inc. Token, you can talk with her and she will offer to reset your raid lock for one token. You can get Freelancers Inc. Tokens by completing the Freelancers Inc. mission from the ICC Holodeck.Andromeda - 3310x840
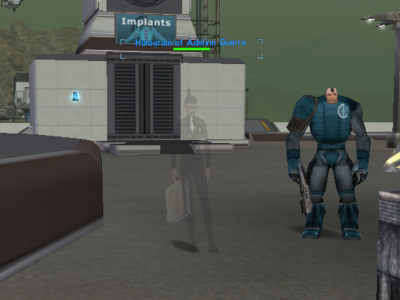
Hologram of Adeline Guerra
Last updated on 01.02.2023 by Saavick
Written by Saavick.
Do you have questions about this article or found an error? 8 comment(s) - Click here to view them!
Written by Saavick.
Do you have questions about this article or found an error? 8 comment(s) - Click here to view them!
