Albtraum
Table of Contents [+]
Class: All Classes
Faction: All Factions
Level: 200-220
Item Links:
Quicklink (copy this):
Feedback: Feedback-Thread
Faction: All Factions
Level: 200-220
Item Links:
Quicklink (copy this):
Feedback: Feedback-Thread
⇑
IntroductionWelcome to Albtraum, a new zone introduced in 17.3. This zone is special, as is it an instanced zone, set for a single team only, from 2-6 people. Anything less than a full team will make this zone really hard however. Make sure you set aside at least a couple of hours for this, as it is not a short mission.
This zone is also particular, as it does not contain any keys. This means that if the whole team leaves the playfield (or wipes), you will have to start in a new playfield. While you won't have to restart the mission, the playfield will be reset, so that means all the mobs will be reset. While this can be nice to get any missed mobs, it will be annoying later on, when you'd rather just run straight to the bosses. Please keep this in mind. If you see that your team is about to wipe, or someone does a really bad pull, it would be wise to run, and keep the playfield open. As long as one person survives, the team will be able to re-enter the playfield.
⇑
LootAlbtraum will have many new drops, most of which are used for tradeskill processes, and MOST are not nodrop (beware, some are). There are a variety of drops, some are common, and some are much rarer. The rarer ones seem to drop more often from bosses, however, they still drop from mobs from time to time. The processes for these items can be found here:
⇑
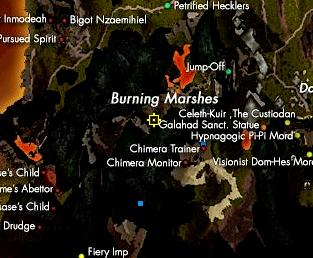
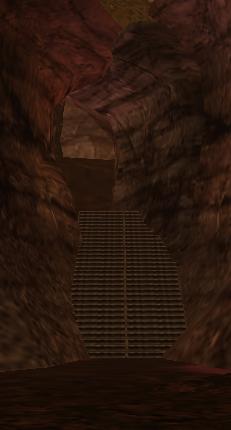
LocationThe portal to Albtraum is located in inferno. From the entrance to Inferno from Penumbra, instead of taking the left path that takes you to the jump-off, take the lower right path. Here you will find some stairs. The portal and yutto are located here.
⇑
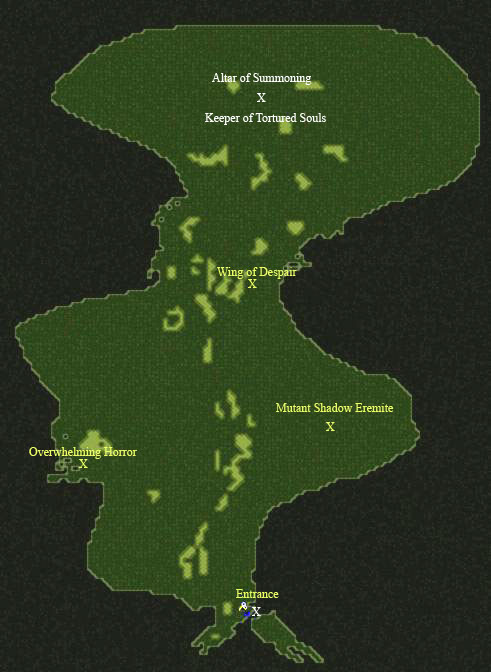
Map of AlbtraumBelow is a map of the new zone, as well as the location of the Bosses that you will find in the later part of the mission.
⇑
Albtraum Quests⇑
Finding answersYou will need to chat with The One that Sees Dead People. He will give you the mission that is needed to enter the portal. He senses a great evil inside Albtraum, and will have you investigate it. He will ask that you kill a number of creatures for him, and return some of their parts for him (which you will receive once you get the required number of kills). You will need to kill 4 Shadow Eremites, 12 Soul Stealers, 15 Shadowy Wings and 20 Voracious Horrors. There are plenty of horrors, wings, and eremites. The Soul Stealers however are the rarest of the zone, and you might need to kill every one inside the zone to reach the required 12. The yuttos asks you to return to him the following parts: a Morphing Eremite Spinal Section, a Crystallizd Residue, a Dark Tooth and a Trasparaent muscle strands. You will get these automatically when you complete the kills.

You must be teamed in order to receive the mission. Each member of the team doesn't need to get the quest,but it helps as each will need to reward from it. Once everyone has the mission, it will be time to enter Albtraum. Simply walk on the portal.
Once inside, you will need to start to kill your required mobs. This should be straightforward enough. With a decent team, you don't need to worry about adds too much. One thing to keep in mind is that the horrors and Soul Stealers have a chance of spawning an extra spirit mob once you kill them. This can be dangerous if you're in a hurry and pull some more before it spawns. It may be a good idea to wait after you kill any horrow or soul stealer.
Once you kill all the required mobs and get your items, return to The One that Sees Dead People. Make sure that at least one person stays inside the playfield, as you do not want it to reset. If this happens, you will have to re-kill the mobs that you killed previously. While you won't have to redo the mission, it will still be bothersome to have to kill everything again.
⇑
Preparing for the "Final" BattleThe One that Sees Dead People will tell you to go talk to One Whose Courage Fails His Heart. This yutto can be found at the entrance of Albtraum. Only one person needs to talk to the him. He will instruct you to go collect 3 parts to make a novictum bomb: a perennium shell, a vial of highly volatile novictum and a detonator. You will find these on 3 bosses that have just spawned inside the playfield. If you kept the playfield, you will be able to walk straight to the bosses without having to fight any mobs. If you lost the playfield, "The little one" will despawn most mobs. Only ones that stay are wanders and eremites.
When you kill the bosses, they will drop a variety of items, as well as 4 identical parts needed to make the bomb. That means only 4 people will be able to make the bomb for each playfield. If you want the entire team to receive the bomb (which *might* be needed) you will have to clear 2 playfields.
⇑
Mutant Shadow Eremite
This first boss is located on the east side of the zone. If you stay on the east wall, you will come to a opening. He is hidden in the ground just at the entrance of that opening. Make sure that your team is ready before going near it.
This boss shouldn't pose too many problems, he has an AoE stun, which can be annoying. Have your doc and any ranged non-tankers stay back. The rest, just have plenty of Free Movement Stims ready, and you should be fine.
⇑
Wings of Despair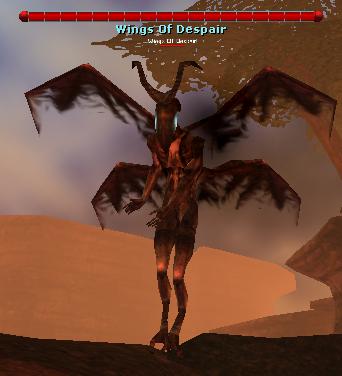
Further north from the eremite, you will find the Wings of Despair. This Boss will be a bit harder than the Eremite. He has an AoE nano drain. It appears to be quite vast, as we couldn't get the doc far enough to get out of its range. Keep some nano stims handy, and make sure to stim your doc when needed. He will need them.
⇑
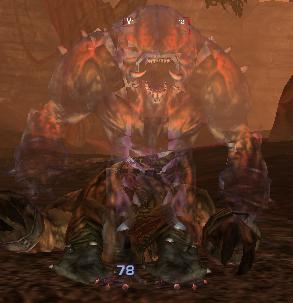
Overwhelming Horror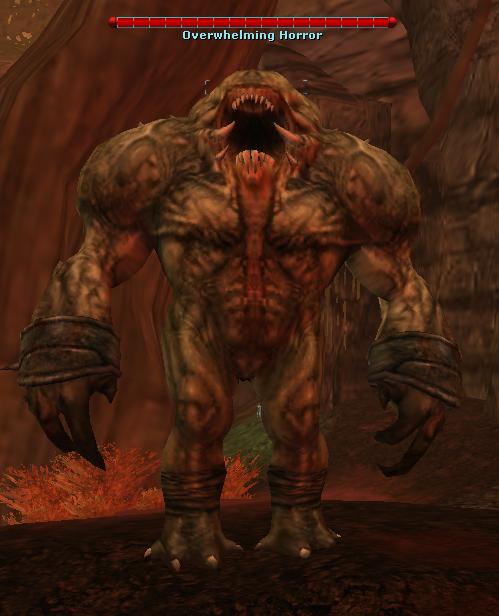
This will be your most difficult challenge yet. This horror is very difficult. He has a nasty 18k nuke, which will decimate your team quickly if you're not careful. It would be a good idea to have your tank on him, and have everyone else way back, attacking him from afar. Unless he has been tuned down since test (this will remain to be seen), he nukes often enough. So it may be a good idea to have your melee classes sit this one out, with the exception of you enforcer if he is tanking of course.
Again, let me remind you that you need to have 1 person alive in order to keep the playfield. If your entire team wipes, while you won't have to start the mission over, you will have to start on a new playfield, with all mobs spawned. If you see that this battle is not going well, it may be a good idea run away to escape his aggro, this will enable your team to return to the same playfield and try again. Do not take this boss lightly.
Once you receive your 3 bomb parts, return to The One Who Sees Dead People. He will make a Novictum Bomb for you, and instruct you to talk to the yuttos inside the playfield again.
Warning! Do not right click the bomb, or use anything (tradeskill) on it. If you do this, it will explode and will be used up. If you do this, you will have to start over.
⇑
The "Final" Battle Note:At this point you can reset the field (by having every team member leave playfield), but the little Yutto will slack again and not despawn all mobs. So a better strategy is clearing the whole playfield after killing the bomb bosses and leaving at least one team member inside to keep playfield.
Once you talk to the Yuttos inside the playfield, the last boss, The Keeper of Tortured Souls, will appear. You will find him at the end of the playfield, near the statue. This boss is extremelly difficult, so be prepared for a wipe if the team is inexperienced.
The keeper has a whole arsenal of nasty tricks up his sleeve. He stuns when near its victim, AoE nukes, doesn't keep aggro and of course spawns bunch of spirit Soul Stealers. They are low level (205), but can still be dangerous if they gang-bang on someone. But they can be disposed with bomb(s) you got earlier. Since they too can drop phats, we advise to keep them alive till Keeper is dead and then use bombs (plural, since they don't have that great AoE effect, so more then likely you wont catch them all with just one) and quickly check their loot.
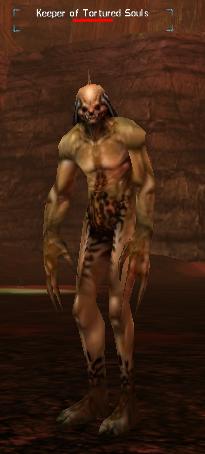
The best strategy found so far for killing keeper is kiting. Soldiers exceed in this field, especially if they have back-up of professions that can stun and root (so that asault force can shot at it from safe distance). And since even this strategy can go wrong, and MP or Engi in team is advised to warp dead raiders back. Warper must think ahead tho and anchor team in a safe location and stay out of fight (Keeper doesn't hold agro, remember).
Its loot consists of:
| 6x | Other stuff you can find in Albtraum (Higher chance on real phats) |
Only Phobia Beads have 100% drop chance, the rest of the loot is random.
Phobia beads are special, since you need 5 of them to complete this nightmarish quest chain and claim final reward. But since Yutto asked for Necklace, you need to create one first, before returning to The One that Sees Dead People.
You need to add last 2 Phobia Beads to the Necklace in the same way and then bring the result to the Yutto, who will award you with one of profession specific Wen-Wens.
| Profession | Reward |
| Adventurer | Reciprocal Wen-Wen |
| Agent | Accurate Wen-Wen |
| Bureaucrat | Wen-Wen of Insignificance |
| Doctor | Wen-Wen of Insignificance |
| Enforcer | Wen-Wen of Fortitude |
| Engineer | Wen-Wen of Insignificance |
| Fixer | Accurate Wen-Wen |
| Keeper | Wen-Wen of Fortitude |
| Matrial Artist | Subtle Wen-Wen |
| Meta-Physicist | Wen-Wen of Insignificance |
| Nano-Technician | Wen-Wen Decoy |
| Shade | Subtle Wen-Wen |
| Soldier | Reciprocal Wen-Wen |
| Trader | Wen-Wen Decoy |
⇑
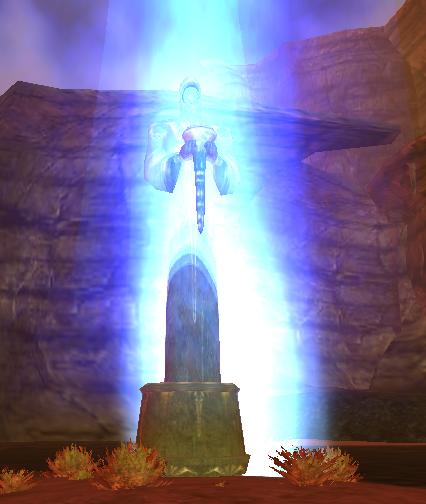
Pocket BossesBut the battle is not over yet! Among the loot of this zone you might also find some of the 5 new Pocket Bosses. These will drop inside the zone, especially on mini-bosses amd the keeper, under the shape of "Xan Essence" crystals - ready to pop:
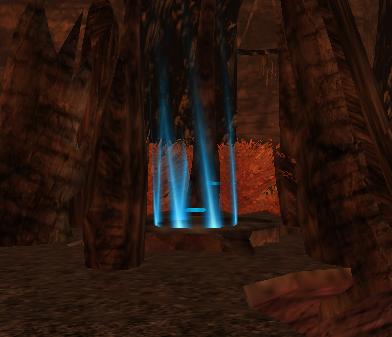
You will need to apply them on the glowing statue at the north end of the zone, preferably once it's all cleaned of any mob. Double check for Eremites and corner Voracious...
We won't spoil the fun of discovering their various abilities and the strats to encounter them. Let's just say that some have adds to help them, some can do impressive nano damage or AOE DOT effect, some have huge HP and reflect, some can warp you out of sight... so be ready to fight for your life!
Let's just give you an idea of their respective difficulty with these 3 levels:
| Easy: Terror & Loyalty | 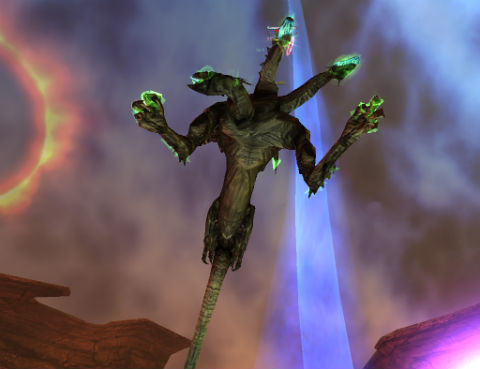 |  |
| Medium: Merciless |  | |
| Hard: Misery & Pestilence | 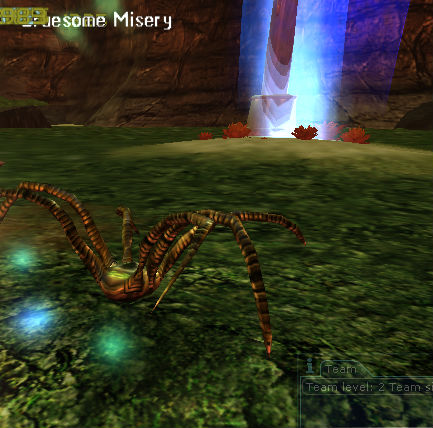 | 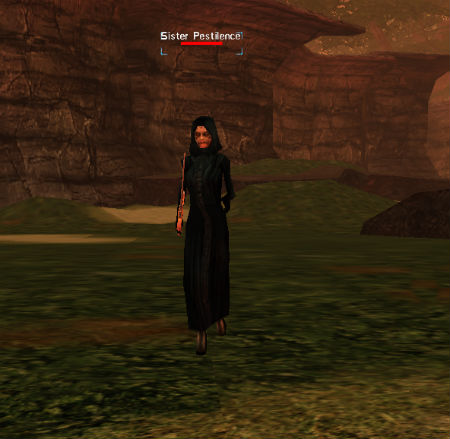 |
Last updated on 04.04.2021 by Saavick
Initially written by Tepamina
Additional information by Trgeorge
Complement by Bitnykk & Fixyourcode
Do you have questions about this article or found an error? 4 comment(s) - Click here to view them!
Initially written by Tepamina
Additional information by Trgeorge
Complement by Bitnykk & Fixyourcode
Do you have questions about this article or found an error? 4 comment(s) - Click here to view them!
