Knowledge of the Yuttos
Table of Contents [+]
- Clear Thought Three
- One with Developing Words
- Scouting Panorama
- One Who is The Same / One Who is Like the Other
- Halcyon Creed
- Interlude: Pattern Essence
- One Whose Words are Jumbled
- One Who will Always Listen
- One Who Never Stops Looking
- One Who is Full of Compassion
- One Who Fears Corruption
- Vanward Four
Class: All Classes
Faction: All Factions
Level: 80-220
Item Links:
Quicklink (copy this):
Feedback: Feedback-Thread
Any special reward for completing parts of this quest line will be mentioned in guide. With few exceptions, the order of quests is set as continuing line. This quest does have a minimum level requirement of 80, but no maximum level.Faction: All Factions
Level: 80-220
Item Links:
Quicklink (copy this):
Feedback: Feedback-Thread
Note: If you intend to do the full Scheol quest set, please be aware that the last Yuttos, Vanward Four will not allow you to assist him or to finish THIS quest line until you have completed Jobe Scientists. So, unless really enjoy questing, you may want to do do hat line first!
⇑
Clear Thought ThreeWe start our journey close to the portal from Elysium, at 1150x120, with
Clear Thought Three
. Scheol Upper - 1150x120
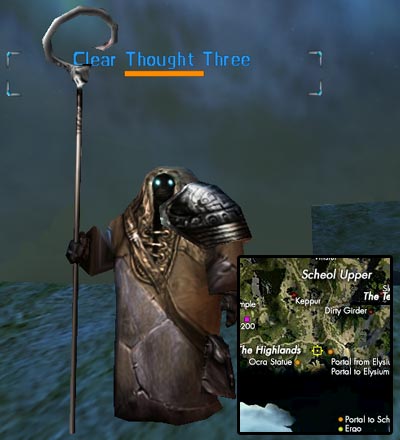
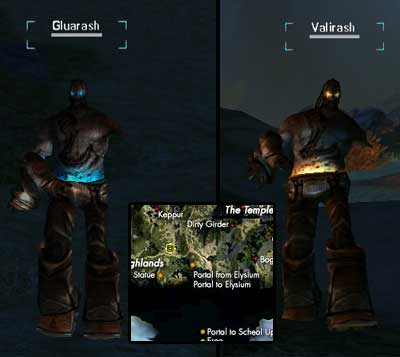
He's concerned about recent traffic in Scheol and wants you to hunt down some predators. He wants you to kill 5 Valirash's and 5 Gluarash's and then return to him. Those mobs are located just below his location (You can simply jump over the cliff, but please be warned that there are mobs below and might agro you).
After you have completed your task, return to him and listen to his story. He'll send you to find
One with Developing Words
.Scheol Upper - 1413.8x236.4
⇑
One with Developing Words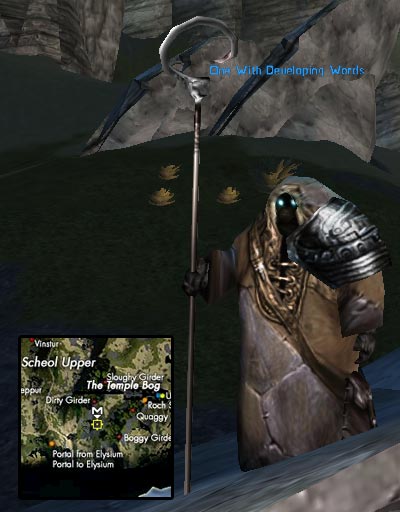
This Yutto also wants you to kill some mobs for him. This time it's 10 Mossy Girders, located a bit North of him.

After you return to One with Developing Words, he'll send you to Scouting Panorama.
⇑
Scouting PanoramaScouting Panorama
is located at 1255x315 (while most quests named 'Find Yutto so-and-so' include a waypoint on the map, once you need to return to them, you will have to remember the way on your own. So it surely helps to memorize the location of your last quest NPC). Scheol Upper - 1255x315
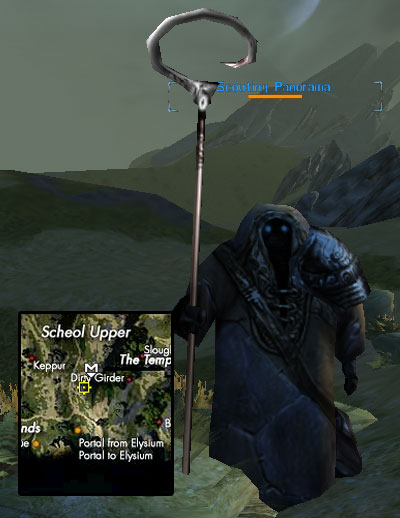
Scouting Panorama is excited about a Topographic Interferometer Specification Unit. Apparently it is used to input geographic changes, measurements and in the analysis of precision surfaces and transmitted wavefronts.
After showing our shared excitement about this tool, he wants you to determine the altitude of several hilltops, with the help of his marvelous tool of course, and bring him back measurement reports.
You will find the Altitude Plates on three rocky hilltops. Be prepared for some nasty company at the top of several of the hills in the form of a Minx. Once she has been exterminated, there are two steps you must take. First, simply locate, then target the plate and right click on it with the Topographic Interferometer Specification Unit to updated and get the quest updated to the next plate location. Once it updates you need to extract a report. To do so Leave the Topographic Interferometer Specification Unit in your inventory this time, and target then right click on the plate.*
*To receive the report the report in your inventory, leave the tool in your inventory while attempting to extract the reports, or you will have to delete are repeat!
The plates are located at the coordinates 870x705 (
Western Altitude Plates
), 1045x800 (Scheol Upper - 870x705
Northern Altitude Plates
) and 1390x690 (Scheol Upper - 1045x800
Eastern Altitude Plates
). The order in which you get to tag the plates appears to be random, so if you are doing this part of the quest in a team, do not be surprised if you have to go to the western cliff next, while your partner would have to head east. What makes this task even more complicated is the fact that the reports are only valid for one hour after retrieval!Scheol Upper - 1390x690

Once you return to Scouting Panorama with the fresh reports, you will receive an Aythem's Coat of Information as reward. Depending on your level, he will send you to find either One who is The Same, or One who is Like the Other. Both of them seem to be knowledgeable about the society structure of the Xan, which we will try to find out next.
⇑
One Who is The Same / One Who is Like the OtherOne Who is The Same and One Who is Like the Other
are located at 1120x320, will send you into the Catacombs under the temples.Scheol Upper - 1120x320
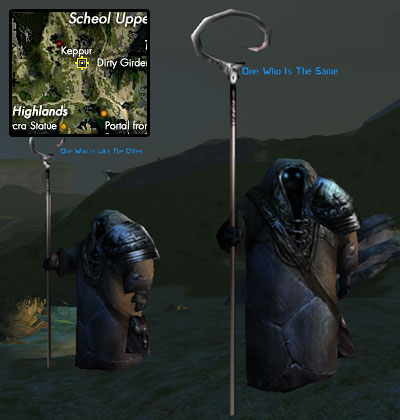
The One Who is the Same will send you to kill special mobs(bosses) and bring him their body parts. While it doesn't matter whether you choose to go to the Redeemed or Unreedemed Temple, the order in which you these kill mobs is to be adhered strictly. (Read the middle part of this guide for information on how to find the Scheol Catacombs.) At this point, a team is advised, should you be around level 150 or lower. So after you killed La Croix, Cemetiere, Jumeaux and Marissa, you should have the Tongue of LaCroix, the Eye of Cemetiere, the Heart of Jumeaux and the Liver of Marissa spawned in your inventory. Bring those back and One Who is The Same to reward you with a Consanguineal Embryo of Annwn'Guinee.
The One Who is Like the Other will send you in the catacombs to collect some visions, as well as fitting vision containers. These will drop off any mob inside. You have to collect 3 different containers (Tempestuous, Reposeful and Unshakable), and fill each with their 2 corresponding visions. This quest should prove easier than the first one, but may take longer to complete. While the visions are freely tradeable, the containers are NODROP. The containers have only been confirmed to drop in the Scheol catacombs. The containers are being filled by applying the container on a corresponding type of vision via the tradeskill interface. Bring the three filled containers back, and One Who is Like the Other will reward you with a Consanguineal Embryo of Annwn'Guinee.
When chatting with your quest Yutto, you can ask him about the Xan rituals and he'll even give you a Bracer of the First Pact, a Ring of the Second Pact and a Band of the Third Pact as a gift, all ql 1. The next topic about the Xan society to discover is their religion, and asked about that he will direct you towards Halcyon Creed, who is apparently the specialist in this field.
⇑
Halcyon CreedHalcyon Creed
, located at 1255x860, sends you out to kill sided mobs. Scheol Upper - 1255x860
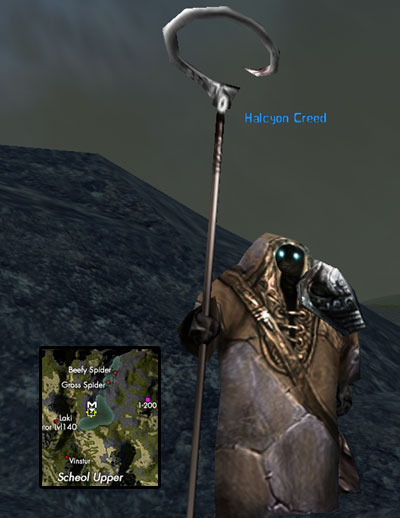
Redeemed aligned people have to kill 3 Cama-Els, 3 Calan-Curs and 3 Sun-Lens. You can find these outside the unredeemed Temple.
Unredeemeds have to kill 3 El-Karats, 3 Or-Modas and 3 Cur-Mans. You can find these creatures outside the Redeemed Temple.
Neutral people at this point will get to choose between killing Unredeemed or Redeemed. If you choose "Goodbye" or press escape when presented with Ocra/Roch choices, you cannot talk to this yutto again and may need to request assistance via /petition.
After you are finished with the carnage and return to the Yutto, his further missions yet again depend on your level. High level people will be sent out to kill Unredeemed Roch or Redeemed Ocra. Spawning those NPCs works exactly the same as with any sided deity in any Shadowlands zone. You enter the Temple, kill the placeholder, feed 6 insignias to NPC that spawns of the same faction as the temple, kill the Omega/Empath and then the main boss spawns.
Lower level shadowlands explorers are instead asked to provide proof of their permanent access to their side's garden. Unfortunately, a simple garden insignia won't be enough for this. So unless you already own a Scheol garden key, proceed forwards on the quest for the key to either the Redeemed or the Unredeemed garden.
Once you complete that and return to Halcyon Creed, he will reward you with a Pattern Essence. He also then proceeds to give his lecture about the theological background of the Xan. In the course of this, the topic changes towards the Xan's more worldly creations in the form of engineering, construction and arts. For this, he sends you off to find One Whose Words are Jumbled, the expert for this field.
⇑
Interlude: Pattern EssenceIf you bring this item with 3 different unassembled pattern pieces of 'Weary Empath Min-Ji Liu' to back
Clear Thought Three
, from the beginning, he'll give you a Complete Blueprint Pattern of 'Weary Empath Min-Ji Liu' in return. This is needed for Scheol garden and sanctuary key quest. Note : you really need to bring the 3 different pattern pieces.Scheol Upper - 1150x120
⇑
One Whose Words are JumbledThis Yutto,
One Whose Words are Jumbled
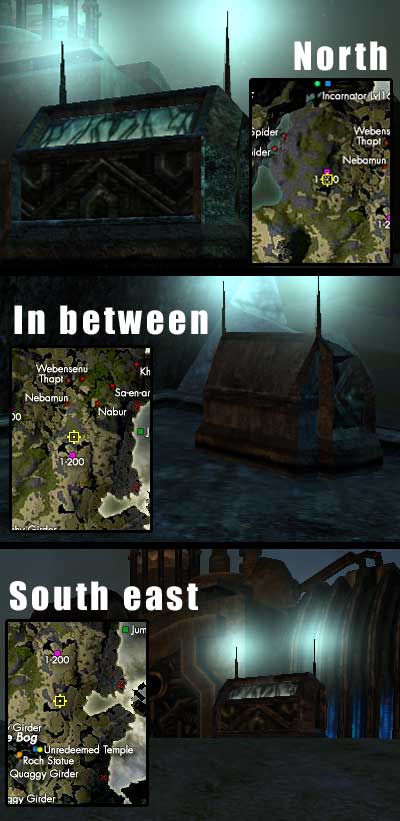
, located at 1585x685, will send you to locate (target) 3 traces of Xan technology. Scheol Upper - 1585x685

Since you only have a few minutes for tagging one of them, finding their location in advance might be good idea. What you need to do is to find and target the Scrapped Alien Technology, to which the Yutto gives just general directions (north, southeast and in-between). The order in which you need to target those matters, and their coordinates in the correct order are : 1530x890 (
Scrapped Alien Technology North
), 1770x550 (Scheol Upper - 1530x890
Scrapped Alien Technology Southeast
) and 1765x800 (Scheol Upper - 1770x550
Scrapped Alien Technology In-Between
).Scheol Upper - 1765x800
Once you return to One Whose Words are Jumbled, he will present you with a simple logical riddle (Answer: It's a picture of his son). For this little run around the block, he will now give you a lecture about the limited abilities of the Xan to shape non living matter. After that you'll have to find One Who will Always Listen.
⇑
One Who will Always ListenOne Who will Always Listen
, located at 1640x875, sends you out to listen to stories. Scheol Upper - 1640x875
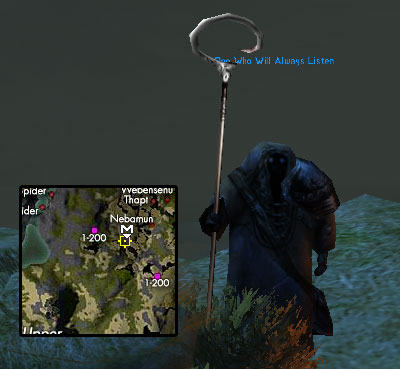
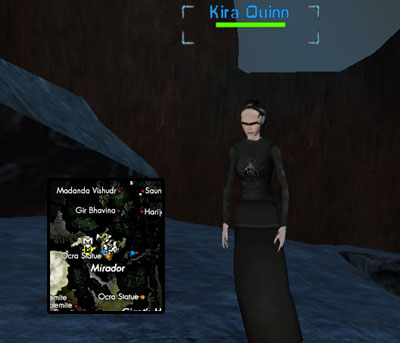
Strangely enough, he wants you to listen to humans and you better pay attention, since he'll ask some questions after. The first person you should talk to is
Kira Quinn
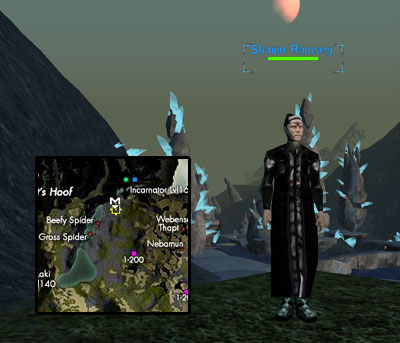
, located at 810x1535. Secondly is Scheol Upper - 810x1535
Shawn Ramsey
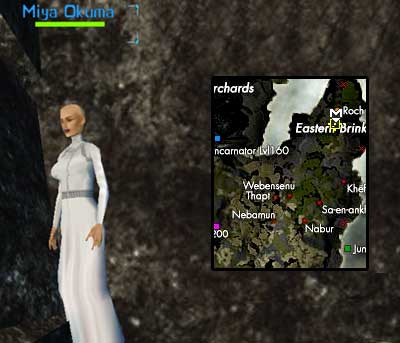
at 1445x1125 and third Scheol Upper - 1445x1125
Miya Okuma
at 1970x1325. After you chatted with all of them, return to Yutto.Scheol Upper - 1970x1325
Now it's his turn to listen, since he'll pose you a series of questions (No, noone was kiding about that part). Correct answers are : Shawn Ramsey, The King, A log, Her husband, Twenty, Three, Sling. Should you prove you have keen ear and patience to endure all the conversations, he'll reward you with ql 150 Ring of Divine Teardrops and send you to One Who Never Stops Looking.
⇑
One Who Never Stops LookingOne Who Never Stops Looking
is standing at 1475x1450. Scheol Upper - 1475x1450
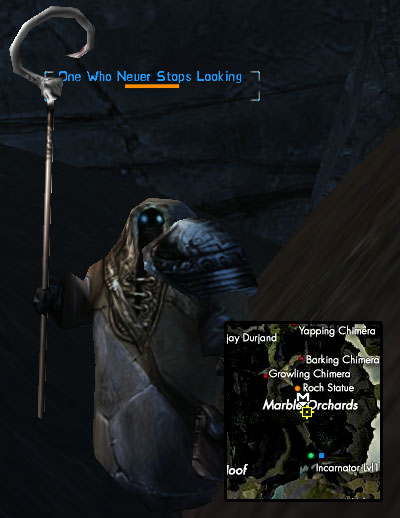
His task for you is to find his mate, One Who is Full of Compassion and bring back a report. Since she doesn't trust strangers, he gives you Stained Chimera Fang as a way of identification.
⇑
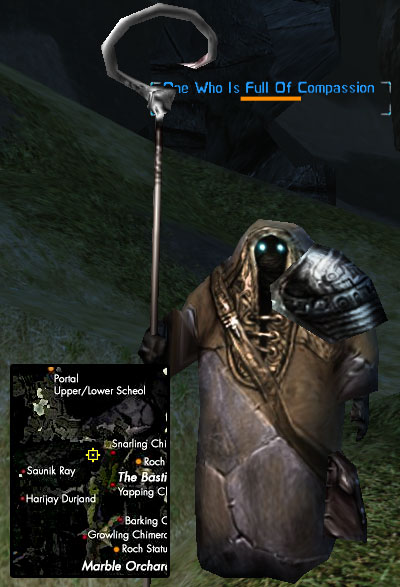
One Who is Full of CompassionYou can find this Yutto,
One Who is Full of Compassion
, at 1360x1915. And she is so busy, she didn't have time to finish report. Scheol Upper - 1360x1915
Fortunately though for you, with a little assistance from you, she will be able to get it finished. Armed with a Radio Chipped Collar, she sends you to herd back Sickly Chimera. Finding them shouldn't be hard, since you passed quite a few of them on your way to her.
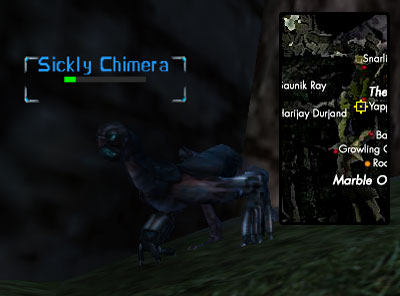
Once Sickly Chimera is located, open chat with it and trade Radio Chipped Collar. Then you need to follow it back to Yutto. She'll heal it (Sickly Chimera despawns and Exhausted Chimera spawns in same place) and you should target this one and start chat with One Who is Full of Compassion. And she'll send you to bring in Sickly Chimera. Finally, after you helped her for third time, she'll give you Animal Status List to bring back to One Who Never Stops Looking. He'll then send you to find One Who Fears Corruption.
⇑
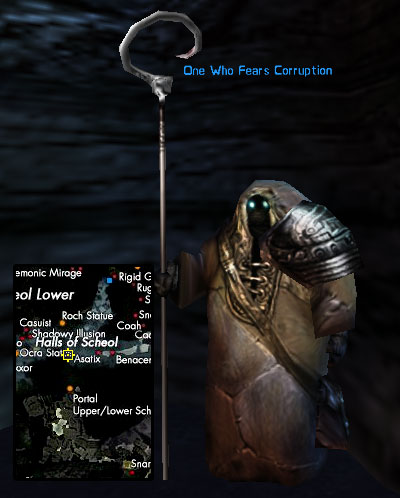
One Who Fears CorruptionOne Who Fears Corruption
is located at 1180x1170.Scheol Lower - 1180x1170
This Yuttos wants you to tag a series of mobs named after some famous greek islands from the Cyclades. This is a series of high-level (ql 200-250) bosses that spawn in succession on a treacherous rocky path extending well over brink.
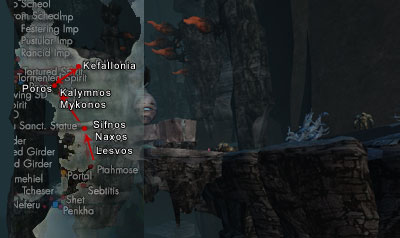
Yet again it's time to travel in team, this time even for higher characters. Unfortunately, like players, those bosses can fall over the edge too, they just don't zone to RK. Since you need to target them to complete this quest, this might prove tricky. On the good side, any boss that has fallen off its rock, is a boss less you need to kill. Once you manage to tab them all, it's time to return to Yutto. He'll send you to last Yutto.
⇑
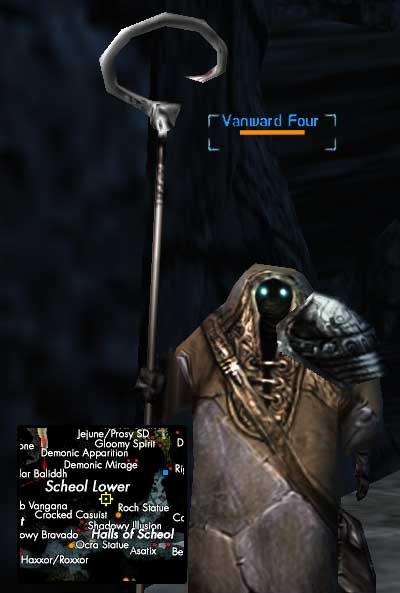
Vanward FourBefore
Vanward Four
, located at 1115x1360, allows you to help him, he demands you complete the whole line of quests from Jobe Scientists. Scheol Lower - 1115x1360
Should you already have done it, he gives you Glowing Bark to use on
Firekeeper Argoth
, located at 840x1150. Scheol Lower - 840x1150
For those level 150 and below, a team is advised at this point. To fulfill your mission you need to open chat with this NPC and trade it the Bark that the Yuttos gave you. This will enable you to attack and kill it.
Unfortunately, the NPC will heal itself during combat (yes, when it's close to dying), before you'll be able to take it down. Victorious, you can return to Vanward Four, to receive your profession specific reward:
| Adventurer | Nano Crystal (Pr0n0wnzm3nt 0f H4xx) |
| Agent | Nano Crystal (Greater Predator) |
| Bureaucrat | Nano Crystal (Greater Gunslinger) |
| Doctor | Nano Crystal (Poisoned Wounds) |
| Enforcer | Ephemeral Annoyance |
| Engineer | Nano Crystal (Miniaturization) |
| Fixer | Nano Crystal (NCU Crash) |
| Keeper | Guard of the Noble Knight |
| Martial Artist | Nano Crystal (Greater Kyudo) |
| Meta Physicist | Nano Crystal (Metaing's Improved Glacial Lance) |
| Nano Technician | Nano Crystal (Notum Overflow Injector) |
| Shade | Necklace of Alacrity |
| Soldier | Deflection Amplifier QL 2 with 2% reflect |
| Trader | Nano Crystal (My Enemy's Enemy is my Friend) |
Last updated on 02.06.2023 by Cariadast
Information originally provided by Trgeorge.
Extra information provided by Tethien RK1
Neutral quest information provided by Kryyn
MP reward confirmed by Nomez
Additional Information and Images provided by Uragon and Ukblizzard
Level lock confirmed by 1k
Details of Soldier reward from Demoder
Do you have questions about this article or found an error? 8 comment(s) - Click here to view them!
