Adventurer Guide o Doom (4/4)
Table of Contents [+]
Class: Adventurer
Faction: All Factions
Level: All Levels
Item Links:
Quicklink (copy this):
Feedback: Please Login first
Faction: All Factions
Level: All Levels
Item Links:
Quicklink (copy this):
Feedback: Please Login first
The Jack of All Trades
Table of Contents
1. Introduction
2. Breed
3. IP
4. Weapons
4a. Melee Weapons
4b. Ranged Weapons
5. Armor
5a. Beginner Armor
5b. Intermediate Armor
5c. Endgame Armor
5d. HUD/Utils Alternatives
6. Implants + Symbiants
6a. Early Levels
6b. Mid Levels
6c. High Levels
6d. End Game Levels
6e. Symbiant Comparison List
7. Nanos
8. Perks
8a Shadowlands Perks
8b Alien Invasion Perks
9. Research
10. Playing as an Adventurer
11. Weapon Specials
⇑
7. Nanos
Adventurer nanos offer a wide variety of support to our role in a team, soloing and in a raid. In this section I will split our nanos up into different categories and explain how they can help you or your team.
For a complete listing of our available nanos: http://auno.org/ao/nanos.php?prof=adventurer
| 6a Heals |
| Heals are possibly the most important nanos for an adventurer in all roles, be it soloing, working in a team or doing a raid. We have several types of heals and I would recommend keeping all of them as up to date as possible. |
| 6a.1. Single Target Heals | ||
| This does what it says on the tin can, heals a single target for an amount between X and Y HP depending on the heal in question. These heals can be split into two section as well: RK Heals :: Heals from Quick Heal to One With Nature SL Heals :: Lifecure, Light of Life and Beauty of Life In addition we have a nano called Invocation of the Phoenix. This nano will heal any target for 10k HP, however it is in no way comparable to the Doctor Equivalent "Complete Heal" because of its long cast- and recharge time. | ||
| 6a.2. Team Heals | ||
| Unlike the single target heals, this line of healing nanos will heal your entire team for a certain amount when you cast it. Team heals will however heal for less than a Single Target Heal with equal requirements. One redeeming feature of team heals is that they have no range limit, as long as your team mates are in Line of Sight they will receive the heal. | ||
Unknown ItemID: 161924 | 6a.3. Morph Instaheals | Unknown ItemID: 161924 |
| As adventurers we also get access to some extremely nice instant-heals when in our morphs. One thing to note is that except for the Sabretooth morph all of these require Shadowlands and level 195+. These heals have a 0.01/0.01 attack/recharge and are SELF-only. Especially nice if we are tanking or soloing! Note: These heals are only usable once every 25 seconds. | ||
| 6b Polymorphs |
| Next to heals, probably our most used nanos. By taking on the form of animals the adventurer is granted benefits, these will depend on which animal morph in particular you make use of. One thing to note about the Polymorphs is that none of the Shadowlands extensions to these polymorphs are castable on others. All the Rubi-Ka versions do have both (Other) and (Team) versions that you can cast on your team mates. These require slightly more nano skills and usually a slightly higher NCU usage. Note: You can only use one of the morphs at any time. |
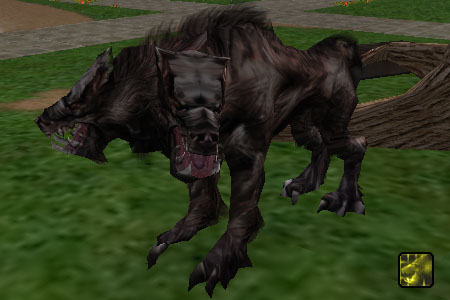 | |||||
| My personal favorite morph. The wolf morph is the more defensive of the morphs, it allows you to make use Wolf Auras (which I will cover later in this guide) gives you a bit of extra damage, some Run Speed and (in the Shadowlands extensions) adds defenses. | |||||
| Name of Morph | QL | Level Req | MM Req | BM Req | SI Req |
| Playful Cub | 47 | - | 212 | 237 | 212 |
| Playful Cub (Other) | 47 | - | 241 | 271 | 241 |
| Playful Cub (Team) | 70 | - | 300 | 344 | 300 |
| Relation to Cerberus | 119 | - | 513 | 567 | 513 |
| Relation to Cerberus (Other) | 126 | - | 543 | 603 | 543 |
| Relation to Cerberus (Team) | 132 | - | 579 | 645 | 579 |
| Calia's Form: Wolf | 156 | - | 666 | 738 | 666 |
| Calia's Form: Wolf (Other) | 159 | - | 683 | 754 | 683 |
| Calia's Form: Wolf (Team) | 162 | - | 700 | 772 | 700 |
| Calia's Morph: Wolf | 201 | 201 | 1090 | 1090 | 1089 |
| Calia's Anatomy: Wolf | 218 | 218 | 1685 | 1685 | 1676 |
| Form of Cerberus | 215 | - | 1843 | 1843 | 1834 |
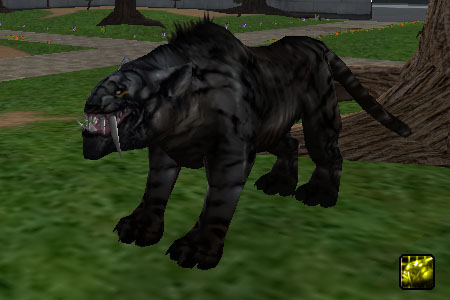 | |||||
| Aimed more at pure offense, these morphs adds more damage than the Wolf morphs, increases your chance for a critical hit and gives you a higher Attack Rating. It does however remove a bit of Run Speed as a penalty. | |||||
| Name of Morph | QL | Level Req | MM Req | BM Req | SI Req |
| Grinning Hunter | 83 | - | 355 | 402 | 355 |
| Grinning Hunter (Other) | 90 | - | 389 | 431 | 389 |
| Grinning Hunter (Team) | 93 | - | 418 | 456 | 418 |
| Calia's Form: Sabretooth | 159 | - | 692 | 763 | 692 |
| Calia's Form: Sabretooth (Other) | 165 | - | 720 | 792 | 720 |
| Calia's Form: Sabretooth (Team) | 175 | - | 759 | 839 | 759 |
| Calia's Morph Sabretooth | 203 | 203 | 1160 | 1160 | 1159 |
| Calia's Anatomy: Sabretooth | 212 | 212 | 1475 | 1475 | 1469 |
| Growling Predator | 219 | 219 | 1720 | 1720 | 1711 |
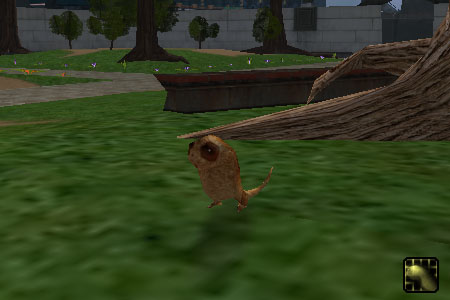 | |||||
| The first polymorph you will have access to, this little baby turns you into a small leet and increases your concealment making it a tad handy at lower levels when the concealment buff might allow you to sneak attack mobs. Beyond level 40 it's mostly just handy for social effects or when raiding in a large group. In addition it enables you to use so-called "leet charms", such as [Leet Friend. As the name implies, you are able to make a leet into your "friend" by charming it. Sadly the leets aren't too useful in combat for a variety of reasons, leaving this nano line as a social "tool". | |||||
| Name of Morph | QL | Level Req | MM Req | BM Req | SI Req |
| Pronouncement of Greatness | 20 | - | 96 | 114 | 96 |
| Pronouncement of Greatness (Other) | 149 | - | 648 | 719 | 648 |
Unknown ItemID: 85060"> 6b.4. Parrot Morph Unknown ItemID: 85060 | |||||
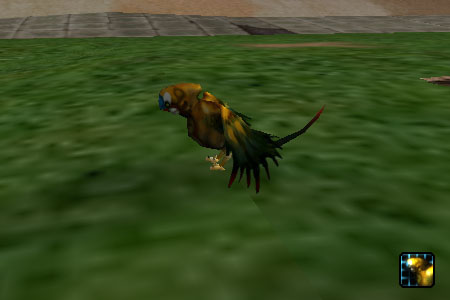 | |||||
| The only morph that is not aimed at combat. In fact these morphs will restrict combat. Mostly handy for the high Run speed buff, also the highest buff (Calia's Form: Parrot) allows for actual flight. Can only be used outdoors. Note: In the Shadowlands Calia's Form: Parrot does not enable flight. | |||||
| Name of Morph | QL | Level Req | MM Req | BM Req | SI Req |
| Sparrow Flight | 24 | - | 112 | 133 | 112 |
| Unknown ItemID: 82836 | 30 | - | 139 | 163 | 139 |
| Unknown ItemID: 85059 | 40 | - | 180 | 203 | 180 |
| Unknown ItemID: 85066 | 90 | - | 399 | 440 | 399 |
| Unknown ItemID: 85064 | 99 | - | 433 | 474 | 433 |
| Unknown ItemID: 85089 | 109 | - | 479 | 526 | 479 |
| Unknown ItemID: 25997 | 149 | - | 644 | 715 | 644 |
| Unknown ItemID: 85060 | 152 | - | 661 | 732 | 661 |
| Unknown ItemID: 85088 | 156 | - | 676 | 747 | 676 |
Unknown ItemID: 85065 Unknown ItemID: 85065 | |||||
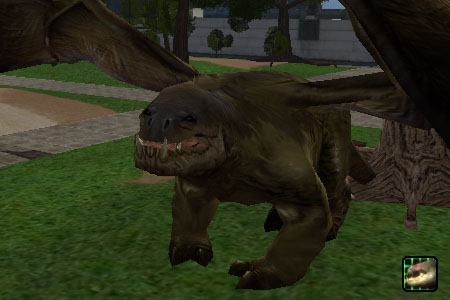 | |||||
| Ever wanted to become a huge, stinking, fire breathing dragon? Well then your dreams just came true! This morph is intended to be used when tanking as it adds a fair bit of HP and damage and allows the use of Unknown ItemID: 161877 | |||||
| Name of Morph | QL | Level Req | MM Req | BM Req | SI Req |
| Hostile Hatchling | 172 | - | 743 | 818 | 743 |
| Unknown ItemID: 85065 | 179 | - | 766 | 847 | 766 |
| Unknown ItemID: 85095 | 182 | - | 784 | 871 | 784 |
| Unknown ItemID: 217668 | 207 | 207 | 1300 | 1300 | 1297 |
| Aggressive Reptile | 220 | 220 | 1755 | 1755 | 1745 |
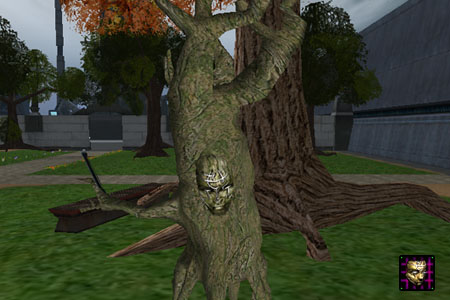 | |||||
| The only non-animal morph. This morph has limited uses. It constantly gives you (and JUST you) nano, adds a bit of heal modifier to yourself and the team and looks awesome! Sadly you are, as you might imagine as a tree, not able to move limiting its usefulness. Also it is only available for Shadowlands players. As with the Pit Lizard and Leet morph, neat for those social events! | |||||
| Name of Morph | QL | Level Req | MM Req | BM Req | SI Req |
| Grove Curator | 180 | 175 | 1004 | 1004 | 1004 |
| Grove Custodian | 205 | 205 | 1230 | 1230 | 1227 |
| Grove Guardian | 211 | 211 | 1440 | 1440 | 1435 |
| Grove Warden | 216 | 216 | 1615 | 1615 | 1607 |
| 6c. Calms | ||
| At first glance, adventurer calms might not look all that great. Unlike other professions that have calms, these require the mob in question Not be in combat. However with a Computer Deck Range Increaser and some creative use of corners this can be used as limited crowd controlling, especially when soloing. Note: Adventurers do have Area of Effect (AoE) calms in the form of "Improved" nanos that can be found in the Shadowlands. However these calms only lasts for ~15 seconds, so if you use it on mobs make sure to run past em as fast as possible! | ||
| 6d Damage Shields |
| There are three types of damage shields available to adventurers, Rubi-Ka shields, Self-only Rubi-Ka Shields and Shadowlands Cyclic shields. |
| 6d.1. Rubi-Ka Damage Shields | ||
| With the use of nano technology the adventurer casts a shield around himself that will inflict a certain amount of damage on the target hitting him. In addition a certain amount of points of X damage (depending on the nano) will be absorbed. Note: These nanos will NOT be cancelled by Bio Cocoon and stacks with the Self-Only RK shields. | ||
| 6d.2. Shadowlands Cyclic Shields | ||
| Pretty much identical to the RK counterparts, however there are a few differences. First of all the cyclic shields will absorb X amount of points in ALL damages, and every 30-120 seconds (depending on the nano) the set amount of points that can be absorbed is refreshed. Secondly these nanos are SELF-only. Note: These nanos WILL be cancelled by Bio Cocoon and can not be stacked with regular RK shields. | ||
| 6d.3. Adventurer-only Damage Shields | ||
| These nanos are "improved" versions of the regular Rubi-Ka shields. In the higher version it also adds a bit of reflects, HP and damage modifiers. Note: They are SELF-only but can be stacked with either the RK shields or SL Cyclic shields. Are not cancelled by Bio Cocoon. | ||
| 6e Perception Buffs |
| As an adventurer you have access to two different, stacking, types of perceptions. Non-wolf and Wolf-perception buffs! |
| 6e.1. Wolf Perception Buffs | ||
| These perception buffs will buff more perception than the non-wolf perception buffs. In addition the higher quality level buffs will add a bit of evades and HP for good measure! | ||
| 6e.2. Non-wolf Perception Buffs | ||
| There is two, almost identical, buffs in this line. "Eagle Eye" and "Team Eagle Eye", I will let you figure out what the difference between em is. In addition to a tiny perception buff it also adds a small amount to Aimed Shot. | ||
| 6f Wolf Auras | ||
| This is one of the best parts of the Wolf Morphs! These auras are extremely nice for yourself and the team you are in. It adds damage, evades and a bit of offense. Note: You and the team do NOT have to be in wolf form to get benefits from this aura. HOWEVER if you are in wolf-form the aura will buff more of everything! | ||
| 6g Snare/Root Resist |
| There are two different, stacking, nano lines for an adventurer that gives you a higher chance of resisting Snares and Roots. |
| 6g.1. Boon of the ... | ||
| The nanos in this line are buffable on others. | ||
| 6g.2. Freedom of the ... | ||
| ]Unlike the "Boon" version, this baby buffs more and also stacks with the Boons! However they can not be cast on others. | ||
| 6h AC Buffs | ||
| Arguably the easiest of our nanos to ignore. However if you have the NCU available and the skills required to cast em, the top AC buff will lower the damage of each hit you take with 37 points and in a hairy spot that can be the difference between reclaim or success. | ||
[strike]
| 6i Shadowlands Maps | ||
| In the Shadowlands you do not get Maps in the same way as on Rubi-Ka. Here you will need to either have enough Veteran Points to buy the "Insight into Shadowlands" map or bug an adventurer for a map! In addition to letting you see the maps of the specific Shadowlands zones it also usually buffs one or two skills. Knowledge of Inferno in particular is interesting because of its 100 Nano Resist buff! | ||
[/strike]
(As of 18.5.2, Shadowland maps are allowed for all professions. Adventurers were given a Shadowleet morph and a XP buff as compensation.)
| 6j Weapons Buffs |
| Adventurers have access to three types of Weapon skills buffs. These are as follows... |
| 6j.1. Pistol Buffs | ||
| As the name implies, it buffs your Pistol skill. The higher Quality nanos will in addition give you a slight bit of Fling Shot and +damage. Be sure to have the highest QL available. Note: even has its uses for Melee advies since there are a lot of "buffing pistols" out there. | ||
| 6j.2. 1 Hand Edged Buffs | ||
| The melee counterpart of the pistols buffs. At higher QLs it also adds +damage and a bit of Fast Attack. | ||
| 6j.3. Multi Melee/Multi Ranged Buffs | ||
| As a duel wielding prof you will be wanting to get these babies as they are available to you. Also, the higher qualities will give you a bit of evades which you can never get enough of. | ||
| 6k Sabretooth Occasional Damage Boosts | ||
| As a Sabretooth you can buff yourself every two minutes with one of the Sabretooth damage boosts. It adds damage, inits, critical chance as well as offense and defense. | ||
| 6l Run Speed Buffs | ||
| In addition to Run Speed in our Wolf, we can also buff ourselves with a low Run speed buff. Not exactly as good as some of the Fixer buffs, but extremely handy at low levels when you need to move a bit faster. Note: Does not stack with Parrot form or Fixer Run Speed buffs. | ||
Unknown ItemID: 161694 | 6m Dragon Form Nukes | Unknown ItemID: 161694 |
| Yes, that's right... Adventurers have nukes. Three of them! Even an AoE version too! Sadly it requires us to be in Pit Lizard and can only be used once every minute. | ||
| 6n Adventurer Spirit Tech Source Pets | ||
| Adventurer pets do have their uses. While they are stationary, they can be handy to your team since when sitting down it will regenerate your Health and Nano points. Sadly it is completely stationary and can only be used outside in the Shadowlands, limit its use further. | ||
⇑
8. Perks
To assign perks you are required to have either Shadowlands or Alien Invasion. Each of the expansion have different perks which can be accessed via the Perks window (Quick Key: Shift+P). Perks named in green are Alien Invasion Perks.
⇑
8a Shadowlands Perks
You are given one Shadowlands perk every 10 regular levels and every single shadowlevel.
8a.1. Ferocity of Nature
Handy line if you need that last bit of Multi Melee/Ranged or if you are one of those DD-whores like myself. The specials aren't too impressive, since they require you to be in certain morphs meaning that you can not use all of em without terminating and recasting new morphs.
All in all, if you have 3 perks to offer, the damage modifier will come in handy and the "Devour" special does heal you a slight bit when you are in wolf form.
Total Stats:
Multi melee 20
Multi ranged 20
55 Damage Modifier
Specials:
Bleeding Wounds
Devour
Gutting Blow
8a.2. Outdoorsman
For ranged adventurers this line is not too impressive, however for melees it adds a bit of 1he. The Special "Stoneworks", a 20m AoE root, isn't too impressive, requires "Encase in Stone" from the "Mountaineer" line to be running.
Total Stats:
200 Swimming
50 Adventuring
30 Multi melee
20 1h Edged
30 Multi ranged
90 Run speed
6% Root Resist
6% Snare Resist
Specials::
Stoneworks
8a.3. Shadowstalker
A bit lacking in weapon special buffing for ranged users, but it does add a bit of defense and evades as well as some fairly alright specials. The specials however require you to be using melee weapons (and be behind the target), thus leaving ranged advies out in the rain.
Total Stats:
25 Agility
45 Defense modifier
80 Sneak attack
10 Duck explosives
10 Dodge ranged
10 Evade close
90 Concealment
Specials:
Blade of Night
Shadow Killer
Shadow Stab
8a.4. Lightstalker
The ranged equivalent of Shadowstalker, gives the same amount of Agility and evades, but instead of Sneak Attack, it provides you with Aimed Shot.
Total Stats:
25 Agility
45 Defense modifier
80 Aimed Shot
10 Duck explosives
10 Dodge ranged
10 Evade close
90 Concealment
Specials:
Light Bullet
Power of Light
Light Killer
8a.5 Acrobat
Extremely nice set of perks. Not only does it gives a massive amount to all different evades, it has what I would consider the two best defensive perks available to an adventurer. Put perk points into this as soon as possible.
Total Stats:
30 Agility
30 Multi melee
30 Multi ranged
190 Duck explosives
190 Dodge ranged
190 Evade close
Specials:
Limber
Dance of Fools
8a.6. Bio Shielding
Another great defensive perk line for adventurers. The stats (Until the last two, which give a bit of reflects) might not be too impressive. But Bio Cocoon alone makes this line worth it. Bio Rejuvenation and Bio Regrowth adds a bit more healing potential to you.
Total Stats:
890 ACs
3 Reflect Damage
80 Shield damage
Specials:
Bio Cocoon
Bio Regrowth
Bio Rejuvenation
Bio Shield
8a.7. Edged Mastery
A must-have for any melee adventurer. Adds to our weapon skills as well as some very powerful perks.
Total Stats:
180 1h Edged
50 Fast attack
Specials:
Flay
Flurry of Cuts
Quick Cut
Ribbon Flesh
8a.8. Mountaineer
Mostly useful for buffing up your Strength and Stamina, however the Encase in Stoneworks does allow the use of the Stoneworks perk from the Outdoorsman line which might be handy in Tower Wars. For a PvM character this wouldn't be the first line to toss perk points into.
Total Stats:
35 Strength
35 Stamina
215 Max health
90 Adventuring
Specials:
Detonate Stoneworks
Encase in Stone
8a.9. Pistol Mastery
The ranged counterpart of Edged Mastery, and arguably one of the best weapon perklines in the game. The perks are amazing, both for the damage provided, as well as the defensive check. Most weapon perks check 100% of the appropriate evade, but the Pistol Mastery perks check dodge-ranged 80%. An excellent line for any ranged adventurer to perk.
Total Stats:
200 Pistol
20 Fling shot
60 Damage Modifier
Specials:
Deadeye
Double Shot
Quick Shot
8a.10. Spatial Displacement
This line is mostly for PvP, since it ups your resistance to Roots and Snares as well as give perks to remove Roots and Snares from your NCU. For PvM characters this line can easily be dropped.
Total Stats:
45% Root Resist
45% Snare Resist
Specials:
Purge 1
Removal 1
Purge 2
Removal 2
Great Purge
8a.11. Genius
For most professions that use a lot of nanos in combat, this is a quite handy perk since 2 perk points into it will give you access to a great nano regaining perk special. Especially for atrox adventurers this will be great for keeping their nano up.
Total Stats:
40 Intelligence
40 Psychic
120 Nano pool
Specials:
Regain Nano
⇑
8b Alien Invasion Perks
One Alien Invasion Perk is given per Alien Level you have. For more information on level requirements and AXP requirements, have a glance at This Guide.
8b.1. The Call
All in all not a too shabby place to stick your AI Perks, gives a bit of nano and health as well as weapon specials and evades. The "Awakening" perk is an extremely nice team heal and Nocturnal Strike is a decent damage perk. If you have the AI perk points, feel free to add a few points into this one.
Total Stats:
520 Max nano
520 Max health
51 Fast attack
51 Fling shot
51 Dodge ranged
51 Evade close
51 Duck explosives
Specials:
Awakening
Beckoning
Nocturnal Strike
8b.2. Counterweight
An alright perk line to toss some points into for the extra Multi Melee/Ranged. The perks do not impress me enough to put points into 'em, might be an alternative for PvP adventurers.
Total Stats:
100 Multi Melee
100 Multi Ranged
Specials:
Full Frontal
Confinement
8b.3. Champion of Light Artillery
If you're a ranged adventurer you'll want a few perks into this line. In addition to adding some much needed Pistol skill it also has two decent damage perks.
Total Stats:
100 Pistol
100 SMG
100 Shotgun
Specials:
Collapser
Implode
8b.4. Champion of Light Infantry
For melee adventurers it's definitely a place to put those AI perks into. Adds some 1h edged as well as giving you access to two very nice damage perks.
Total Stats:
100 1h edged
100 1h blunt
100 Martial Arts
100 Piercing
Specials:
Crave
Bore
8b.5. Champion of Nano Combat
An alternative line to put AI perks into for the more support-orientated adventurer to be able to use better heals and nanos. In addition it gives two great perks that are especially nice against enemies that have high evades since they check Nano Resist.
Total Stats:
100 Nano skills
Specials:
Nano Feast
Bot Confinement
8b.6. Alien Technology Expertise
A perk line which is required to equip Alien Armor. Personally I keep ATE3 perked at all times because I switch armor often, others prefer those 3 perks placed in other perk lines.
⇑
9. Research
With Lost Eden each profession was allowed 7 lines of different "research". These are somewhat similar to perks, however instead of being allowed X amount at X level you can place X% of your XP/SK into the research line of your choice and once it has been finished you will always have it "perked".
First off I will go over each individual line and what each research level offers you, then I will go over a total stat/skill increase and finally a quick run-down of the exciting procs available to adventurers.
9a Exploration
"Some adventurers specialize in exploring previously unknown and dangerous territory"
L1: 5 Stamina
L2: 10 Bio Metamor
L3: 15 Run Speed
L4: 10 Stamina
L5: 20 Matter Crea
L6: Special: Charring Blow
L7: 30 Sensory Impr
L8: Special: Aesir Absorption
L9: 50 Bio Metamor
L10: 25 Stamina
9b Keen Eyes
"An observant adventurer always stays aware of their surroundings and any possible dangers"
L1: 10 Ranged Init
L2: 5 Sense
L3: 15 Sensory Improvement
L4: 10 Strength
L5: 10 Stamina
L6: 25 Bio Metamor
L7: Special: Machete Flurry
L8: 50 Melee Init
L9: 50 Matt.Metam
L10: Special: Healing Herbs
9c Wilderness Lore
"An adventurer with wilderness lore has studied the flora and fauna of Rubi-Ka, and can use it to their advantage"
L1: Special: Basic Dressing
L2: Special: Soothing Herbs
L3: 10 Intelligence
L4: 15 Bio Metamor
L5: 20 Sensory Impr
L6: 10 Agility
L7: 30 Matter Crea
L8: 50 Ranged Init
L9: 15 Stamina
L10: 60 Bio Metamor
9d Gunslinger
"Gunslingers practice with their pistols until the pistol is virtually an extension of their body."
L1: 5 Pistol
L2: 10 Fling Shot
L3: Special: Skin Protection
L4: 15 Pistol
L5: 15 Fling Shot
L6: 30 Pistol
L7: 30 Burst
L8: 50 Pistol
L9: 50 Fling Shot
L10: 60 Pistol
9e Wilderness Survival
"Some adventurers have made an art out of surviving far away from the confines and safety of civilization."
L1: 5 1h Edged
L2: 10 Fast Attack
L3: Special: Machete Slice
L4: Special: Restore Vigor
L5: 20 1h Edged
L6: 30 Sneak Atck
L7: 50 1h Edged
L8: 50 Fast Attack
L9: 60 1h Edged
L10: Special: Combustion
9f Game Warden
"Volunteer wardens act to protect and control the fauna of Rubi-Ka to the best of their abilities on such a troubled world"
L1: Special: Ferocious Hits
L2: 5 Stamina
L3: 10 Agility
L4: 15 Matt.Metam
L5: 10 Sense
L6: 10 Strength
L7: 40 Psycho Modi
L8: 15 Psychic
L9: 150 Max Health
L10: 60 Matt.Metam
9g Safari Guide
"Adventurers are often hired when the elite of Rubi-Ka wish to go hunting and are in need of an expert"
L1: 5 Psychic
L2: 10 Matter Crea
L3: 15 Psycho Modi
L4: 10 Sense
L5: Special: Durable Bandages
L6: 25 1h Edged
L7: 15 Agility
L8: 50 Matt.Metam
L9: 50 Sensory Impr
L10: 25 Agility
9h Total Stats
Abilities
Intelligence 10
Agility 60
Stamina 70
Psychic 20
Sense 25
Strength 20
Max health 150
Melee
Fast attack 60
1h Edged 160
Sneak attack 30
Ranged
Pistol 160
Fling shot 75
Burst 30
Speed
Ranged init 60
Melee init 50
Run speed 15
Nano and Aiding
Biological metamorphosis 160
Matter creation 60
Sensory improvement 115
Psychological modifications 55
Matter metamorphosis 175
9i Research Procs/Specials
Taken from Glarawyn's thread in the AO Forums.
Complete List of Type 1 Actions
| Name | Research Line |
| Machete Slice | Wilderness Survival Level 3 |
| Skin Protection | Gunslinger Level 3 |
| Skin Protection | Gunslinger Level 3 |
| Charring Blow | Exploration Level 6 |
| Machete Flurry | Keen Eyes Level 7 |
| Aesir Absorption | Exploration Level 8 |
Complete List of Type 2 Actions
| Name | Research Line |
| Flaming Hit | Game Warden Level 1 |
| Basic Dressing | Wilderness Lore Level 1 |
| Soothing Herbs | Wilderness Lore Level 2 |
| Restore Vigor | Wilderness Survival Level 4 |
| Durable Bandages | Safari Guide Level 5 |
| Healing Herbs | Keen Eyes Level 10 |
| Combustion | Wilderness Survival Level 10 |
Actions and their effects
Type 1 Direct Damage
:: Direct Damage actions have a chance of performing an extra hit on your target ::
:: Direct Damage actions have a chance of performing an extra hit on your target ::
| Name | Research Line | Effect |
| Machete Slice | Wilderness Survival 3 | 5% 137-350 FireAC |
| Charring Blow | Exploration 6 | 5% 533-1120 (Under 220) 844-1434 (220) FireAC |
Type 1 Shield
:: Shield actions have a chance of raising an extra shield ::
:: Shield actions have a chance of raising an extra shield ::
| Name | Research Line | Effect |
| Skin Protection | Gunslinger 3 | 10% ShieldAC31, AbsorbAC 150 (15 ticks at 2 minutes) |
Type 1 Defense
:: Defense actions have a chance of increasing your defenses ::
:: Defense actions have a chance of increasing your defenses ::
| Name | Research Line | Effect |
| Aesir Absorption | Exploration 8 | 10% AddAllDef 50 |
Type 2 Direct Damage
:: Direct Damage actions have a chance of performing an extra hit on your target ::
:: Direct Damage actions have a chance of performing an extra hit on your target ::
| Name | Research Line | Effect |
| Flaming Hit | Game Warden 1 | 5% 12-22 FireAC |
| Combustion | Wilderness Survival 10 | 5% 1294-2415 |
Type 1 Damage Buff
:: Damage Buff actions have a chance of adding additional damage to your normal attacks ::
:: Damage Buff actions have a chance of adding additional damage to your normal attacks ::
| Name | Research Line | Effect |
| Machete Flurry | Keen Eyes 7 | 5% +60 Damage |
Type 2 Heal
:: Heal actions have a chance of healing yourself or your team. (When you're hit) ::
:: Heal actions have a chance of healing yourself or your team. (When you're hit) ::
| Name | Research Line | Effect |
| Basic Dressing | Wilderness Lore 1 | 5% 15-25 :: Self |
| Soothing Herbs | Wilderness Lore 2 | 5% 186-391 :: Self |
| Durable Bandages | Safari Guide 5 | 5% 261-595 :: Team |
| Restore Vigor | Wilderness Survival 4 | 5% 356-746 :: Self |
| Healing Herbs | Keen Eyes 10 | 5% 697-1193 :: Self |
⇑
10. Playing as an Adventurer

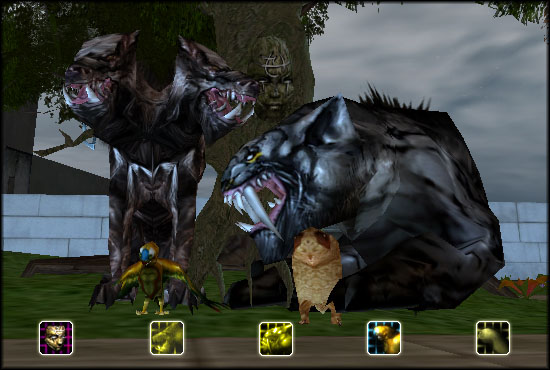
Back row from the left: Speedyadvy, Burntorun, Quilluck, Yoham
Lying in front: Nahuatl
Back row from the left: Speedyadvy, Burntorun, Quilluck, Yoham
Lying in front: Nahuatl
Adventurers are, arguably, one of the best overall professions in PvM, and can be played in a wide variety of ways. I will try to go through the basics of how to play the profession, mainly in PvM.
10a. Solo
Except for Doctors, I would argue that as a soloing profession adventurers are at the top. Remember to bring your swords or pistols to the party.
10a.1 General Tips
Once you get to a level where you have both Dance of Fools and Limber from the Acrobat Perk Line I would recommend "cycling" through them to lessen the period in which you are a bit more touchable. My general rule of thumb is firing off DoF, wait until ~20 seconds remains and then perk Limber. If you've timed it right you can cycle through DoF and Limber with very little time when you have neither of the perks running.
If running through very hostile territory tactical use of our calms can be an excellent idea. As mentioned previously in this guide, Adventurer calms require that your target Not be in a fight, this means that you will have to be a bit sly to not attract any friends of the target you are calming. Be sure to grab a Computer Deck Range Increaser, the longer away you are from the target you are trying to calm, the less likely you are to end up with a few social mates chewing on you. Creative use of the landscape, such as hills, corners, etc can also decrease the chances of unforeseen mobs becoming aware of your presence.
Don't be afraid to try taking on mobs that you think you might be unable to take on, there's nothing more satisfying than surprising yourself!
10a.2 Defensively focused
Adventurers work great when soloing in a defensive setup, we have excellent evade support and add on top of that our heals and we can easily handle most things that are tossed our way. The only downside, depending on what mob in particular you are fighting, is that as a defensive adventurer you will spend a longer time in a fight solo. In a tight fight, that could be the end of you.
10a.3 Offensively focused
An offensive adventurer is likely to have compromised his/her/its defensive capabilities, be it pure evades, AAD or perks and possibly even lesser healing capabilities in certain leveling ranges. In boss fights, and even against capable regular mobs, offensive advies might have to resort to kiting. A truly pimped out offensive adventurer can be compared to some of the best damage dealers in Anarchy Online.
10a.4 Healing focused
Can't say I have met too many of these adventurers myself, but they do exist. And depending on how focused they are on keeping their nano pool in working order, they might be lacking in NCU, evades, offense and perks. It's an interesting choice, however it might prove difficult to solo when lacking both offense and defense. If you focus on heals, you will be a great asset to your team but you might not be quite as capable at handling things on your own.
10b. Teams
Adventurers generally have no problem getting teams. Extra heals, great damage and a decent support profession. You might also be called on to be the designated tank or even secondary tank.
Be sure to run your wolf auras, even if you are not in Wolf Form you and your team will still get lesser benefits from it.
If you have problems keeping up with your nano, a good tip is to perk Genius 2 for the Regain Nano perk action.
While your heals are usually not comparable to doctors, you can certainly lessen the load on the doctor if there is one in team by helping out with additional heals. So be sure to have the best heals possible.
It is not impossible for the team to rely on you as the tank if no soldier or enforcer is available. While adventurers do have a lot of defensive tools to keep damage taken at a minimum, we lack in the taunting section. So be certain to talk to your team and inform them that they might have to hold back on their damage, especially the big damage dealing professions. Since you will rely solely on the damage the mob is registering from you, be sure to use all your specials and perks as well as running the best damage shields you can find.
In general an adventurer can fill most, excuse the term, holes in a team semi-decently. Just make sure you inform your team that you can not heal as well as a doctor, tank as well as an enforcer, calm as well as a crat, etc.
⇑
11. Weapon Specials
Both Melee and Ranged Adventurers have a wide array of specials. In this section I will quickly sum up the basics of each of the them, as well as the recharge calculations if there is any.
11a Ranged Specials
11a.1 Fling Shot
 | |
| This special attack works the same as any normal attack, only the recharge for this attack is based on the Fling Shot skill. Fling Shot uses up one unit of ammunition. | |
| Recharge Calculation: 1600 x Attack Speed - Fling Shot skill 100 | Minimum Recharge Time: 6 Seconds + Attack Speed |
11a.2 Burst
 | |
| Burst, as the icon implies, is a special that shoots three bullets at once. BurstCycle is a property of the individual weapon, you can not see this ingame, but it can be found in the AO Item databases such as Auno. | |
| Recharge Calculation: 2000 x Recharge + BurstCycle - 4x Burst skill 100 | Minimum Recharge Time: 8 Seconds + Attack Speed |
11a.3 Full Auto
 | |
| A Full Auto attack causes the weapon to fire all of its remaining bullets at the target. This isn't always as efficient as some would like though, as the Full Auto Skill determines how many bullets actually hit the intended target up to a maximum of 15 bullets. This damage is also affected by how many shots are remaining in the weapon, so if there are only five bullets in the gun then a maximum of 5 bullets have a chance to hit even if a character normally could hit with as many as 15. Full Auto Cycle is, as Burst Cycle, defined by each individual weapon, Item databases such as Auno list it. | |
| Recharge Calculation: 4000 x Recharge Speed + FullAutoCycle - 4x FA skill 100 | Minimum Recharge Time: 10 Seconds + Recharge Speed |
11a.4 Aimed Shot
 | |
| Aimed Shot is, mostly, reserved for ranged advies in PvP as adventurers do not have nearly enough Concealment to hide from mobs of even equal level. In PvP it is not required for the target to unaware of your presence. | |
| Recharge Calculation: 4000 x Recharge Speed - 3x AS skill 100 | Minimum Recharge Time: 10 Seconds + Attack Speed |
11b Melee Specials
11b.1 Fast Attack
 | |
| In essence, Fast Attack is just another attack only with the recharge calculated from your Fast Attack skill instead of the Weapon recharge and your initiative. Basically it is the Fling Shot equivalent for Melee. | |
| Recharge Calculation: (Attack Speed x 15) - FA Skill 100 | Minimum Recharge Time: 5 Seconds + Recharge Speed |
11b.2 Brawl
 | |
| Brawl's chance of hitting and damage are both determined by the character's Brawl Skill. Unlike almost all other weapon specials, it has a hardcap and recharge stays at 15 seconds no matter what your Brawl skill or recharge/attack speed. | |
| Recharge Calculation: Brawl has a 15 second hardcap | Minimum Recharge Time: 15 seconds. |
11b.3 Dimach
 | |
| Dimach is, for adventurers, not a hugely important special. It will have a recharge of 30 minutes for adventurers, but it can potentially do a very huge amount of damage and can be the deciding factor in a PvP fight. | |
| Recharge Calculation: Only varies for Martial Artists | Minimum Recharge Time: 30 Minutes |
11b.4 Sneak Attack
 | |
| Sneak Attack is the Aimed Shot for Melee. Like Aimed Shot it requires that the mob you are targeting is unaware of your presence. As with Aimed Shot it is mostly a special used in PvP, since adventurers do not have a huge amount of concealment to be able to hide from mobs of even their own level. | |
| Recharge Calculation: Unknown | Minimum Recharge Time: Unknown. 40 seconds is the usual recharge for adventurers. |
11b.5 Backstab
 | ||
| Backstab is an addition to Sneak Attack that only applies to Shades and Adventurers. For enabling and additional damage and critical modifiers you will require various levels of Sneak Attack BASE skill (Read: Un-buffed and Un-implanted Sneak Attack skill.) To use this attack the character must be standing behind the target with the target fighting someone else. Backstab is also the only weapon special I am aware of that is affected by Skill Lock Modifier. | ||
| Backstab Progression: Enabled: 350 Sneak Attack Skill Damage Multipliers: 540 Sneak Attack Skill Critical Backstab: 625 Sneak Attack Skill | Recharge Calculation: 40 - Sneak Attack skill/150) 2 | Minimum Recharge Time: Unknown |
Final Words
I hope you have got a good sense of the adventurer profession from this guide, and any constructive feedback is more than welcome. Remember that the profession is extremely varied and wide ranging. Best of wishes with your adventurer. Enjoy!
The Pit Lizard was not invited along due to its corrosive cloud of bad breath.
| Previous Section: Implants and Symbiants |
Last updated on 10.17.2012 by Llie
Originally written by Quilluck.
Additional Information about Research Procs provided by Glarawyn.
Additional help by Ophiuchus & Tinkerz.
Models Nahuatl, Speedyadvy, Burntorun, Yoham, Darvi, Yaroze, Sinhound
Do you have questions about this article or found an error? No comments yet - Please login first to post a comment.
