Jobe Scientists
Table of Contents [+]
Class: All Classes
Faction: All Factions
Level: All Levels
Item Links:
Quicklink (copy this):
Feedback: Feedback-Thread
Any special reward for completing parts of this questline will be mentioned in guide. With few exceptions, the order of quests is set as continuing line. This quest line isn't level locked. Faction: All Factions
Level: All Levels
Item Links:
Quicklink (copy this):
Feedback: Feedback-Thread
Also note that the amount of xp you get from this quest is huge. You'll get the equivalent of a Daily Mission for many parts of this quest line. They are marked with DMxp below.
⇑
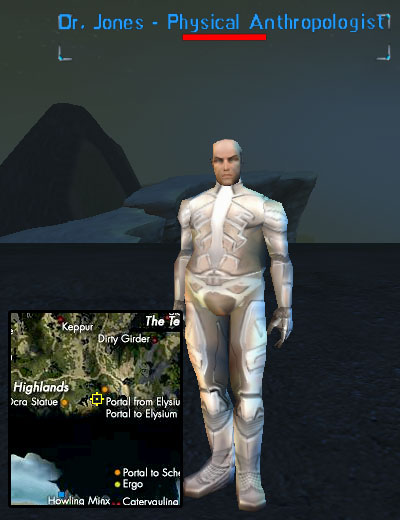
Dr. JonesRead the latest copy of Jobe Scientist?
Dr. Jones
certainly has a lot to say about his field of expertise. When you have listened to what he has to say you will probably be brimming with excitement to get started on the work he has to offer you. Scheol Upper - 1179.4x92.4
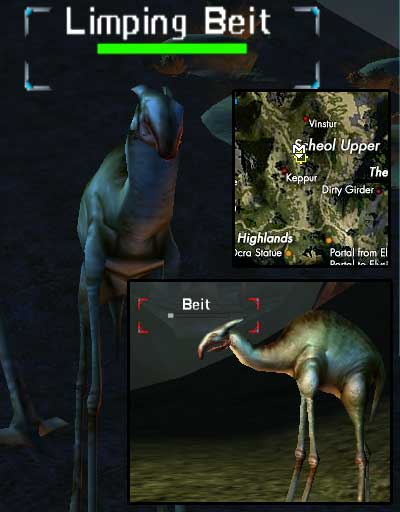
To start you off nice and easily, when you ask him whether you can help, he has 2 simple quests for you. Firstly you will need to find and observe (target) Limping Beit and regular Beit. They are located just north of where he is standing.
Target them in the specified order to fulfill this mission (and receive 100k xp and DMxp).
At the same time as receiving the other mission, you will have received one to find and kill 3 Aggresive Beits.
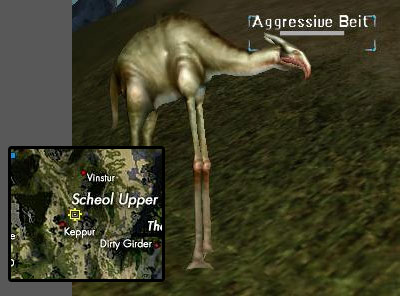
When you kill each of them, three Beit Bones will spawn in your inventory. (Please note: These mobs might not be at the exact spot the map shows, since they start roaming around once spawned. You'll get 150k xp and DMxp for this part of the quest.)
Once you return, he wants another set of Bones, this time Old Beit Bones, which are located in The Plundge, Facility Entrance.
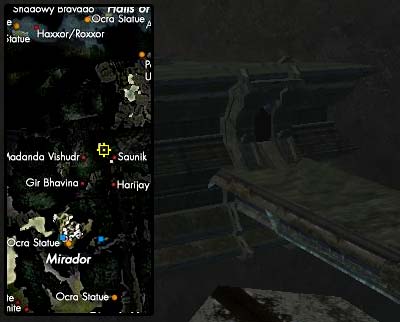
The mission requires you to find the item in a dungeon, pick it up and bring it back. The bones will look like a skeleton rib cage:
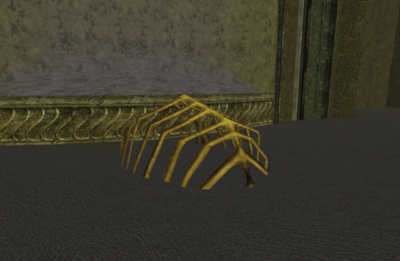
Note: You must target the old bones first and then pick them up to your inventory before you leave the mission to return to Dr. Jones.
So, with the old bones in your inventory and your mission updated, you need to head back to Dr Jones, open dialog with him and trade him his old bones (another 200k xp and DMxp for you). After a chat, he will direct you to
Technologist Frank Jobin
.Scheol Upper - 1065.6x1814.8
⇑
Technologist Frank Jobin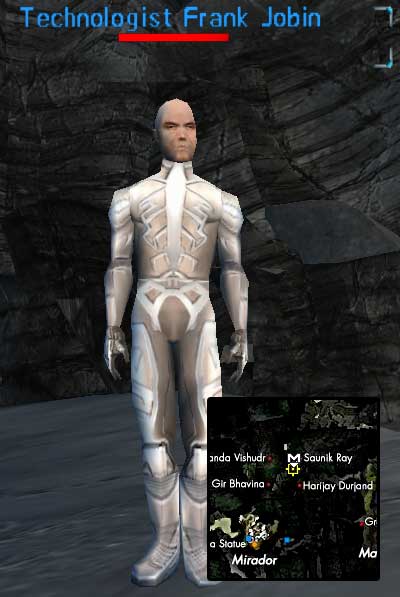
Frank will talk to you about the structure of the Notum Battery Tree which he is stood next to. He also wants you to obtain a Crystal Filled by the Source for him, of which the quality level of crystal doesn't appear to matter.
When you have gained one and traded it with him, he will ask you to spawn 2 crystals for him.
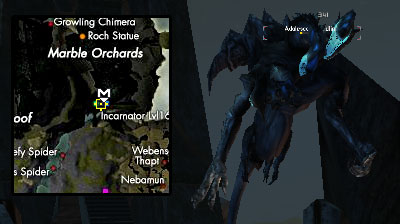
You will need to spawn these at the Incarnators in Scheol. The mission has a way point of the western incarnator to start with. So, lets head there!
To spawn poket bosses, you must target the incarnator by clicking it, and then click the crystal while it is in your inventory.
Our first spawn will be the Imature Voidling:
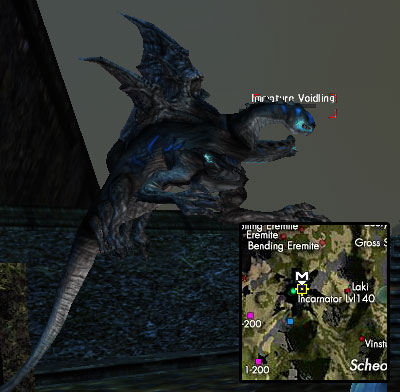
Once that is killed, your mission will update and show you towards the eastern incarnator.
The second pocket boss to spawn is the Adolescent Voidling:
Neither of these pocket bosses drop anything, so as soon as the second one hits the floor, you can start heading back to Frank. When you begin talking with him you'll get 570k xp and DMxp and he will tell you about how the incarnators work, but not long into the conversation will suggest that you speak with Dr Hestiya. He asks you to deliver an Ancient device to her while you are there.
⇑
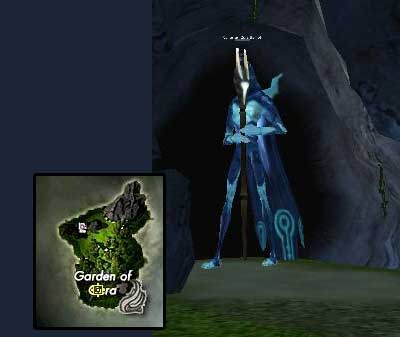
Dr.Hestiya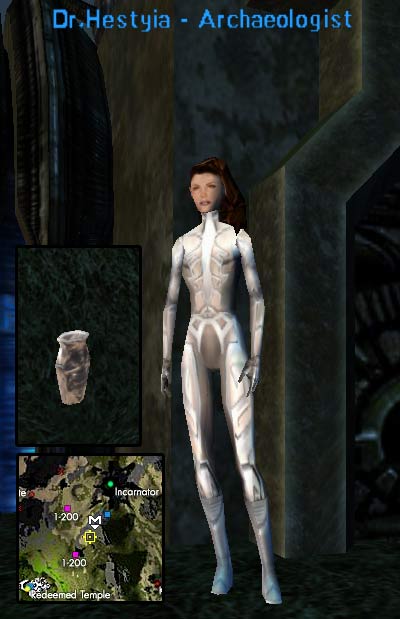
Dr. Hestiya
is located at 805x605 within a camp of level 120 malahs. After delivering the Ancient Device, she will identify it as an Ancient Novictum Refiner, which is used for subduing novictum in the process of making pocket boss crystals. Since she doesn't need it, she will give it back to you to keep (the item is not unique anymore since patch 18.4.13). She needs three different Xan Nanocrystals and will give you a Space-Time Extraction Device used to extract those. You can harvest the crystals by right clicking this device on jars on the ground. One set of them is located right south of Dr. Hestiya and there's another set near the western incarnator.Scheol Upper - 805x605
You will have to extract three of the following types of crystals: Cracked Xan Notum Crystal, Deformed Xan Notum Crystal, Pristine Xan Notum Crystal, or Empty Xan Notum Crystal. Once you return to her and deliver those (300k xp and DMxp), she directs you to on towards Dr.Curry, an expert in linguistics.
Hint: It is advisable that you try to get one of the books mentioned below before you got to Halls of Scheol to Dr. Curry.
⇑
Dr.CurryDr. Curry
is located at 1090x1145.Scheol Lower - 1090x1145
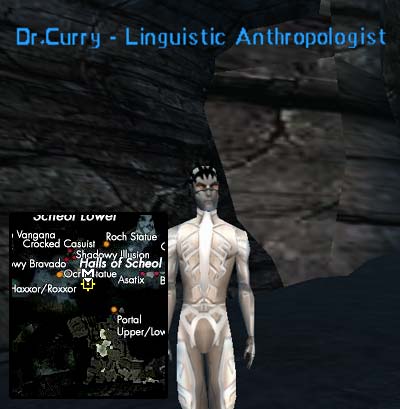
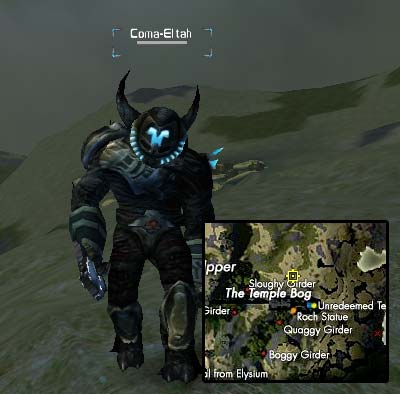
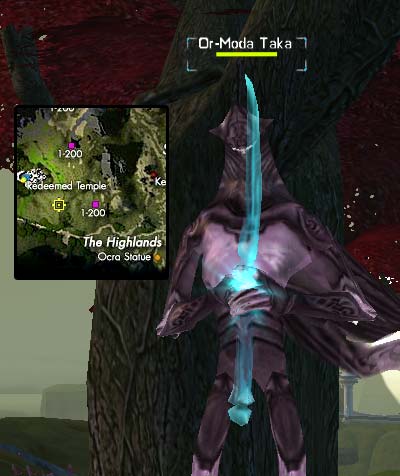
As we show our interest in learning about the Xan, he sends us off to gather literature. He is interested in one of these holy books: The Word of Roch or The Word of Ocra. He isn't picky which once you deliver to him. Those drop from Coma-Eltah (Roch) and Or-Mada Taka (Ocra), located outside the temples. Since those are sided mobs, unless you are neutral, it is advisable to pick the opposing faction's guardians to kill. While you are there, also stay on the lookout for an Ancient Insignia of Roch or Ancient Insignia of Ocra. You will need these in a later part of this line of quests.
Once you return with to him with one of the books (and earn 200k xp and DMxp), he has another task for you. Equipped with a Hadron Recording Device, you are sent to earsdrop on specific targets from both factions. The device's description explains exactly why it appears to be "just a lump of rock" -- ingenious, huh? In any case, you are now the proud temporary owner of a well disguised listening device, and are going to use it on these two creatures:
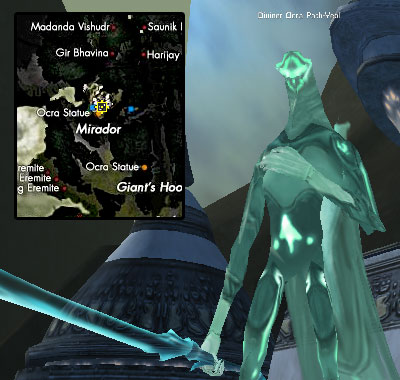
Diviner Ocra Path-Yeol
, who can be found at Mirador (920x1235) and Scheol Upper - 930x1540
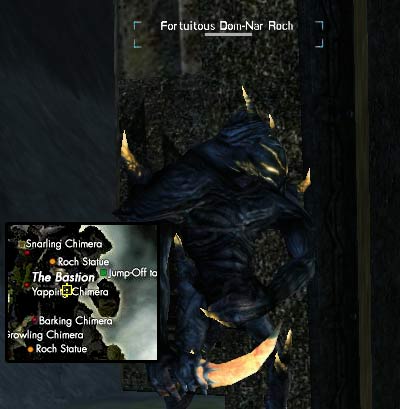
Fortuitous Dom-Nar Roch
, to be found in Bastion (1581.8x1783.7).Scheol Upper - 1581.8x1783.7
For both of them, you need to right click the device on them. When we did this questline we found that it could be done from quite a distance, however recent comments have suggested that you do now need to get a little closer.
When you have made the recordings return the device to Dr. Curry (and get 400xp and DMxp). He suggests you pay a visit to Dr. Darnell.
⇑
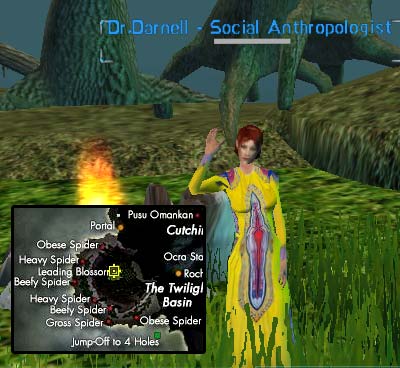
Dr. DarnellDr. Darnell
is sitting next to Leading Blossom at 310x1110. To get to her can be kind of tricky the first time around. So, we took you a picture! Scheol Lower - 310x1110
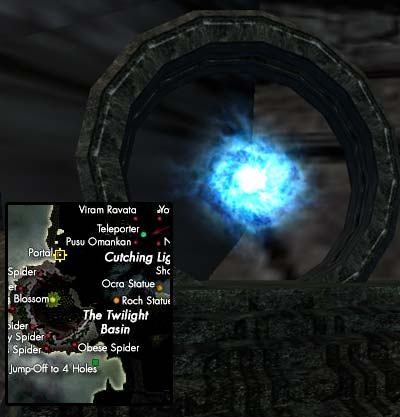
If you head towards the northern edge of where it states Leading Blossom on the Sphere map, you will get to an edge. If you move your camera angle around, you will see the portal on a ledge just below you:
Don't over jump when you pop down there or else you will have quite a run on your hands back from Rubi ka!
When using the dialog option stating that we were looking for a job.
Dr. Darnell seems to be trying to gain knowledge from studying the ways of the yuttos. She has two tasks for you, you can initiate dialog with her twice in order to get both of the quests uploaded to your mission panel.
One of her tasks sent us on our way to bring back a Spun Pygmaeus Platter from The Uncharted Entrance dungeon. This is a dynamically generated mission with mobs your level, so if you brought help be sure to have a mission key duplicator with you for your companions.
The Dungeon, whilst marked on the map with the mission symbol, is not immediately obvious in it's location. Head West past the Girder Runts and turn left through the Mutant Spiders.
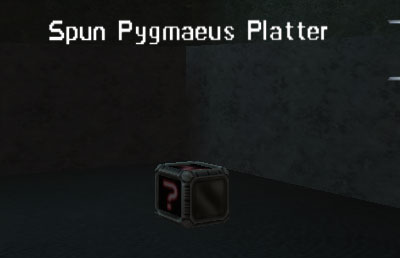
Again.. really isn't what I would think a platter would look like, but on second inspection when you see it in your inventory, it sure looks good enough to eat your dinner off. Armed with your platter, return back to Dr Darnell. You'll receive 300k xp and DMxp for your efforts.
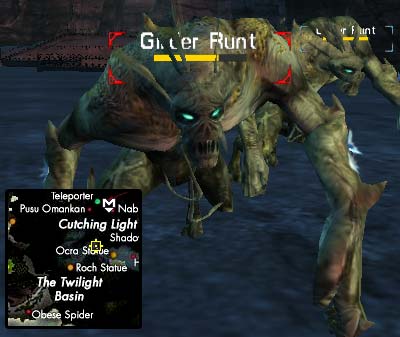
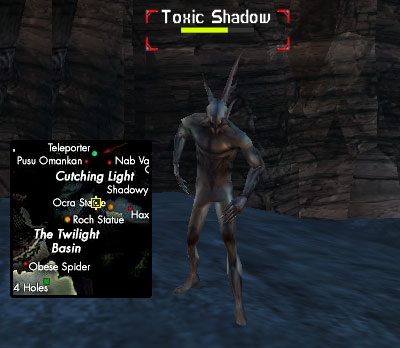
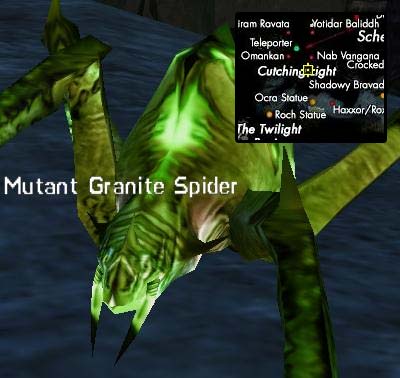
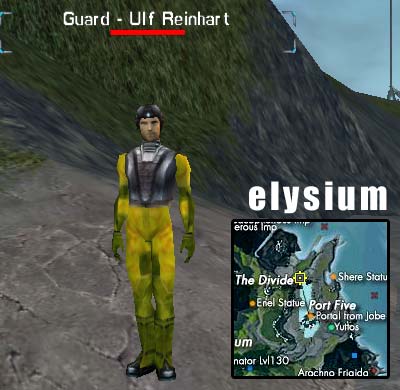
Dr. Darnell's other assignment is an urgent one, and requires you to collect some DNA samples. For those, you need to kill Toxic Shadows for Tagged Shadow DNA sample, Girder Runts for Tagged Girder DNA sample and Mutant Granite Spiders for Tagged Spider DNA sample. In all 3 cases you need to loot DNA sample of the corpse, which seem to drop quite often. Finding mobs shouldn't pose major problem, since you passed most of them on your previus quest.
Once you secure samples, you need to deliver them to Guard Ulf Reinhart at Port5 in Elysium. As a receipt for these, you will receive a Delivery Confirmation for Dr. Darnell.
So back to her we head. After receiving the confirmation, Dr. Darnell will send you on a courier job to deliver a Jobe Research Symbolism Reference Library to Dr. Hestiya. So... back just south of the level 140 incarnator we go on our messenger duties. She in turn will give you a profession specific reward (You will need to have retrieved Spun Pygmaeus Platter for Dr. Darnell as well as delivering the DNA samples before you will receive this reward):
| Adventurer | Nano Crystal (Learning by Doing (Team)) |
| Agent | Nano Crystal (Lesser Predator) |
| Bureaucrat | Nano Crystal (Skilled Gunslinger) |
| Doctor | Nano Crystal (Simple Viral Agent) |
| Enforcer | Ephemeral Annoyance ql 120 |
| Engineer | Nano Crystal (Lesser Miniaturization) |
| Fixer | Nano Crystal (Minor NCU Crash) |
| Keeper | Shield of the Honorable Warrior |
| Martial Artist | Nano Crystal (Kyudo) |
| Meta Phisicist | Mesmerizing Staff of Francois |
| Nano Technician | Nano Crystal (Nanobot Shelter) |
| Shade | Necklace of Alacrity |
| Soldier | Deflection Amplifier |
| Trader | Nano Crystal (Minor Nanobot Defense) |
⇑
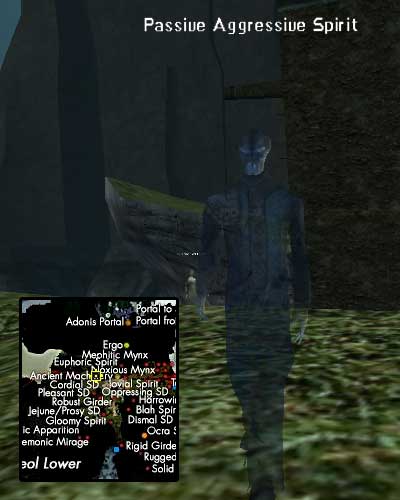
Searching for the UnknownDr. Hestiya isn't done with you yet! Now, she wants you to go to Necropolis to find proofs of Xan burial rituals. Her mission contains a waypoint that is uploadable to your planet map. At this waypoint at 1255x1770, you need to kill
Passive Aggressive Spirits
, and return with a Cracked Xan Burial Stone. These are NODROP UNIQUE and you must loot it from their corpses.Scheol Lower - 1255x1770
While you are already in this area watch out for Thieving Spirits and loot Igneous Rock Machine Component, Advanced Alloy Fuse, and Crystallized Notum Circuitry from them (NODROP UNIQUE). You need them later in this quest and there is too much running back and forth to the same places already.
Once you have acquired the stone, we need to head back to Dr. Hestiya. Telling her you found what she was looking for will give you the opportunity to trade the item to her. She will however return it to you in order to take it to Dr. Darnell. Which means, we are about to head back to the Twilight Basin.
Once you get there, advise Dr. Darnell that Dr. Hestiya asked you to bring the stone. She will in return for it give you some information about their beliefs. This also leads us straight to her next assignment for us.
⇑
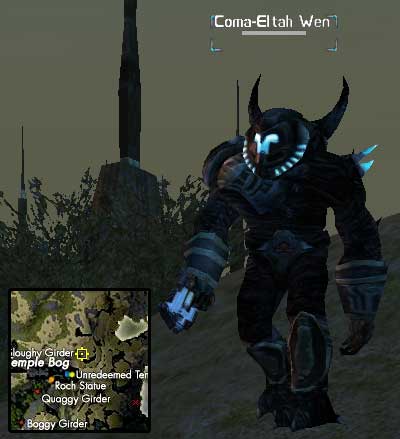
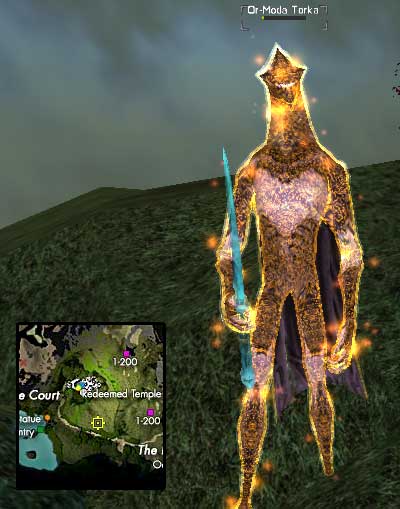
Looting the DevotedDr. Darnell will send you to find either an Ancient Insignia of Roch or an Ancient Insignia of Ocra. Those drop from Cama-Eltah Wens (Unredeemed) and Or-Moda Torka(Redeemed), located around Temples. Yet again, choose carefully which side of the conflict you represent and take care to avoid any friendly fire on your own side.
While you are near The Court you could hunt for Crusty Eremites and loot Nucleus of Crusty Eremite. You'll need this item near the end of this quest and this will spare you running back and forth to this place.
⇑
Learn about the GardensWhen you return with one of these Ancient Insignias to Dr. Darnell, she sends you to investigate the gardens. To help you with that, she gives you an insignia for your side's garden, since access to it is required for the third step of this mission.
First up you just have to left click garden statues of both sides. For the order in which to do this, check the mission window. You do not appear to need the insignia even though it asks for it. After this tagging part is complete, head into the second garden and talk to the NPC designated by the mission inside it. You'll have to find
Conserver Ocra Jha-Ilad
in the south of Ocra garden or Operator Bhotaar-Bhotaar Roch in the far west of Roch garden depending on your side. As soon as you open dialogue, your mission will update. - 361.7x262.6
Head back to Dr. Darnell. Tell her you visited one of the gardens, and that you would like to know more about the Xan rituals. Apparently, there were some artifacts that were maybe used in their rituals. She wants you to go to Dr. Hestiya again... How can you possibly refuse?
⇑
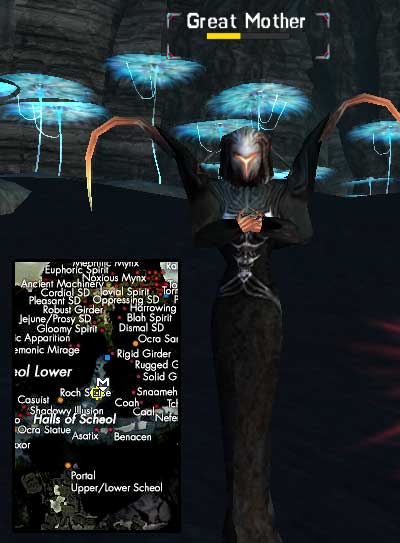
Ancient RitualsWhen you get to Dr. Hestiya, tell her Dr. Darnell sent you. She will give you the location details to find this ritual artifact: A Scepter. Pick it up from this yet again dynamically generated mission at The Plunge, and bring it back to the doctor. After giving it to her, she indentifies it as a Xan Ritual Scepter, and sends you off find out wether the scepter is still functioning. For this task, you need to find some kind of altar. This mission is yet again provided with uploadable coordinates.
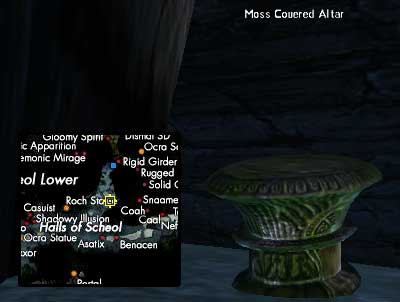
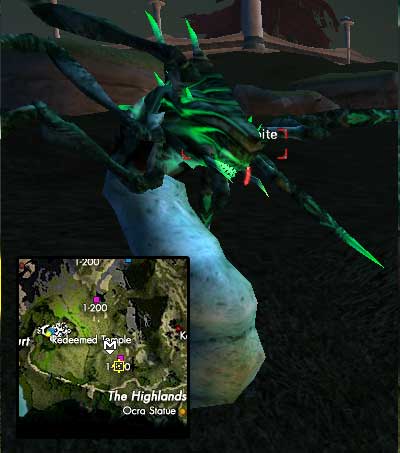
So, we head into the Halls of Scheol again. Once you have located the alter within a Malah camp, target it and right click the scepter in your invetory. This will spawn the Great Mother, which you should kill.
After you return to report to Dr. Hestiya, she wants to make sure that the scepter is still intact. So once you hand it over to her and receive it back, she tells you to deliver it to Dr. Darnell. After heading there, she will reward you with a Consanguineal Embryo of Annwn'Guinee, a Tier 1 armour embryo!
⇑
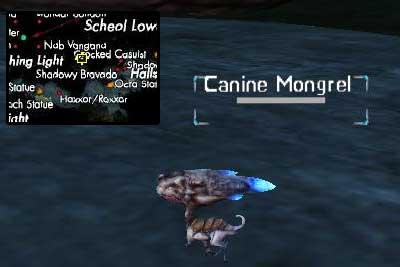
Pet HuntYour tasks are still not complete for the scientists... you would have thought by now that a complimentary garden warp might have been included... but oh no... now we have to kill some mongrels... maybe this will help them learn to understand more about the Xan. So, Dr. Darnell will send you to kill 3
Canine Mongrels
, located at 875x1285. The mongrels are social -- so careful about just wading in and bashing, if you are just kinda little. Once you acomplish your mission of butchery, The Corpse of a Canine Mongrel will spawn in your inventory. Return with it to Dr. Darnell.Scheol Lower - 875x1285
⇑
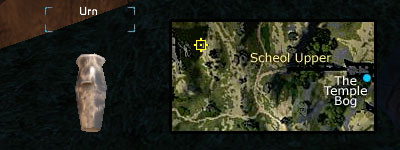
Ancient UrnsShe'll send you to find an
Urn
. Those are located at foot of rocky hill at 955x440. Scheol Upper - 955x440
Now you need to deliver this item to Dr.Hestiya. Once you show it to her she identifies it as a Broken Xan Prayer Urn. She'll suggest that you should find a Yutto that will know how to fix it. That Yutto is named
Vanward Four
and is located at 1115x1360.Scheol Lower - 1115x1360
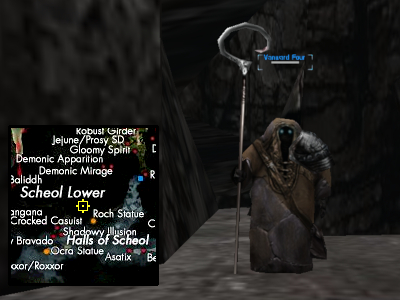
He'll indeed know how to fix it and give you Xan Funeral Urn to deliver to Dr.Darnell. This time she won't give you any more quests, just hint that Dr.Hestiya might have some more work for you.
⇑
A DeliveryDr.Hestiya has a small delivery job for you. You should bring Scan of Yuttos Wall Carvings to Dr.Jones.
⇑
Hidden SecretsDr. Jones is extatic about the Scan as well as Dr.Hestiya. And also about fact that his earlier theory about bones isn't correct. Unknown to him, this is early symptom of High Altitude sickness, coused by lower concentration of oxygen higher up. So kids, don't go loitering afk around Scheol portal. Another sympthom is fatigue, so he sends you to collect Nucleus of Crusty Eremite.
Once you bring it to him, he sends you towards Frank Jobin.
⇑
Thieving SpiritsFrank has one last adventure for you. You should return 3 pieces of Xan technology that spirits around Ergo cave keep on stealing. And yes, those mobs are actually named Thieving spirits. (You already have the items if you followed the advice from above.)
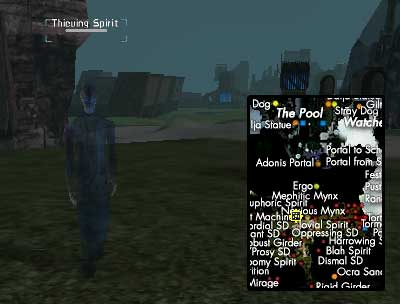
Once you have collected Igneous Rock Machine Component, Advanced Alloy Fuse, Crystallized Notum Circuitry and returned them to Frank, he'll reward you with ql 150 Ring of Computing and DMxp.
Last updated on 03.03.2023 by Cariadast
Information originally provided by Trgeorge.
Additional Information and Images provided by Ukblizzard and Uragon.
MP Reward given by Nomez.
Dungeon Location information enhanced by Vashon.
Urn information by Arrien.
Recording device comment from Aouni.
Dr. Darnell mission update from Zlipperypete.
Info about garden NPCs, some shortcuts, and xp rewards updated by Afreng.
Old Beit Bones screenshot by Starkness.
Do you have questions about this article or found an error? 23 comment(s) - Click here to view them!
