Abandoned Facilities (Biodomes)
Table of Contents [+]
Class: All Classes
Faction: All Factions
Level: 150-220
Item Links:
Quicklink (copy this):
Feedback: Feedback-Thread
Faction: All Factions
Level: 150-220
Item Links:
Quicklink (copy this):
Feedback: Feedback-Thread
⇑
IntroductionAround the grid in Omni-Ent and Tir are special recruiters, Channeled Force Arbiters. They are seeking people brave enough to visit Biodomes. Well, not to actually step inside them just yet, but at least to speak with Research Dome Wardens. They'll try to convince you to do that. But that's a team endeavour and needs some preperation first !
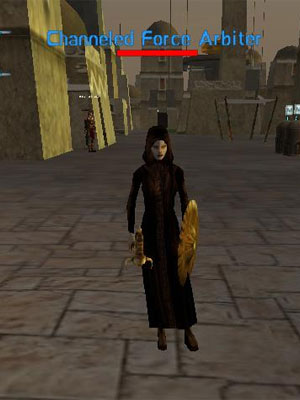
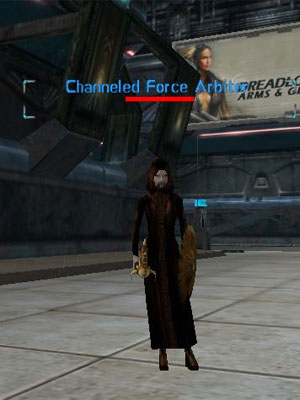
Channeled Force Arbiters
The Biodome raid is considered as one of the most difficult raids on Rubi-ka, and frequently fails due to ill-preparation and poor management during the raid. It requires a high level of cooperation and knowledge of raid details on the part of all raiders in order to complete it successfully. It consists of two parts divided into several phases: farming the actual key to get inside of the Biodome, and then entering the Biodome and killing the boss inside.
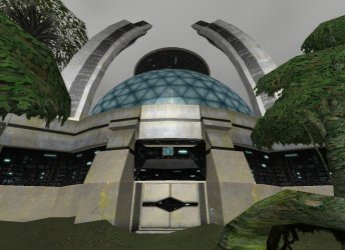
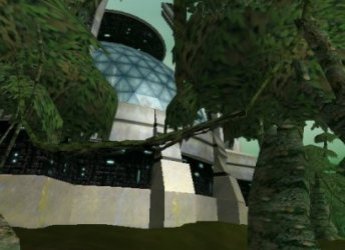
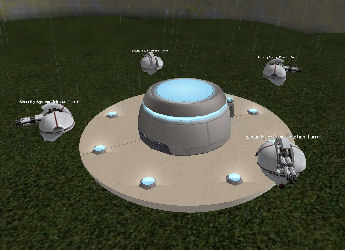
The biodomes
The Biodomes are located in two playfields; Belial Forest (Clan), and Southern Artery Valley (Omni). There are three different biodomes in each playfield, located at various locations throughout each zone, in the swamp or forest areas. They are easy to find as they are isolated and very large dome-like structures.
Please note that any side is able to perform the following steps for any dome of the both playfields, or join in to help any opposite side friends as long wearing the corresponding HUD (we'll detail that below). The only side limitation comes from the armor dropped that are purely side locked (as lower tables will show) while other loots ain't.

Each biodome has a warden
This guide uses the Omni version of the raid as an example, however, if you are Clan you can simply repeat these steps in Belial Forest. The name of the keycard will be different as will the molybdenum armor, however, the process will be exactly the same.
To prepare for the first phase, you will typically need about 1-2 teams of level 200+ players depending on how powerful the players are, with at least 2 docs and a tank-type.
⇑
PHASE 1: Get the key to the Biodome For phase 1, you need to kill Resurrecting Swamp Hags located at various Swamp Dens.
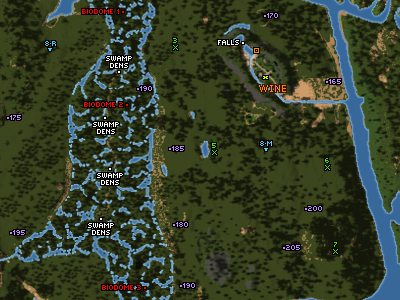
Belial Forest (Clan location)
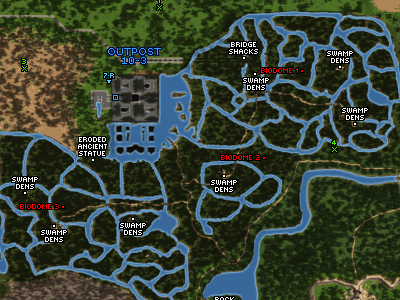
Southern Artery Valley (Omni location)
There are 7 camps in Southern Artery Valley but the Hag will only be spawned at 3 of the camps. You get one key part from each Hag, so you will need to scout the camps and find which 3 of the 7 camps the Hag is located, one by one.
Spoilers
Notes for killing the Ressurecting Swamp Hag and the corresponding adds
1) The Hag AoE nukes for 3-7k, NSD is not affective. A good strategy for killing her is to send an enforcer or someone with tanking ability in right near her. Ranged weapon users should keep a distance out of nuke range, and melee users should be very careful. Docs should get nano range buffs from an NT if possible so they can stay out of range of the AoE. Docs might be best using Alpha & Omega if there are a lot of melee weapon users in the teams. She will occasionally warp attackers, so docs should be wary of who's being warped in and whether they need heals from a possible AoE nuke. If there isn't a doc present on raid, the player being warped into the camp should run away from the team, instead of back to it. This way only the warped player is affected by nuke.
2) After the Hag dies, there will be a respawn process of roughly 12 respawns, each with corresponding swamp-type creatures and a central boss in each spawn. An assisted caller should direct the raid force to pick off the adds while the tank focuses on the boss. When all adds are dead, have the rest of the raid force focus on the boss again. Rinse and repeat until the final boss dies (he looks like a large biledrinker), and you can retrieve one of the three key parts with some additional loot (see loot table for phase 1 below). NB : after final kill, there's a cooldown of several hours before a new Hag pops again, so be very patient if it's not up when you arrive ...
The Shard of a Keycard parts will combine to form words:
Clan version : NO+PH+EX = NOPHEX | Omni version : ZN+OR+E = ZNORE |
Once you have the correct key for your faction, you can start the next phase at any of the Research Domes located in your factions area. (As shown above on the maps)
Loot Table for Phase 1
Drops from Ressurecting Swamp hags, and bosses prelude to final spawn process boss:
Folded Cardboard Box
Makes a novelty backpack item
|
The Extruder
Trader tradeskill item
| |||||
| Requires 250 Pharmaceuticals and 1000 credits |
Final boss drops of this phase
Faction specific |
⇑
PHASE 2: Organize teams for Biodome bossOrganize teams, ideally with one doc and one reflect buffing profession (for example soldier or engineer), in each team. It's recommended that you form 3 or 4 teams, however, with experience it may be possible to do it with 1 or 2 teams with as many docs and high damage dealers as possible.
Ideally a 210+ enforcer (for his massive HP and taunting ability) is needed to keep aggro and tank on the main boss in the biodome itself (enforcer should not mongo! only single spec 4 taunts). A soldier is a great secondary tank if an enforcer isn't available.
Important note: Make sure that everyone takes note of what damage type their weapons do, and bring a weapon of a different damage type if possible. This will be important later.
Now you can head to the Dome of your choice, among the 3 existing in the playfield corresponding to your Broken Keycard.
⇑
PHASE 3: Get everyone their Pass and Enter Biodome1) Hand the Broken Keycard card to the Warden at the entrance of the chosen Dome, and a Complete Keycard will be given back to you along with a Box of Security Passes - which name will either contain "Biodome" (for Omni) or "Research Dome" (for Clan) plus the number of the Dome you're at (1, 2 or 3). The Security Pass it will generate can work only for this particular Dome, no other. Note that the Warden will disappear for the time of your raid.
2) Make copies of the Security Pass by right clicking on the Box of Security Passes. You can only right click 5 times that way, and each right click generates 6 new Security Passes. Those HUD passes have a 30 minutes lifetime after which they simply disappear. If you're still inside the Dome (or enter without wearing one of those HUD Security Passes) the towers inside will instakill you on sight.
Therefore the raid leader that has done trade with the Warden should hand one Security Pass out to each person in the raid as quickly as possible, right-clicking again once each set of 6 Security Pass are handed out. There are a maximum of 30 Security Pass that can be made, so the maximum number of teams that can enter the dome is 5.
Also the 30 minutes time limit on each key basically means you have one good shot at killing the main boss inside of the biodome because there probably won't be enough time to get back if something goes wrong. This, unless you still have more Security Pass to be distributed from the Box of Security Passes, then, just need to reform outside of the dome, and right-click again to get the remaining Box of Security Passes (until all 30 were generated).
Important note: Make sure everyone has their Security Pass equipped in one of their HUD slots, or they will be killed by the Security System Deletion Turrets as soon as they enter!

Security System Deletion Turrets
⇑
PHASE 4: Kill the main boss inside of BiodomeOnce inside you need to spawn the boss. To do this the raid leader should right-click the Complete Keycard on the small terminal near the core of the Dome. This will spawn the boss, Urqhart the Absorber, who looks like a giant tree.
Strategy
1) After a certain amount of damage has been dealt with any given damage type, the boss will raise a reflect shield against it with 1000 reflected damage, e.g. an energy reflect shield. This might require that all energy attackers should stop until he changes damage to another, and then those people stop attacking, etc. Raid leaders should take note of the damage being taken, and direct raiders who use a certain damage type to either stop attacking/limit attacks or switch to another damage type if possible.
2) Depending on the composition of you raid force and what weapons people use, it may happen that the boss raises a shield against all damage types. In this case, those who can take it should continue fighting with careful attention to healing.
3) Nothing that causes AoE damage or debuffs should be used. This includes Shadowbreeds, AoE nukes, AoE debuffs such as calms/roots/snares, enforcer Mongos (!) and AoE perks. This is very important to remember. This could draw aggro from the four turrets, and they could start aggroing and killing random raiders. If this happens, it will effectively end the raid.
4) If someone does aggro the turrets, it's usually best for the healers not to heal that person, as that will cause the turrets to attack the healer and quickly wipe the raid.
Loot table for Urqhart the Absorber
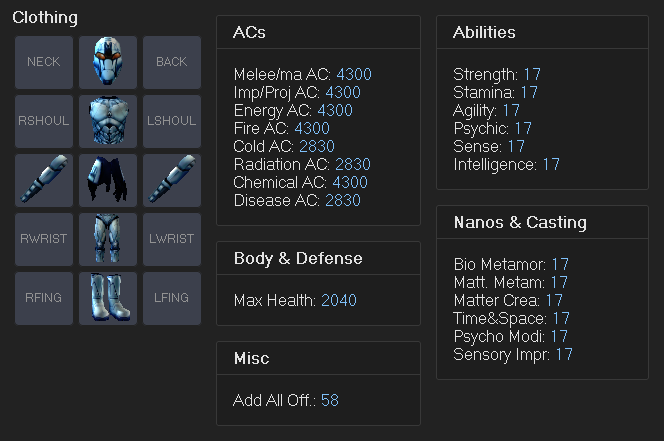
Kegern's Molybdenum Plate armor
Jathos' Molybdenum Plate armor
Molybdenum Plate armor can be upgraded with items found Inside the Machine. For more information check this guide.
Last updated on 10.07.2023 by bitnykk
Information originally provided by Hollowburn. Additional information provided by Windguaerd.
Do you have questions about this article or found an error? 10 comment(s) - Click here to view them!
Information originally provided by Hollowburn. Additional information provided by Windguaerd.
Do you have questions about this article or found an error? 10 comment(s) - Click here to view them!
